Good time!
In some cases, you need to get an image via HDMI from a camcorder, another PC, set-top box, and other devices (this can be useful if, for example, you decided to create your own broadcast on the network or shoot something and comment).
This operation is somewhat "confusing", tk. most computers have HDMI ports only on the graphics card, and they are for withdrawal images (but many users get confused and try to connect other devices to them - of course, the picture "from nowhere" does not appear ...).
This note, in general, aims to show the general plan of action step by step using the example of the simplest adapter for video capture (so to speak, so that there was something to start with this topic ...).
👉 To this topic!
How to connect a laptop to a TV [via HDMI] - step instructions
*
Video capture and image acquisition from other devices: what and how
👉 STEP 1: schematic diagram
And so ... In order to receive an image transmitted via HDMI from a computer, phone, camera (and others) - we need a special. 👉 capture device (they are called adapters or capture carats, in English something like: "Video Capture" ).
By default, in ordinary PCs and laptops (if you do not take gaming solutions into account), such cards are not installed and must be purchased separately.
👉 To help!
Similar cards and capture devices can be ordered from Chinese online stores (request like: "Video Capture").
*
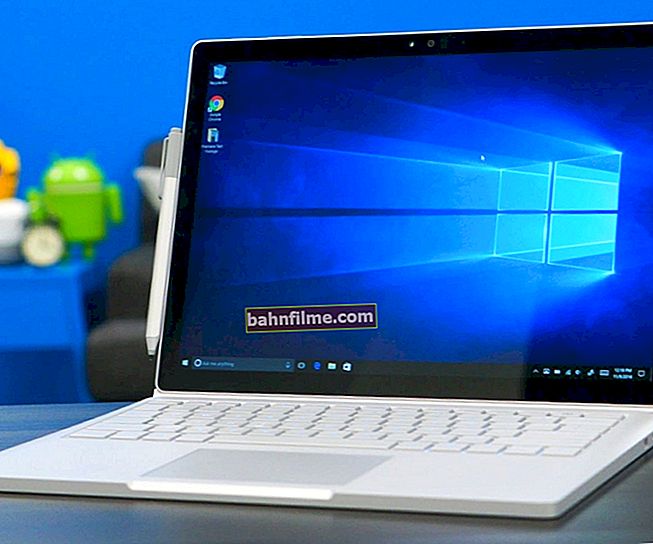
In his below As an example, I will focus on an entry-level Chinese adapter for HDMI video capture (from Rullz): it looks like a regular USB flash drive (just plug it into a PC USB port and the adapter works! 👇).
Note:
- Input is the input signal (i.e. the image quality that the adapter can accept is 4K / 30 HZ 👇);
- Output is the output signal, i.e. the image quality that the adapter can "send" via USB to a PC / laptop (1920x1080 / 30 HZ).

Simplest gripper (from Rullz). Not larger than a regular flash drive
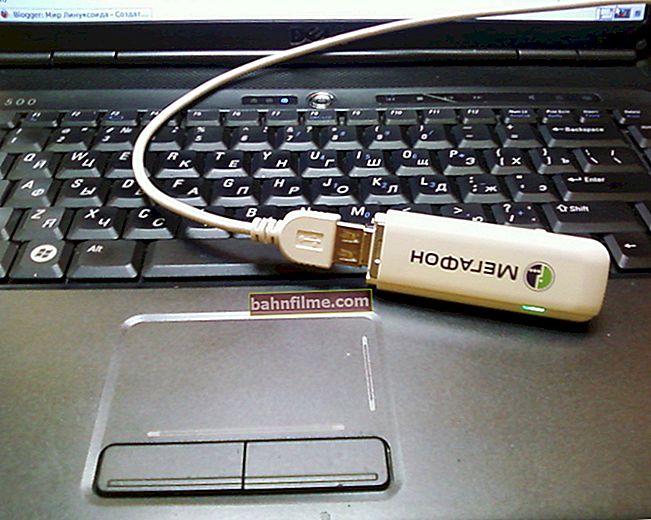
I think that from the picture below, the basic scheme of work will be clear to most users:
- first we connect the video capture card to the USB port;
- we connect it with an HDMI cable to a device that will broadcast the "picture" (another PC, camera, set-top box, etc.);
- we are recording or broadcasting to the network (stream).

Capture schematic diagram
Of course, if you purchase more sophisticated adapters for capturing, the circuit may change somewhat (but there is no point in getting into the "jungle" in this note).
*
👉 STEP 2: connection, driver installation
As I said above, if you have the most common entry-level capture adapter, then the whole connection comes down to "connecting" two devices with an HDMI cable. 👌
However, let me remind you right away that it is better to connect when both devices off (i.e. laptop, PC, camera, etc.).
👉 Important!
HDMI Hot Plugging: Will Port Burn? (why the monitor / TV does not work via HDMI)

Connection
Further on that device, to the USB port of which the video capture adapter is connected, you need to check: whether it was installed on it driver .
To do this, just open 👉 Device Manager - and go to the tabs "Cameras" , "Sound, game and video devices" ... There you should have a new device (no exclamation mark). 👇
In my case, the name of the device was very simple: "USB Video".
👉 To help!
10 Best Driver Updaters (Automatic!)

Installing Drivers
*
👉 STEP 3: projecting
This applies to the devices from which the image will be transmitted to the capture adapter.
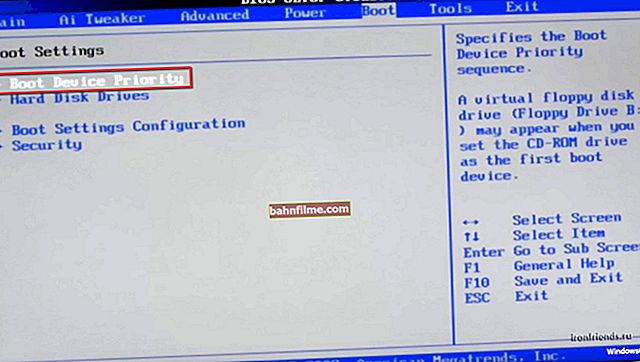
An important point: not all devices, when connecting them with an HDMI cable with other equipment, automatically start broadcasting an image to it (sometimes this must be indicated!).
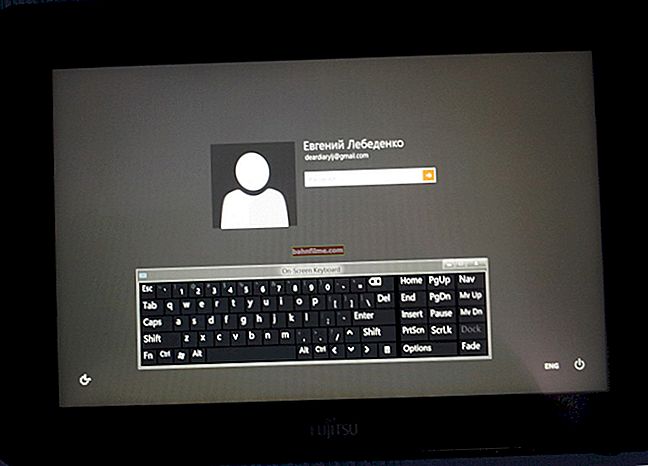
For example, in Windows 8/10 for this you need to press the combination of buttonsWin + P - in the sidebar that appears, select "To repeat" .

Project Screen - Win + P
If we talk about set-top boxes and cameras: then, as a rule, you just need to turn them on, and the image is automatically ⇒ HDMI ...
*
👉 STEP 4: receive and record the image from the video capture adapter (via HDMI)
Of course, in order to view the image from the video capture adapter, we need to install a special. program (note: on the computer to which the capture adapter is connected).
In my opinion, they are very universal in this regard: 👉 VLC Player and 👉 OBS (I recommend choosing the second option - below are examples just in OBS).
*
OBS
Developer site: //obsproject.com/ru

One of the best programs for recording video from a slave. table and gripper devices. It also allows you to create streams and broadcast videos in social media. networks.
*
👉 Installation OBS has a standard one (so I'll skip it). Immediately after launch, you need to right-click (right-click) on the tab "Sources" and add new "Video capture device ".

OBS - video capture device
In line "Device" select the name of the video capture card, set the resolution, FPS (number of frames per second), video format.

Capture device setup
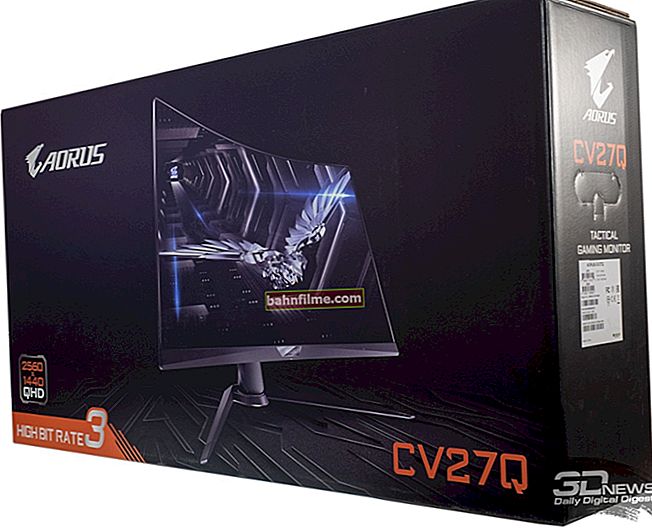
Next, you should notice that OBS will start showing what the adapter / card is capturing (in my example, this is broadcasting an image from a laptop to a PC 👇).

Capturing video from a laptop (via HDMI, the image is transmitted to a PC and recorded in OBS)
Important: please note that if you use a USB capture card, then it is better to connect it to the USB 3.0 port (when connected to USB 2.0, the bandwidth may not be enough and the "picture" will be jerky).

The screen broadcast has gone

How to tell a USB 3.0 port from a USB 2.0 port
*
Fine-tuning the quality of the "picture"
Before recording (broadcasting) a video - in OBS, I would recommend changing a number of settings (which are set in it by default).
First, in the tab "Video" set the base resolution and output (in my case it is 1920 by 1080 (Full HD)). It would also be nice to change the scaling filter and FPS.

Base resolution, input resolution
Second, in the section "Output" indicate folder for the record, format records, and encoder.
Note: I recommend choosing FLV or MKV as the format. if an error occurs and the program crashes, then part of the video will be saved (unlike MP4).

Output settings
*
Additions on the topic are welcome!
Good luck!
👋