Good day everyone!
Today's post will be about setting up the OBS (or Open Broadcaster Software) program. If anyone does not know, this application is widely used both for creating broadcasts (streams) and for recording video from a desktop, webcam, etc.
By the way, I can't help but note that now when buying some devices: adapters, boards, cameras - the manufacturer in the operating instructions in some cases recommends using OBS (apparently, this also affects the popularity of the program, and the number of questions about it ...).
For a simpler perception, I will make this note in the form of simple step-by-step actions (I think even beginners will be able to write down at least something ... 👌).
👉 By the way!
OBS has a lot of interesting analog programs (not all of them have the same functionality, but sometimes they turn out to be more convenient ...).
*
Setting up and working with OBS Studio
STEP 1
And so, for a start, I recommend downloading the OBS program from the developer's official website (website: //obsproject.com/). And then some users take various "incomprehensible" assemblies from "craftsmen" and are indignant why everything is not so with them, as shown in the example ... 😉
Below is a screenshot from the official website of the application (by the way, in my examples below I use the version for Windows 10).

Screenshot from the OBS official website
Please note that at the moment the program occupies about 70 ÷ 80 MB (if you downloaded something on a third-party site for 2 ÷ 5 MB - most likely it is a "downloader" with an advertising add-on).

Downloading the installation file in the browser
As for the installation of the program: it is standard, you do not need to configure and customize something during the installation process! Therefore, I do not describe it in detail ...
*
STEP 2
During the first launch - in OBS you will not see anything except a simple "black" screen (👇). This is as it should be, since we have not added any source to capture (broadcast) yet ...
Therefore, first I recommend clicking on the button "Add" In chapter "Sources" .

Add video source
Then choose what you want to start "capturing". Usually, the most popular options are:
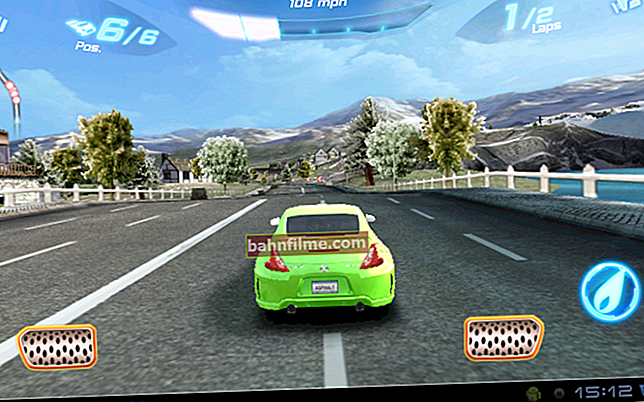
- Game / Window Capture - This is used to record video from your chosen game (or application). For example, if you want to show how to draw a circle correctly in AutoCAD;
- screen capture - everything that will be displayed on your screen will be captured;
- a video capture device - this is worth choosing if you want to get an image from a video camera (webcam) connected to your PC / laptop.

What can be captured (OBS)
for example, I chose "Capture game" - I needed to set the following settings:
- specify its "window" / name (note: the game must be started before setting up OBS!);
- set priorities (you can leave the default);
- specify whether to record the cursor (if necessary, set the FPS).
Note: Please note that as soon as you specify a game or program (which you want to "capture") - its image will immediately start showing in OBS. 👇

Game capture properties
Then you can add another video source (if necessary) and adjust the size of the captured window.

Only one source, you can resize the window
For example, in addition to the game, I added screen recording : so that you can see both the desktop and everything that happens directly in the game.
By the way, please note that video sources can be placed in the desired priority (the higher the source in the column, the higher the priority).

Capture desktop and game at the same time!
By the way, with OBS, you can get an image from the screen of another computer / laptop. True, this will require a special. device - a capture adapter (I talked about this in detail here).

Capturing video from a laptop (via HDMI, the image is transmitted to a PC and recorded in OBS)
*
STEP 3
After the video sources are added - before starting recording, you need to set folder (where videos will be saved), codec for compression, and format (FLV, MKV, MP4, etc.).
To do this, open the program settings and go to the tab "Output" :
- indicate first folder for records (arrow-3 👇);
- then format records (I recommend choosing FLV - in this case, even if you close OBS with an error, the recording will remain intact on the disk);
- after indicate encoder (which one is best for you - you can only determine experimentally. If the PC will slow down a lot during the recording process, then specify another ...).

Your videos will be stored here!
Besides, I definitely recommend opening the tab "Video" and indicate basic and weekend resolution (the quality of the recording depends on this). Ideally, of course, set the max. possible for your monitor (e.g. 1920 x 1080).
The number of FPS - usually a number in the range from 30 to 60 is set (the more you set, the smoother and more dynamic the picture will be (and the higher the load on the PC)).

Scaling settings
*
STEP 4
Another tip: in the section Hot Keys specify the buttons to start recording and end it (note: it is not always convenient to start recording by pressing a button in the program interface (especially if you are already in the game 😉)).

Configuring Hot Keys (OBS)
Of course, it will not be superfluous to also set buttons for pauses , repetition and so on, depending on what and how you plan to shoot (above on the screen is just an example).
*
STEP 5
Actually, now you can start "shooting" - in the right corner, just click on "Start recording" ... Pay attention immediately to the CPU load (👇): ideally, the value should not go beyond 25-30% (otherwise there is a risk that the recording will turn out to be "torn", and the game will slow down).

Start - stop recording. CPU load
If the load on the CPU is too high (or suddenly the program crashed / freezes): try changing the codec, reducing the output resolution and the number of FPS (what we configured in STEP 3).
In any case, these parameters can only be selected experimentally (depending on your hardware).
*
By the way, if you don't need audio recording, adjust the volume in the audio mixer (at the bottom of the OBS window). For example, you can just click on the icon "loudspeaker" (to make him blush) - and you will have a recording completely without sound ...

Volume
*
Additions on the topic are, of course, welcome!
Easy and successful setup!
👋