User question
Good day.
After playing for 40-50 minutes in one computer game (note: the name is cut out) - the processor temperature rises to 70-85 degrees (Celsius). I changed the thermal paste, cleaned it from dust - the result is the same.
So I'm thinking, is it possible to increase the rotational speed of the cooler on the processor to the maximum (otherwise, in my opinion, it rotates poorly)? Temperature without CPU load is 40 ° C. By the way, is this possible due to the heat? And then we have about 33-36 ° C outside the window ...
Arthur, Saransk
Good day!
Of course, the temperature of the components and the load on the cooling system strongly depend on the temperature of the room in which the computer is located (therefore, overheating is most often encountered in hot summer months). 👀
The fact that your temperature reaches 80-85 degrees is not normal (although some laptop manufacturers allow such heating).
In most cases, you can try to set the cooler rotation settings to maximum, but I would still recommend doing package of measures (you can learn about them from the article on measuring and controlling the temperature of the processor, video card, HDD).
By the way, the other side of the coin often arises: coolers rotate at maximum and create a lot of noise (while the user does not load the computer with anything at all, and they could rotate much slower and quieter).
Below I will consider how you can adjust their rotation speed, and what to look for.
So...
*
Increase / decrease the rotation speed of coolers
Basics, important note
In general, on a modern computer (laptop), the rotational speed of coolers is set by the motherboard, based on data from sensors temperature (i.e. the higher it is, the faster the coolers start to rotate ☝) and load data.
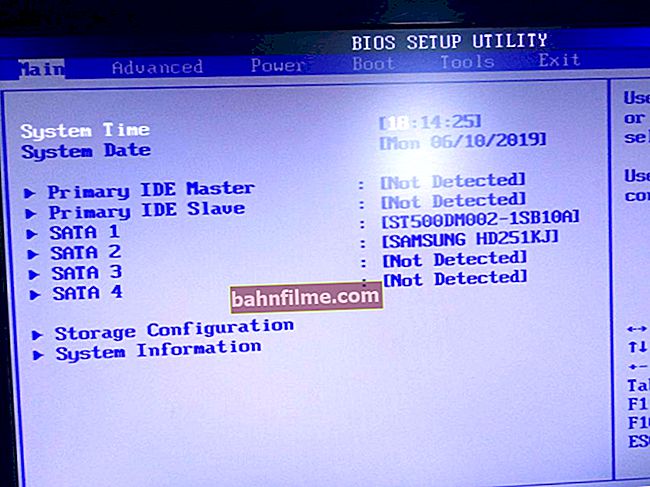
The parameters from which the checkmate is based. the board can usually be set in the BIOS.
☝ How is the rotational speed of the cooler measured?
It is measured in rpm. This indicator is designated as rpm (by the way, it measures all mechanical devices, for example, the same hard drives).
As for the cooler, the optimal rotation speed is usually on the order of 1000-3000 rpm. But this is a very average value, and it is impossible to say exactly which one should be set. This parameter strongly depends on the type of your cooler, what it is used for, on the room temperature, on the type of radiator, etc.
Ways to adjust the rotation speed:
- in the BIOS settings (how to enter it). This method is not always justified, because you need to enter the BIOS to change certain parameters (that is, wasting time, and changing values is often required promptly). In addition, automatic adjustment technology (like Q-Fan, CPU Fan Control, Fan Monitor, Fan Optimize, etc.) - do not always work optimally (spinning the cooler to the maximum where it is unnecessary).
- physically disable the noisy cooler or install reobass (a special device that allows you to adjust the rotation of the cooler). This option is also not always justified: either turning off the cooler, then turning it on (when needed) is not the best idea. The same reobass is an extra expense, and you can't install it on every computer;

Reobas
- using special utilities. One of these very famous utilities is SpeedFan ... In my opinion, one of the easiest and fastest options is to adjust the rotational speed of the coolers installed on the computer. Not all coolers are displayed in the same BIOS, for example, if it is not connected to the motherboard. It is on her that I will focus on in this article ...
Method 1: adjusting with SpeedFan (universal option)
SpeedFan
Developer site: //www.almico.com/sfdownload.php
A free multifunctional utility that allows you to control the temperature of computer components, as well as monitor the operation of coolers. By the way, this program "sees" almost all coolers installed in the system (in most cases).
In addition, you can dynamically change the rotation speed of the PC fans, depending on the temperature of the components.
All changeable values, work statistics, etc., are saved by the program in a separate log file. Based on them, you can see graphs of temperature changes, and fan speeds.
SpeedFan works in all popular Windows 7, 8, 10 (32/64 bits), supports Russian (to select it, click the "Configure" button, then the "Options" tab, see the screenshot below).

Choosing the Russian language in SpeedFan
*
The main window and appearance of the SpeedFan program
After installing and running the SpeedFan utility, the Readings tab should appear in front of you (this is the main program window - see the screenshot below 👇). In my screenshot, I conditionally divided the window into several areas in order to comment and show what is responsible for what.

SpeedFan main window
- Block 1 - the "CPU Usage" field indicates the load on the processor and its cores. Nearby are also the buttons "Minimize" and "Configure", intended for minimizing the program and configuring it (respectively). There is also a checkbox "Automatic fan speed" in this field - its purpose is to automatically regulate the temperature (I'll talk about this a little below);
- Block 2 - here is a list of detected cooler rotation speed sensors. Please note that they all have a different name (SysFan, CPU Fan, etc.) and opposite each has its own meaning rpm (i.e. rotational speed per minute)... Some sensors show rpm by zeros - these are "junk" values (you can ignore them *).
- 👉By the way, the names contain abbreviations that are incomprehensible to someone (I will decipher it just in case): CPU0 Fan - a fan on the processor (that is, a sensor from a cooler plugged into the CPU_Fan connector on the motherboard); Aux Fun, PWR Fun, etc. - the rpm of fans connected to these connectors on the mat is shown in the same way. board;
- Block 3 - the temperature of the components is shown here: GPU - video card, CPU - processor, HDD - hard drive. By the way, there are also "garbage" values that should not be paid attention to (Temp 1, 2, etc.). By the way, it is convenient to take the temperature using AIDA64 (and other special utilities);
- Block 4 - but this block allows you to decrease / increase the rotational speed of coolers (set in percentage). Changing the percentages in the columns Speed01, Speed02 - you need to look at which cooler changed the speed (i.e. what is responsible for what).
*
Important!
The list of some indicators in SpeedFan will not always coincide with the cooler that it is signed with. The point is that some computer builders connect (for one reason or another), for example, a processor cooler not to the CPU Fan socket.
Therefore, I recommend gradually changing the values in the program and looking at changes in the rotation speed and temperature of the components (even better, open the roof of the system side and visually watch how the fan rotation speed changes).
*
Setting the fan speed in SpeedFan
Option 1
- As an example, it will try to adjust the rotation speed of the processor fan. To do this, you need to pay attention to the "CPU 0 Fan" column - it is in this column that the rpm indicator should be displayed;
- Then alternately change the values in the columns "Pwm1", "Pwm2", etc. When the value has been changed, wait a while, and see if it has changed. rpm, and temperature (see screen below);
- When you find the right onePwm - adjust the rotational speed of the cooler to the optimal number of revolutions (I spoke about the processor temperature here, I also recommend it for review).

Pwm adjustment
*
Option 2
If you want the smart mode to be activated (i.e. for the program to dynamically change the rotation speed, depending on the temperature of the processor ), then it is necessary to do the following (see screenshot below):
- open program configuration (note: "Configure" button) then open the tab "Speeds" ;
- then select the line that is responsible for the cooler you need (you must first find it experimentally, as recommended in option 1, see a little higher in the article) ;
- now in the graphs "Minimum" and "Maximum" set the desired values in percent and check the box "Autochange" ;
- in the main window of the program, check the box next to "Fan autospeed" ... Actually, this is how the rotational speed of the coolers is regulated.

Fan Autospeed Mode
👉 Supplement!
It is also advisable to go to the tab "Temperatures" and find the cpu temperature sensor.
In its settings, set the desired temperature that the program will maintain and the alarm temperature. If the processor heats up to this alarming temperature, then SpeedFan will start to spin up the cooler at full capacity (up to 100%)!
Method 2: using MSI Afterburner utility (graphics card cooler adjustment)
MSI Afterburner
Official site: //ru.msi.com/page/afterburner
In general, this utility is designed to overclock video cards (however, in its arsenal it has options for recording video, fine tuning the cooler, the function of displaying FPS on the screen, etc.).
Of course, I do not consider all the functions of the utility here, below I will give only a short solution to the current problem (by the way, MSI Afterburner does not only work on devices from "MSI").
1) After starting MSI Afterburner, you need to go to its settings - the button "Settings" .

MSI Afterburner - open program settings
2) Next in the tab "Basic" would recommend ticking "Run with Windows" .

Run with Windows
3) After, go to the tab "Cooler" and rearrange control points on the graph according to your requirements. See the screenshot below: the first checkpoint shows us that at a temperature of 40 ° C - the cooler will work at only 30% of its capacity.

Move the control points to the desired mode
Actually, you just need to move 3-4 points, and the matter is "settled"! 👌
*
Method 3: utilities from the manufacturer (usually for gaming devices)
Powerful gaming laptops (PCs) most often come with specials. Software from the manufacturer (and usually, in its options there is a possibility of detailed adjustment of the operation of coolers). In this case, there is no point in fiddling with SpeedFan (especially since it may not be able to access the cooler).
As an example, I will cite the most popular line of gaming laptops from MSI. Using the utility Dragon center many "fine" parameters can be adjusted, including the operation of coolers (see the "Fan Speed" tab 👇).

FAN SPEED - rotational speed of coolers (Dragon Center)
Most often the parameter "Fan Speed" for manual configuration, you need to switch to the mode "Advanced" (extended).

Fan Speed - switch to Advanced mode (i.e. advanced settings)
And then adjust the cooler the way you need it. For example, if summer has come (it has become hot outside the window) and you have downloaded a new game hit, you should add power ☝ ...

Manual adjustment of the cooler of the video card (GPU) and CPU (CPU)
Of course, different manufacturers may have their own solutions. Dragon Center is just an example ...
*
Method 4: adjust the rotation of the cooler in the BIOS
The utilities SpeedFan, MSI Afterburner (and others) do not always work correctly (especially on laptops).
The fact is that the BIOS has special functions that are responsible for automatically adjusting the rotational speed of coolers. They can be named differently in each BIOS version, for example, Q-Fan, Fan Monitor, Fan Optomize, CPU Fan Contol etc.
And I will immediately note that they do not always work well, at least SpeedFan allows you to very accurately and finely adjust the operation of the coolers so that they perform the task and do not interfere with the user. 👌
To disable these modes (the photo below shows Q-Fan and CPU Smart Fan Control), you need to 👉 enter the BIOS and put these functions into Disable.
By the way, after that the coolers will start working at maximum power, they may become very noisy (this will be so until you adjust their work in SpeedFan (or other utility)).
👉 To help! Hot keys for entering the BIOS menu, Boot Menu, recovery from a hidden partition.

Adjusting the rotation of coolers in the BIOS

UEFI Settings (AsRock)
👉 Important!
In many mid-price laptops, the cooler adjustment is disabled - i.e. in principle, it cannot be adjusted (apparently, this is how manufacturers protect the user from inept actions).
True, in some (for example, the HP Pavilion line) the cooler can be turned off (option "Fan Always On" - the cooler turns off when you do not load the device 👇).

Fan Always On - the cooler is always on
*
That's all for today, good luck to everyone and optimal operation of the fans ...
Add-ons are welcome ...
Have a nice day!
👋
First publication: 31.07.2017
Correction: 01/05/2020

