Hello.
Do not say, but SSD drives are gaining popularity more and more - after all, an increase in the real speed of reading / writing a disk several times is visible to the naked eye!
Of course, along with this, quite a few questions arise: one of them is transferring the system partition of a Windows disk from an old HDD to a new SSD drive. Moreover, it is desirable to do everything without unnecessary spending on software, i.e. free (and most software for transferring and cloning a disk partition costs money), without losing information and reinstalling the system.
Actually, in this article I will try to describe how this can be done (with all previous wishes).
Note: although we will transfer all data without loss, we strongly recommend that you make a backup of important documents (just in case). Moreover, if you are performing such an operation for the first time ...
*
👉 By the way!

You may find useful an article on how to connect two disks to a laptop at once, for example, HDD and SSD.
*
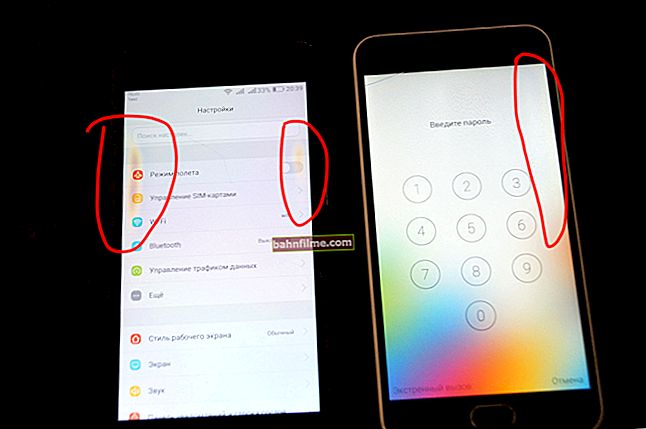
Installing an SSD in a laptop. Transfer Windows from HDD to SSD
❶
Step 1: preparing what we need
1) Directly the SSD drive itself.
In this article, I will show the installation of a 120GB SSD drive from Transcend, the disc packaging is shown in the photo below (not advertising).
👉 To help!
Important points when choosing SSD / HDD drives for a laptop

Packing with an SSD
2) Screwdriver (s).
Depending on your laptop design (in most cases, a small Phillips screwdriver will suffice). Needed to remove the laptop's protective cover and install the SSD.

Phillips screwdriver
3) Special cable (box / box) USB ---> SATA (for connecting an SSD disk to a USB port of a computer). I highly recommend buying, you can find it in any computer store (it is not expensive).
👉 By the way!
Similar cables and adapters can be ordered on AliExpress at very cheap prices (and even get a cashback).
You can do without it, but if you are dealing with a laptop, there will be some difficulties, and it is better to avoid them (you will need, for example, a capacious flash drive or an external hard drive, on which you will first need to "throw" a backup (image) of the system disk, and then from it, when the SSD drive is installed in the laptop, deploy this image to the SSD. This option is more confusing and longer in time, so I will not consider it in this article).

USB 2.0 to SATA Adapter Cable
4) Specialized software.
I recommend MiniTool Partition Wizard (actually a magical program, and free)!
1. MiniTool Partition Wizard
Website: //www.partitionwizard.com/free-partition-manager.html

A simple and convenient program for working with various types of drives: hard drives, flash drives, solid-state drives, etc. Allows you to perform the entire range of the most necessary operations: formatting, splitting, moving partitions, resizing partitions, etc. How to transfer Windows from HDD to SSD - I'll show you in it!
2.Specialized software from the manufacturer SSD Scope (for those with a Transcend drive) Website://ru.transcend-info.com/Support/Software-10/ Most SSD manufacturers, by the way, have their own specialized utilities that will help you transfer Windows quickly and for free. So, do not be lazy to go to the site and download such software (although I personally, I always prefer to use third-party software, which has already been tested more than once, therefore, I recommend, nevertheless, to use the first program I proposed). 3. If paid ... If you agree to pay a little for software, then the choice of programs is simply great: Acronis Disk Director, Migrate OS to SSD, AOMEI Partition Assistant, etc. (I personally think that paid software should be bought when there are no free analogues ...). 5) Free time (about an hour), so that no one jerks or interferes (and does not press the keys on the laptop 👌).And in general, I am a supporter of carrying out such procedures when I know that I do not urgently need a computer in the next day or two (otherwise some people start transferring before passing the diploma). ❷ Step 2: copy the system partition of the hard drive to the SSD drive 1) Drive connection First, you need to connect our SSD drive to the USB port (by the way, do not try to look at the disk in the explorer - most likely you will not see it, because it is not formatted). By the way, if you have an LED on the box (adapter) - pay attention to whether it is on (ideally, ☺ should be on). The SSD drive is connected to the laptop using a special. cable 2) Start OS migration // is the disk visible We launch the MiniTool Partition Wizard program and see if our disk is visible (the program usually sees all the disks connected to the laptop / PC). In the screenshot below, the connected SSD is highlighted in yellow (2). Important: before the procedure, close all other programs (torrents, editors, etc.). If the disk is visible, click the "Migrate OS to SSD" button (see arrow 1 on the screenshot below). If the drive is not visible, check out this article: //ocomp.info/pc-ne-vidit-vneshniy-hdd.html The program saw the SSD - we start the migration of MiniTool Partition Wizard 3) Setting up the transfer // set the parameters in the MiniTool Partition Wizard The first question that the program asks: how to transfer Windows OS - only the system partition with the OS, or all partitions, i.e. the whole disk. I assume that your SSD drive is smaller in volume than your hard drive - so it is reasonable to transfer only the system itself now, and you can transfer all other documents later, manually. I recommend choosing the second option (B) - i.e. transferring only one partition with the Windows system (if so, make a choice as in the screenshot below). We copy only the system disk with Windows (and not the whole one) // MiniTool Partition Wizard At the next step, the program asks you to specify the SSD drive where you will transfer the system. Here, in general, no comment - just select the drive and press Next (i.e. further). Select the disk where the system will be cloned // MiniTool Partition Wizard In the next step, select the option "1. Fit partitions to entire disk" and click next (i.e. fill the entire disk with one partition, which will be our Windows / Best option). We fill the entire SSD: we make one partition with our system Next, MiniTool Partition Wizard will warn us that it will be necessary to change the BIOS settings afterwards - just agree (looking ahead, I will say that in most cases, if you disconnect the HDD and connect the SSD, you do not need to configure anything in the BIOS). One final warning - just agree 4) Copy (clone) the system partition of the disk After setting all the parameters, in order for MiniTool Partition Wizard to start working, it remains to click the "Apply" button. Click the Apply button (make changes) Then the program will recommend closing the rest of the programs for the last time in order to avoid unnecessary errors and conflicts. Beginning of work Everything! The process has started. After a while, MiniTool Partition Wizard will ask you to restart your computer - select option A - Restart now (after restarting the PC, it is not the Windows OS that will boot, but the MiniTool Partition Wizard and will continue to perform the specified operations). Computer restart required After rebooting, you will see a "black window": the copy statistics will be shown at the bottom of the window. It took me a little over 20 minutes to create a disk partition with a size of about 50 GB. When the data is copied, the program will automatically reboot the device itself. The program continued copying files from HDD to SSD ❸ Step 3: installing the SSD into your laptop (PC) Now the entire system partition of the hard drive is already on the SSD drive and it's time to install it into the laptop ... By the way, this operation requires carefulness and calmness - if you accidentally spill something, press with force, touch it with your hand, the laptop may not turn on. In most cases, there is nothing complicated and anyone who held a screwdriver can handle it - I will consider all the steps in order (with a photo). Perhaps, an exception may be the case - when the protective cover is missing, and to access the inside of the laptop, you will need to disassemble the entire case. In this case, first evaluate your strength ... 1) Disconnecting the laptop from the power supply, mouse, headphones, etc. The first thing to do is turn off the laptop and disconnect all cables from it: mouse, power, headphones, etc. After turning over and disconnecting the battery (usually, it is fastened with two latches that you just need to slide.A photo of a typical laptop is presented below). Latches for removing the battery 2) Remove the protective cover After the power is completely turned off, go to the protective cover. In general, there are dozens of laptop designs, and which one you have is difficult to predict ... Most often, there is always a protective cover, under which there is a hard drive and RAM (for quick access to them). In some cases, the protective cover allows access to the cooler and heatsink as well (as in my example below). Usually, such a cover is fastened with several screws: in my example in the photo below, there are two of them. We unscrew them and remove the cover. Remove the protective cover 3) Remove the hard drive The hard drive is usually attached to a carrier, which in turn is attached to the body of the device. First you need to unscrew the screws that secure the slide to the case - and remove the drive from the SATA port (just slide the drive to the side. In the example below, the drive moves to the left). Hard drive in a laptop, how to remove it Next, remove the screws that secure the drive to the sled. Next, put the slide to the SSD drive casing and fasten them in the same way with the screws. Remove the sled from the HDD and put them on the SSD Then place the disc into the "pocket" where it was previously and secure with the screws. Basically, everything about everything will take 5-10 minutes (even if you don't have much experience). SSD is installed, put the protective cover, battery and turn on the laptop 4) Installing the protective cover, battery Next, you just need to put the protective cover, the battery, connect the power, etc. - in general, all the steps are in reverse order to assemble the device. 5) Turn on the laptop After turning on the device, the first thing you will notice is the boot speed of the Windows OS. If before your laptop turned on in 1-2 minutes, it will become in 15-20 seconds. (the numbers are, of course, approximate, but the difference is visible to the naked eye)! Below in the screenshot I give an example of an SSD drive with Windows 10 transferred to it. The whole operation took about 35-40 minutes (of which ~ 25 minutes - to copy 50 GB from HDD to SSD). SSD installed // This computer By the way, the results of testing the speed of the disk only confirm that the SSD drive is, on average, 5 times faster (the speed of writing and reading data from the disk has increased!). 👉 To help! Instructions for testing the speed of the disk. WAS (screen below) Test results with HDD (which stood before) // CrystalDiskMark Has become SSD test results // CrystalDiskMark 6) Transfer of documents If you need some more documents / files from the old hard drive (which we took out of the laptop) - you just connect it as an SSD drive using the cable (box) that you used in the previous step (that's why I recommended buying such cable - thanks to it you can connect any other hard drives to your laptop). In general, further is the usual routine work, which you can handle without my instructions ... * PS About optimizing the system for an SSD drive If you have a modern Windows 8/10 OS, then nothing additional optimization (in principle) is required. If you want to speed up the system somewhat, you can try using 👉 special. utility for automatic optimization. * That's it, happy transfer! 👋 First publication: 08.12.2017 Correction: 02/10/2020