Hello!
Today Wi-Fi networks have entangled all major cities, there are routers in almost every apartment where there is a computer or laptop. However, connecting a laptop to the Internet does not always go rosy and easy (as you understand, today the article will be about this ☝).
In general, the first thing a laptop user needs to do is check the Wi-Fi adapter, whether it is turned on, whether it works.
With this, many have all sorts of questions, especially if the power button suddenly does not appear on the device case (even worse, if, moreover, there is no function key on the keyboard).
In this short article, I'll show you how to check and enable the Wi-Fi adapter, and then connect your laptop to the network. 👌
So, let's begin...
Prayer when connected ...
One-two-three Wi-Fi light - burn!
*
How to enable Wi-Fi adapter
Method 1: via the network icon in the tray
In many cases, a laptop from the store already comes with preinstalled software and is ready to go (including with Wi-Fi networks). Therefore, the first thing I recommend to do is try to connect to a Wi-Fi network.
To connect to the network, do the following (valid for Windows 7/8/10):
- Click on the Wi-Fi tray icon (star icon (no network) -
 ) ;
) ; - If everything is in order with your laptop (the adapter is working, the drivers are installed, there are no errors) - you will see a list of Wi-Fi networks to which you can connect. One of them should be yours;

Seeing available Wi-Fi networks
- Then you click the mouse on your network and press the connect button. By the way, it is highly advisable to put a tick in front of the item "Connect automatically";

Connect to the network
- Next, you will be asked to enter a password. If the password is correct, the connection will be established. The tray icon will change to this:
 .
.
 ) ;
) ;

 .
.In general, such a simple sequence in most cases helps to quickly connect and get rid of the need for a long digging in the settings. If you failed to connect, then further recommendations are for you.
*
Method 2: use the "buttons" on the device case
Option 1
The most popular way to enable Wi-Fi adapter on laptops is special. function key (F2, F3, F12, etc.).
As a rule, to turn on Wi-Fi - just press it (by the way, sometimes you need to press it together with the FN button). For example, FN + F3.
👉 To help!
Fn and function keys F1 ÷ F12 do not work on laptop
The photo below shows an example of such a "button". By the way, please note that some laptops are equipped with an LED on these keys, which helps you determine if your adapter is working.

Button to turn on Wi-Fi on the keyboard
Option 2
On some laptops, the Wi-Fi adapter button is located above the main keyboard. On the one hand, it is very convenient - you can quickly turn on / off Wi-Fi without tinkering with Windows settings. An example of such a button is shown below.

Acer Travelmate 8371 laptop - Wi-Fi button above keyboard
By the way, in addition to Wi-Fi, buttons for sound, updating, entering the BIOS, etc., are brought out in the same way.

On / off button Wi-Fi on an HP laptop
Option 3
Quite rarely, but still there are laptops where not a button is installed, but a whole switch, and it is located on the side of the laptop (for example, next to some kind of headphone jack ...).

Wi-Fi on button on the side of the device // Equipped with some Lenovo, Acer, etc.
By the way, it is very convenient if there are separate LEDs on the laptop case, which are responsible for the operation of the hard disk, Wi-Fi, power, etc. They help you quickly find out what works and what doesn't.

The LED on the laptop case HP / Wi-Fi adapter works (already good ☺)
Option 4
The last option - there may not be any buttons AT ALL to turn on / off the Wi-Fi adapter on the device case.In this case, you need to enable it programmatically (more on this below in the article).
By the way, if you use a USB adapter, you will also have to turn it on programmatically, because most of them do not have any buttons to enable Wi-Fi (by default, they should always be enabled, unless disabled programmatically). 👇
*
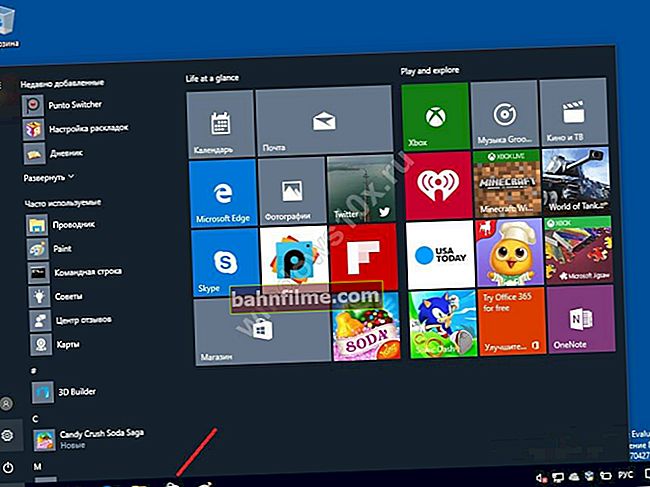
Method 3: via Windows network settings
If your wireless adapter is programmatically disabled, then by clicking on the network icon in the tray (an example of an icon when the adapter is disabled - ), You will not see any networks to which you can connect (just no one will find them 😎). I will consider a couple of options for how you can enable it.
Option # 1: via network connections
The easiest way to open network connections in Windows (relevant for Windows XP, 7, 8, 10) - this is to press the combination of the Win + R buttons, and in the line "Open" to introduce ncpa.cpl ... Then press Enter.

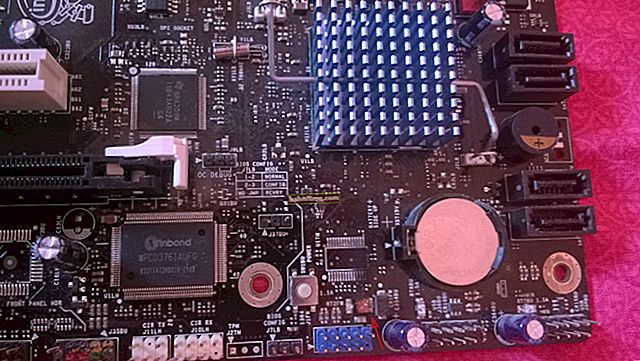
ncpa.cpl - View all network connections
A section should open "Control Panel \ Network and Internet \ Network Connections" - it will show all the network connections available on the laptop. In general, on any modern laptop, as a rule, at least two network adapters:
- wireless network (sometimes in English. "Wireless") - this is the Wi-Fi adapter, what we are looking for;
- Ethernet (network controller or "Network controller").
If the wireless network icon is colorless (there are no crosses or exclamation marks on the icon. Note: what the "colored" icon looks like - shown below), then the adapter is simply turned off. To enable it - right-click on it and select "Enable" as in fig. below.
If the wireless network icon is colored, but with an exclamation mark (or cross) - right-click on it and select the option "Connection" .

Enable wireless
If the adapter works - you will immediately notice this by the fact that the icon has become colored (example below), the status will be something like "Connection, identification, verification, etc." .
By the way, after you turned on the adapter, use the advice from the very beginning of the article (note: "Trying" to connect to Wi-Fi) .

Adapter works
Option number 2: through the device manager
Another way how you can turn on the Wi-Fi adapter is to open 👉 device Manager , find the device you need and click the "Activate" button. I'll show you with an example ...
First, open the Device Manager (in Windows 10 - just right-click on START). Universal option: press combination Win + R , enter the command devmgmt.msc and press Enter (example below).

Launching Device Manager - devmgmt.msc
Then you need to open the "Network adapters" tab, select your network adapter that you want to enable, right-click on it, and select the option from the menu "Engage" .
Note: The Wi-Fi adapter is most often labeled as "Wireless Adapter", "Wireless Network Adapter".

Activate a disabled device
👉 Important!
If in the tab "Network adapters" your Wi-Fi adapter is missing (or an exclamation mark is lit in front of it) - most likely, there is no driver for your device in Windows, and you need to find and install it. 👇
*
Typical connection problems
Missing driver (driver conflict)
Drivers are often the cornerstone when trying to connect to Wi-Fi networks. The fact is that if they are not available for the Wi-Fi adapter in the system, then all your attempts will be in vain, you simply cannot turn it on.
By the way, as I wrote above, if there is no driver in the system, then open 👉 device Manager , You will see that a yellow exclamation mark will be lit in front of this device (by the way, sometimes the device (the same wireless adapter) can be in the "Other devices" tab) .

Wireless adapter missing driver
To update the driver on Wi-Fi , I recommend using the tips and programs from the following articles:
- 👉 solving problems with drivers for Wi-Fi (removing, updating, installing);
- 👉 a large collection of programs for updating drivers (updating drivers in automatic mode is much faster and more pleasant 👌).
*
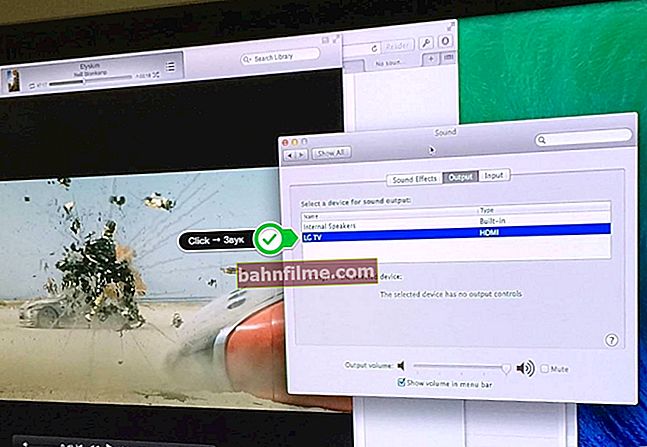
A few words about "Diagnostics"
If, after installing the drivers and turning on the Wi-Fi adapter (+ restarting the laptop), you still do not have a list of found networks to which you can connect early, I recommend running diagnostics (built into Windows).
In general, many for some reason underestimate it, but in some cases it helps to quickly solve the problem and save time!
And so, open up first "Network connections" (Win + R -> ncpa.cpl) then right click on the wireless icon and select "Diagnostics" .
Further a wizard should start, which will begin testing your network and looking for possible causes and failures. In some cases, the problem will be eliminated even without your intervention. 👌

Running diagnostics
For example, in my case, 1 minute of diagnostics was enough, and the Wi-Fi network immediately began to work as expected (example below 👇).

Network issues found fixed
*
That, in fact, today is all ...
Good signal, good luck!
👋
First publication: 25.04.2017
Correction: 01/30/2020