Good day.
Quite often, if the behavior of the computer / laptop is unstable (for example, errors began to appear, freezes, a blue screen crashes, image distortions, etc.), it is required to check the random access memory (RAM).
During this testing, you can find out if everything is in order with the memory, if there are any errors, if you need to replace the die (by the way, it may not be superfluous to test the RAM when buying a new strip).
In general, memory diagnostics can be done in different ways:
- use Windows diagnostic tools (if you have Windows 7, 8.1, 10);
- or use third-party software (in my opinion, one of the best utilities for such a test is Memtest 86+).
In this article I will consider both of these options (in general, of course, the second option is more preferable!).
So...
*
Checking RAM (RAM) for errors
Windows Memory Diagnostic Tool
In general, in my personal opinion, the built-in software in Windows, as a rule, is inferior to the software of a third-party developer. Therefore, nevertheless, if you have a free flash drive (CD / DVD disc), I recommend using the test in the Memtest 86+ program (see in the second part of the article).
And nevertheless, how to run a check of RAM bars in Windows (relevant for Windows 7, 8, 10):
- press a combination of buttons Win + R ;
- in the window that appears "Run" enter command mdsched and press Enter (as in the screenshot below).

mdsched - command to check RAM (Win + R)
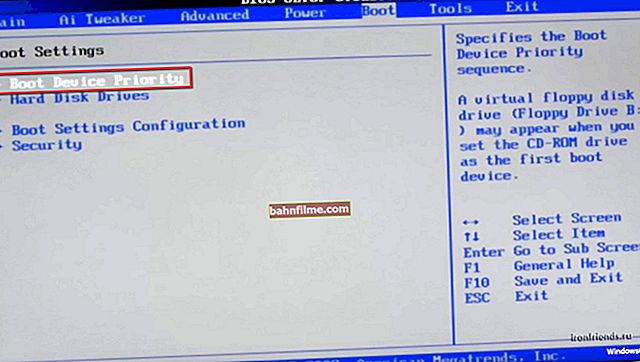
Next, a window should appear in which you will be offered a choice of two verification options:
- reboot and check right now (i.e. start checking immediately);
- check the next time you turn on the PC (this is what I recommend choosing in order to save all documents without haste, close programs and calmly send the PC to reboot).

Windows Memory Checker
If everything is OK with the diagnostics, you will see a message that the memory test was successfully scheduled.

Memory test scheduled
After restarting your computer / laptop, you will see a window as in the photo below. 2 passes will be performed, the status of the operation is shown at the bottom of the window. If everything is fine with your memory, then the state will be in the status "No problems found yet".

Windows Memory Diagnostic Tool
If problems are found
I recommend running it again with the Memtest 86+ utility. If the errors are confirmed in this utility, then see the end of this article, there are some tips ...
*
Testing RAM in Memtest 86+
Memtest 86+
Website: //www.memtest.org/#downiso

Memtest 86+ is one of the best utilities for testing RAM. The utility can be run using its own bootloader, so it basically doesn't need an operating system.
The program supports modern multi-core processors, most motherboard chipsets. Memtest 86+ is available for download on the official website (link above), in several versions. A few words about them below ...
About the version of the program Memtest 86+ (V5.01):
- Download - Pre-Compiled Bootable ISO (.gz) - the program is distributed in an ISO image. Such an image can be written even to a USB flash drive, even to a regular CD / DVD disc (although you may need additional utilities - for example, UltraISO). In general, a versatile option;
- Download - Pre-Compiled Bootable ISO (.zip) - the same, only the archive format is different;
- Download - Pre-Compiled Bootable Binary (.gz) - file in bin format (this is also a disk image, similar to ISO);
- Download - Pre-Compiled Bootable Binary (.zip) - the same;
- Download - Auto-installer for USB Key (Win 9x / 2k / xp / 7) * NEW! * - the most demanded option (in my opinion). Allows you to automatically create a bootable USB stick with Memtest 86+ in a few steps. The program works in all versions of Windows: XP, 7, 8, 10;
- Download - Pre-Compiled package for Floppy (DOS - Win) - creating a bootable floppy disk (in my opinion, today it is practically irrelevant).
I chose the 5th option (Download - Auto-installer for USB Key (Win 9x / 2k / xp / 7) * NEW! *), It is with it that I will show you how to create a USB flash drive.
Creating a bootable flash drive with Memtest86 +
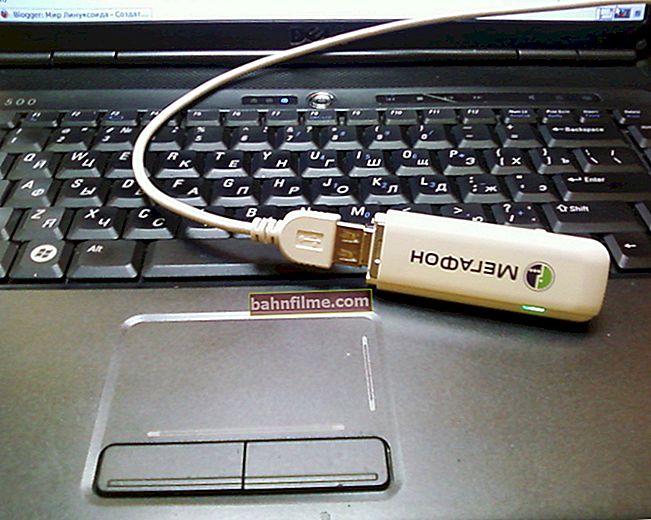
Download the archive, unzip it and run the program file (the choice of version is given above). Next, you need to insert the USB flash drive into the USB port and:
- in the first window, the program will ask you to specify the drive letter of the flash drive (important! All data on it, before recording Memtest 86+, will be deleted) ;
- then you need to check the box opposite "We will format G: \ as Fat32" and press the button "Create" ;
- wait for the message "Installation Done, Your Drive should be ready to boot" (means that the media has been written);
- by the way, if you go to "This computer" - you will see that the name of your flash drive has become "MULTIBOOT" .

Create a bootable USB stick in Memtest 86+
Booting from a USB stick and running the test in Memtest 86+
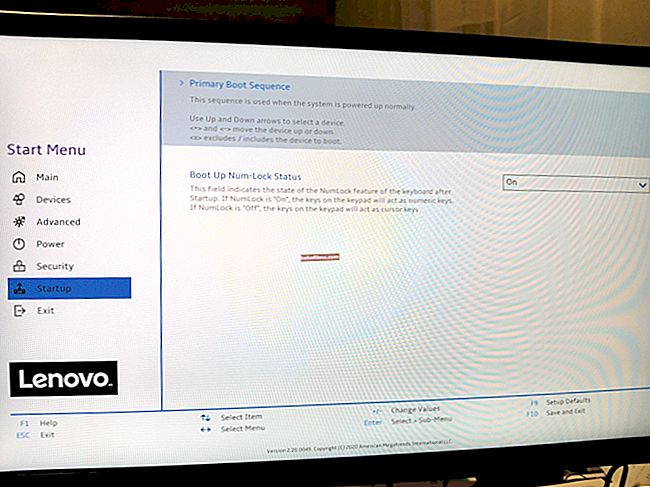
To boot from the previously created USB flash drive, you need to configure the BIOS accordingly (or use the button to call the Boot Menu). This topic is quite extensive, so I will give links to my articles just below.

How to configure BIOS to boot from USB stick or CD / DVD - //ocomp.info/kak-nastroit-bios-dlya-zagruzki-s-diska-ili-fleshki.html
Hotkeys for calling Boot Menu - //ocomp.info/goryachie-klavishi-dlya-vh-bios-boot-menu.html
I used the Boot Menu call, indicated where to boot (USB flash drives) and pressed Enter (screen below).

Boot from USB stick
Further, if your flash drive is correctly recorded, the Memtest 86+ utility will automatically start and start testing the RAM. You are not required to press anything. The red arrow in the photo below shows the progress of testing (how many percent is verified).

Testing in Memtest 86+ // starts automatically
Note! Just in case, I will give the control keys (although they are not needed in most cases).
Esc - close the program and restart the PC;
C - setting parameters in manual mode (for advanced users);
F1 - Enhanced Fail Safe Mode (extended Fail Safe Mode).
F2 - Experimental SMT support up to 32 cores (experimental SMT support up to 32 cores).
At startup, the analysis of computer components is performed, then testing of the RAM begins.
If the test does not start in auto-mode, start it by pressing the F1 or F2 buttons.
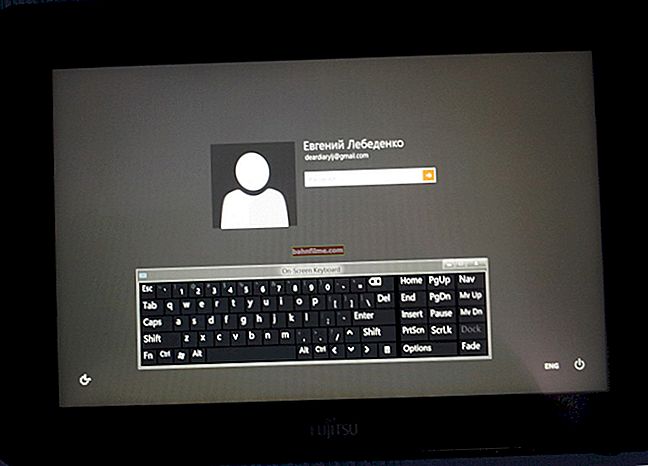
In general, I recommend leaving the PC to test like this for several hours so that the utility runs the memory several times. If everything is in order with memory, you should see a message at the bottom of the window "Pass complete, no errors, press Esc to exit" (as in the photo below).
Note!
Memtest 86+ writes information to each memory block, and then reads it and checks for errors. The program tests the RAM cyclically, i.e. it has 11 tests by default (including zero), which it runs in a loop an unlimited number of times (until you stop it by pressing Esc).

Everything is good with memory // passed the test
If errors are found during testing, you will see red lines (this is not good anyway (at least)).

There are problems with memory ...
What to do if errors were found
Quite a popular question, along with questions about memory testing ...
First you need to open the system unit and clean it from dust. Remove the memory sticks from the slots and blow out the slots themselves (it is convenient to do this using a vacuum cleaner with a reverse mode, or a can of compressed air - these are sold in computer stores).

An article on cleaning your computer from dust - //ocomp.info/kak-pochistit-kompyuter-ot-pyili.html
Next, check the planks themselves: if there are any chips, scratches on them, if they are clean. If there are signs of mechanical damage, then you will probably need to replace the memory with a new one.
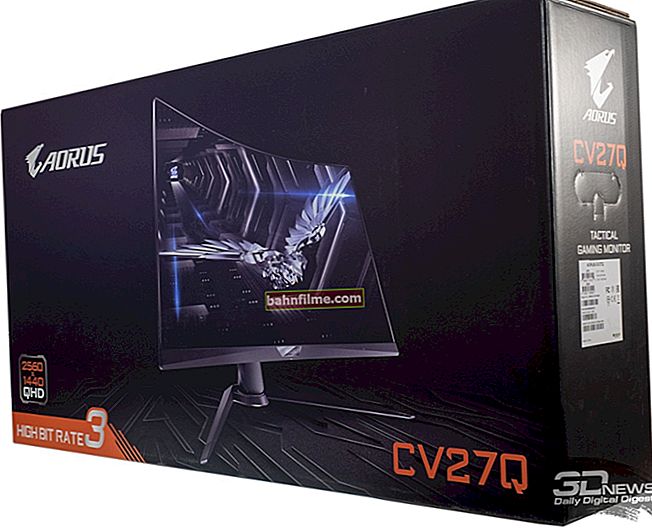
Also pay attention to contacts ... The fact is that after a while they can oxidize, and when inserted into the slot, they do not completely (not always) give contact. As a result, as soon as the contact is "lost", your computer freezes. I recommend cleaning them in any case, a regular eraser / eraser (school) is suitable for this. The remaining pellets can either be blown away or brushed off with a soft brush.

Cleaning memory contacts with an eraser and a brush
Note. The procedure must be carried out very carefully, on a clean, dry, flat surface. An elastic band is better than one with two sides: one blue, the other pink. It is recommended to rub with blue. In some cases, the yellow contacts change color to a lighter color.
After cleaning the memory, insert it back into the slot and turn on the PC (by the way, try inserting the memory into other slots, or swapping the brackets if you have all the slots occupied).
Then test again. In some cases, such a simple procedure allows you to get rid of errors related to memory, the computer stops freezing, rebooting and giving a blue screen (thereby saving your money).
If errors are found again, you can try to hand over the memory for repair (but personally I do not recommend it). If there is no warranty service, it is better to replace it with a new one (the fact is that the price of RAM repair - in many cases, costs almost the same as a new bar).
*
That's all for now. Add-ons are welcome ...
Good luck and good tests!
👋
Article revised: 02/25/2019