Good day!
For various problems with the computer, it is quite often necessary to resort to special bootable LiveCDs ("live" disks).
The essence of such a disk (flash drive) is that you can boot a full-fledged operating system from it in a few minutes without installing it on your hard drive! In addition, almost most of these disks will contain useful utilities for OS recovery, viewing and editing popular documents, files, etc.
When you need a LiveCD:
- if suddenly Windows does not load (even worse, if you urgently need to copy files from the disk on which the system is located);
- if you need to change disk partitions, formatting, etc.;
- in case of a virus infection of the system;
- if some folders, files, etc. are not deleted.
In this article I will show by an example how to create two such LiveCDs (better even say LiveUSB) and write them to a USB flash drive: one with antivirus (NOD 32 or Dr.Web), the other with Windows and service utilities. So that if something happens - be ready with all weapons!
👉 To help!
Best LiveCDs for Windows Disaster Recovery
*
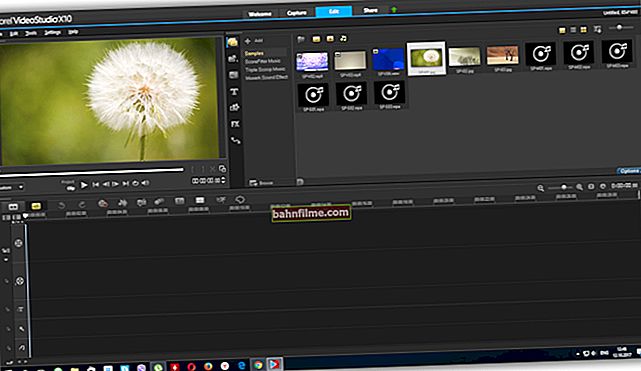
How to create a LiveUSB stick
(CD | DVD is created in the same way)
With Windows (Windows PE)
Windows PE is a minimal operating system with limited services. Usually, it is used to prepare the computer for installing Windows, to configure and launch the OS installation. So-called LiveCD / USB are also created on its basis.
Usually, in most cases, Windows PE is distributed in ISO images (there are many manufacturers of such images, and their content may vary). Next, this image must be written to a USB flash drive or disk, and booted from it.
Below I will go over each step in detail ...
*
AOMEI PE Builder
Official website: //www.aomeitech.com/

Free tool to create bootable Windows PE on USB or CD / DVD. In addition, I want to note that in this program you can add your drivers and any programs during the creation of such an ISO image.
You can download the program from the official website (link above). Works in all versions of Windows: 7, 8, 10 (32/64 bits).
FEATURES (WHAT WILL BE INCLUDED IN THE ISO IMAGE):
- This LiveCD will already have integrated "Backupper Standard" and "Partition Assistant" (from the same manufacturer). With the help of them you can: create and restore disk backups, modify, expand, copy, merge hard disk partitions;
- There is a native Windows recovery environment (very useful if the bootloader is damaged in the OS);
- There is a 7Z archiver for working with archives;
- There is a utility Bootice - to restore the master boot records;
- IrfanView - viewing pictures and photos;
- Notepad ++ - very handy notepad (txt, php, inf and other files can be opened and edited);
- Everything - easy and fast search for files on the disk;
- Ntpwedit - a program for editing and resetting passwords in Windows;
- Recuva - special utility for recovering files on disks and flash drives (you can find out how to search for deleted documents on a disk in Recuva here: //ocomp.info/kak-vosstanovit-dokument-word.html);
- SumatraPDF - viewing PDF, ePub, MOBI, CHM, XPS, DjVu, CBZ, CBR files;
- QtWeb is a user-friendly internet browser, and much more ...
*
How to create a Windows PE ISO in AOMEI PE Builder
I omit the download and installation of the program (nothing complicated, everything is standard). Further, after starting, the first welcome screen appears, informing you of the features of this software. Click the button "Next" (Further).

Beginning of work
Need to press again "Next" to start creating bootable media.

A warning
In this step, you can add various files, programs and drivers to your created image.Please note, by the way, that AOMEI PE Builder has already included many popular programs for work by default (browser, notepad, file recovery utility, etc.).

Adding drivers and programs, files
In this step, you will be asked to specify the bootable media: CD / DVD, USB, or simply export and create an ISO image. You can immediately choose what you need, but I will consider the universal option and create an ISO.

Media selection. It is possible to create a bootable ISO
The final touch: it remains to wait until all the files are packed into an ISO image. The process, on average, takes 5-10 minutes. (it also depends on what files you added in the previous steps).

Create ISO file
*
How to burn the resulting ISO from Windows PE to disk or flash drive
We will assume that you have an ISO image (either created it yourself, according to the instructions above, or downloaded the finished one somewhere). The easiest way to burn ISO to disc or flash drive is with программой UltraISO.
👉 Help!

You can find a detailed description and a link to download the UltraISO program in this article.
(it also contains other useful utilities for creating bootable media)
I will briefly consider how to write an image in it:
1) First, install and run the program (UltraISO).
2) Press the menu File / open and specify your ISO file.
3) To create a bootable USB drive: click Boot / Burn Hard Disk Image (for CD / DVD - Tools / Burn CD Image) ... The screenshot below is for help. 👇

Burn hard disk image
4) Next, specify the desired media (for example, a USB flash drive) in paragraph Disk Drive , specify the write method - USB-HDD (for DVD - you do not need to specify anything), and press the button Write /GO.

Burn disc
5) After 5-10 minutes. the flash drive or disc will be burned. You can start testing ...
*
How to boot from a LiveUSB flash drive (disk)
- You must first configure the BIOS accordingly, or, even better, call the Boot Menu. In order not to repeat myself, I recommend 👉 to read this article;
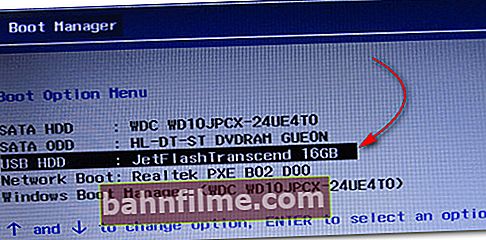
- Next, select our USB flash drive from the list of boot devices:

Boot Menu example - choosing to boot from a USB flash drive
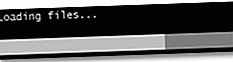
- Next, a message should appear that the loading of files has started (Loading Files ...).
Loading
- Actually, then the desktop should appear, as in classic Windows (the same as if it was installed on the hard drive). An example is shown in the photo below. Consider how to work further - I don't see the point, tk. all programs are in Russian, and you can use them in the same way as in regular Windows.
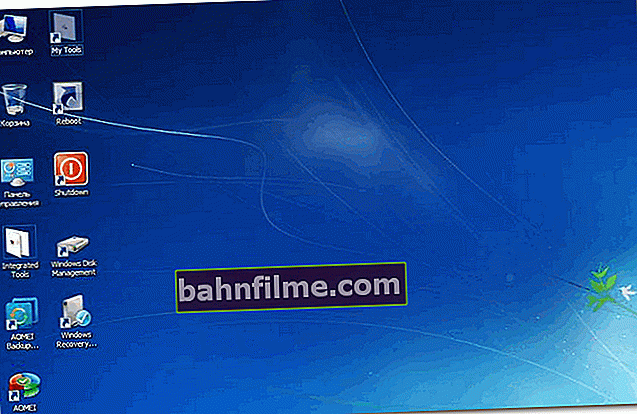
After boot: familiar desktop, so you can't immediately say that Windows was booted from a USB flash drive


*
With antivirus (NOD32, Dr.Web, etc.)
Many Windows PE ISO images already have antivirus software included with them. Nevertheless, in this article I cannot ignore the bootable ISO images from the developers of popular antivirus products.
By downloading such an ISO file from the developer's website and writing it to a USB flash drive (disk), you can boot from it and check your disk and system for viruses (in some cases, during a virus infection, Windows does not load, perhaps only such disks and help out).
Recommended LiveDisk
1) NOD32
Website: //www.esetnod32.ru/download/utilities/livecd/

A good LiveCD that you can quickly write to a USB flash drive or disk, and also quickly check your computer for virus software. It is distinguished by its small size and rather effective search for all kinds of malware. By the way, I recommend having both disks: with both NOD32 and Dr.Web.
2) Dr.Web (system administrator's first aid kit)
Website: //free.drweb.ru/aid_admin/

Free disaster recovery product from CD / DVD or USB stick. It will help if adware or viruses damaged the OS boot. Such a disk will help not only clean your PC, but also transfer important information to removable media.
Important! The writing utility works on Windows (32/64-bit). To boot from a USB flash drive, your computer's BIOS must support the USB-HDD device (note: all modern BIOS versions support this mode).
*
👉 Burn bootable ISO from NOD32 antivirus
To work, you need the WinSetupFromUSB utility.
WinSetupFromUSB

Website: //www.winsetupfromusb.com/
One of the most convenient and popular programs for writing bootable flash drives.The program allows you to create bootable USB drives with different Windows operating systems: 2000, XP, Vista, 7, 8, Linux ISO, etc.
In general, in our case, she can easily create bootable media from an ISO image with an antivirus product.
After starting the program, you need:
- Select a USB stick;
- Next, put a tick in front of the item Auto Format it with FBinst (all data on the flash drive will be deleted!). By the way, the rest of the settings should be set automatically, see the screen below;
- Then in paragraph "Linux ISO / Other Grub4Dos compatible ISO" select our downloaded (created) ISO image from antivirus software developers (I took the image from NOD32);
- the last step is to press the GO button and wait for the end of the recording.

WinSetupFromUSB recording settings
By the way, WinSetupFromUSB will ask you again about whether it is accurate to format the flash drive and delete all data on it.

Asks again
If everything went well and the data was written to the USB flash drive, you will see a windowJob done (work completed).

Flash drive recorded - Job Done
*
How to boot from such a flash drive:
- In principle, the same as with the flash drive that we created in the first section of this article. It is enough to call 👉 Boot Menu, then select our USB flash drive from the list of devices from which you can boot;
Boot menu - flash drive selection
Note: If you get errors when loading an ISO image, you may need to switch Boot Mode (boot mode) from UEFI to Legacy in the BIOS settings (support for booting old OS, boot images, etc.). About BIOS setup 👉 in pictures, see this article;
- Next, the GRUB4DOS window should appear (if you recorded the USB flash drive in the WinSetupFromUSB program) - just select the line with "ESET ..." and press Enter;

Download NOD32
- Then the antivirus LiveCD will start loading: when you see the welcome screen, note that there are several boot modes on the right: graphical, text, memory testing, etc. By default, graphical will be loaded (the most optimal for most users, working in it is the same as if you booted into regular Windows) .
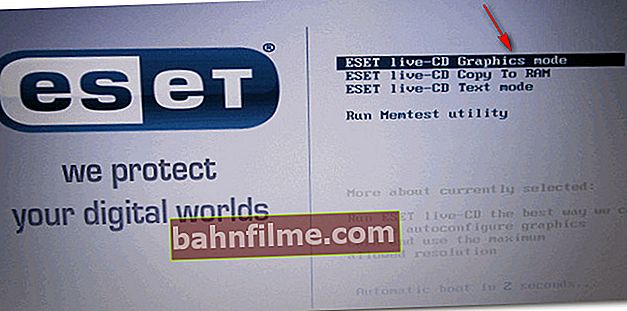
ESET welcome screen - select boot mode (graphical, text)
- the graphical interface is generally classic, it's easy to work like in the classic explorer ... (see the screenshot below 👇).

ESET NOD 32 LiveCD - screenshot


*
That's all...
I hope I gave a more or less comprehensive answer about the LiveCD.
I will often refer to the article in my other instructions.
Good luck!
👋
First publication: 16.02.2019
Correction: 04/16/2020