User question
Hello.
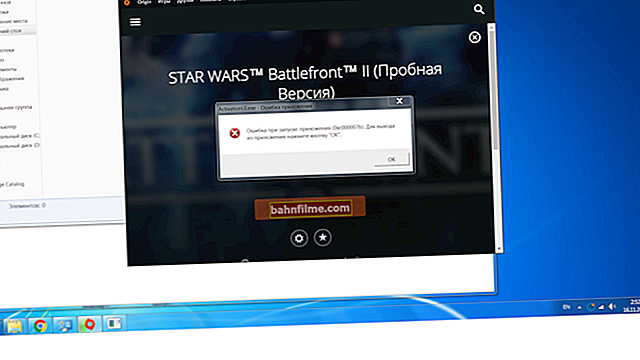
Tell me what you can do with this problem ... Not so long ago I bought a new computer, but I need one old program to study - it does not start in Windows 10. I used to have Windows XP and everything worked. Is it possible to somehow run the old Windows XP in the new Windows 10 operating system? ..
(editor's note: part of the question has been deleted because it is not informative)
Good day.
To do what you described, you need a special program called virtual machine (in fact, this program, when launched, will emulate the work of a real computer with the BIOS, its disk, hardware, OS, etc.).
So, by installing and running it, you can install the version of Windows that you need on the virtual machine disk (and carry out any experiments with it 👌).
Quite often, they resort to using a virtual machine when they want to run old applications in a modern OS (for example, games); Also, software developers do not ignore this issue when they need to test their programs in a variety of operating systems at once, etc.
I don't know if a novice user will understand what I tried to describe above in simple language. Nevertheless, in this article I will try to describe in detail all the actions to the desired result: i.e. from installing a virtual machine to installing and running the old Windows XP operating system in it, and some old program.
So...
👉 Important!
If you are using Windows 10, then there is an easier option for creating a virtual machine (without downloading additional software). I told about it here ->
*
Setting up and working with a virtual machine (VirtualBox)
Selecting a virtual machine
Now there are a lot of such programs: among them there are both paid options and free ones. If you are just getting acquainted with virtual machines, I recommend opting for such as:Windows Virtual PC, VMware, VirtualBox.
They are simple enough to learn, there are many instructions and recommendations on the net for them. In this article I will focus on the programVirtualBox...
♦
VirtualBox
Developer site: //www.virtualbox.org/wiki/Downloads

A free program that allows you to create and run on your computers several virtual machines with different OS at the same time! Moreover, the program has quite flexible settings: you can specify the size of the hard disk, the amount of allocated RAM, the amount of video card memory, and other parameters.
The main advantages of the program:
- the ability to run several operating systems at the same time;
- setting parameters for each OS separately (size of RAM, hard disk, etc.);
- the ability to save the state of the virtual machine on exit;
- there is an option to record video (what happens in the window of a running virtual OS);
- the ability to set shared folders with the main OS for file exchange;
- Russian language support;
- support for all modern OS Windows 7, 8, 10 (32/64 bits).
♦
As for the direct installation of VirtualBox, everything is standard here: like any other program for Windows. In principle, you can leave all the parameters by default and do not change anything by clicking the next button (there is no adware in the installer, unless, of course, you downloaded it from the official website).

VirtualBox installation is standard
*
Creating a new car
After installing and running the program, the first action that needs to be performed is to start creating a new machine (because at the moment, there is nothing to even configure).
To create a car - click the "Create" button (see the screen below 👇).

Create virtual. car
Next, you must specify the following data:
- the name of your virtual machine (can be anything, but I recommend specifying it in accordance with the OS you want to install.For example, my name is Windows XP, see the screen below);
- specify the type and version of the system (the one you want to install).

Name, type, version
In the next step, you need to specify the amount of allocated RAM.
In general, VirtualBox will give you hints on the recommended amount of memory by default. In general, the rule works: the more, the better, for example, for Windows XP, I recommend allocating at least 512 MB of memory.

Setting the amount of RAM
If you are creating a virtual machine for the first time and you do not yet have a virtual disk to connect, select the tab "Create a new virtual hard disk" .
Note: the virtual disk will be a regular file that will be saved on your real disk.

Selecting the type of hard drive
Next, you need to specify the type of disk - I recommend choosing VHD (the fact is that this format of disks can be connected directly to Windows and see what is on them. It will be very useful when you want to transfer something to a virtual machine disk).

Virtual disk type
Next, you will be asked to indicate the storage format of the disk, there are two types:
- dynamic: preferred (saves space on your real hard drive). The bottom line is that the disk file will grow in size as it fills with data, and will not take away the entire allotted space at once;
- fixed: it is recommended to choose if you are installing specific and very old software. For example, I had errors with a dynamic disk when working with Windows 95-98.

Storage format
Then just specify where the disk image file will be stored.

file size
Actually, the virtual machine has been created - now you can start it. To do this, click the button with the green arrow "Run".
Note: if you get an error that the launch is not possible, try to select the launch option "Run in the background with interface".

The machine has been created!
By the way, after launching, you will not see anything - just a black screen with the inscription: "No Bootable media ..." we haven’t installed the system yet. It's like turning on a computer whose hard drive isn't even formatted ...
*
Installing Windows XP
Before proceeding with the installation, you need to do two things:
- first: you need an installation image file (usually ISO format) with the desired OS - in this case, with Windows XP. You can do it yourself, or download it from the network;
- second: open the settings of your virtual machine, the "Display" section, and move the slider of the video memory to 128 MB, also check the boxes next to the items "Enable 3D Acceleration" and Enable 2D Acceleration (see screenshot below). This will help to avoid errors (in some cases) later during installation, and when launching games, it will have a positive effect on their performance.

Display setting
And so, now we start the virtual machine (as I said above, if an error appears at startup, try starting in the background with the interface).

Running in the background
Next, when you see a message stating that the boot device was not found "No bootable ..." , click on the tab "Device / optical discs / select disc image" ... Then specify the installation ISO image file from your Windows OS that you want to install.

Select disk image
Then the virtual machine needs to be rebooted - click "Machine / Restart" .

Reboot
After the reboot, the installation of your OS should begin (much when starting the OS installation depends on the installation image file that you connected in the previous step).

Running Windows XP installation
When installing Windows XP: the first step is to specify the installation drive. Because in the virtual machine, it is one (the one that we created in the previous steps for 10 GB) - then we select it (it will be marked as an unallocated area, see the screen below).
Note: in general, all the steps below will be the same as when installing a real OS on a real disk.

Selecting a disk for installation
Next, choose how you need to format the disk. In most cases, the option "Format partition in NTFS system" .

Format partition in NTFS system
After the installer, let's start formatting (just wait here ...).

Formatting process
Next, the installer will copy the files and restart the virtual machine.

Copying files
In general, in the next steps you will need to specify the computer name, time zone, enter the serial number, etc. data. There is nothing complicated (as a rule) in these steps, some of them can be skipped altogether, so I am not commenting on them here.

Installation and configuration process
Actually, after installation, Windows will be loaded, and you can already start working in it.

In general, Windows XP is installed ...
Mission number one, in my opinion, has been accomplished! Old Windows XP was running on modern Windows 10.
Already now you can use standard programs in Windows XP (by the way, if you have the Internet in a real system, then in most cases it will be in a virtual system too. That is, you can download the necessary programs or games directly into the virtual system, and start to the main ✌ ...).
Note: in a virtual system, you may also need to install DirectX, Net Framework, specialized software, etc., just like in a real OS.
The only one The difficulty faced by many novice users is the exchange of files of a real system with a virtual one. A few words about this below ...
*
File exchange with a virtual machine (launching games, programs)
Quite often, when working with a virtual machine, you will need to transfer files from a real disk to a virtual one (and vice versa). To do it just like that: copy / paste is not allowed!
There are several ways to solve this problem. Here are 3 of them.
1) Use the cloud service
If you have access to the Internet in a virtual machine, then you can connect to your cloud storage and exchange files in it (for example, the Yandex disk service gives 32 GB, which is enough for many tasks). More details about this here: //ocomp.info/kak-podklyuchit-oblachnyiy-disk.html
2) Create a shared folder for sharing
In the VirtualBox settings, you need to open the section "Shared folders" , then press the button "Add" and specify a folder that will be common for the virtual system and the real one. Note that it is not always possible to correctly configure such a feature (errors often crash).

Shared folders
3) Connect the virtual disk to real Windows
In the previous steps, when we created a virtual disk, I recommended that you make it in VHD format. The fact is that you can connect a disk of this format to Windows and see all the files on it! Those. to gain access to it, you do not need to install any additional software.
1. To connect it, first shut down the virtual system and close the VirtualBox program.
2. Then open disk management: to do this, press the combination of buttons Win + R, enter diskmgmt.msc and press Enter (see screenshot below).

How to open disk management - diskmgmt.msc
3. Next press the menu Action / Attach VHD .

Attach disc
4. Specify its location (it was specified when the system was created, see above in the article).

Select location
5. By the way, pay attention to the check mark "only for reading" - remove it so that you can write the necessary files to the disk.

Location specified
6. Next, Windows will connect the drive, and it will become visible in "On my computer" and the conductor. You can now work with it as with a regular disk (see disk H: in the screenshot below).

The disk is attached you can work with it
7. For example, I transferred the Games folder 👌.

Games loaded
8. To disconnect a virtual disk - I recommend using the safe removal menu (as when disconnecting a USB flash drive). Click the corresponding icon in the tray, next to the clock (see screenshot below).

Safely ejecting a disc

Extract
*
RESULTS
Actually, the virtual machine has been created, files (games, programs, etc.) are loaded on it, the system is working. It seems that the mission of the article is completed ?!
Below is a screenshot of a standard sapper game (that is, a virtual machine with Windows XP was launched in Windows 10, and the game "Sapper" is open in it).

Now you can play
Below is another screenshot of a game that does not belong to standard Windows XP applications - we are talking about Doom 2.
To run such games, the principle of operation is the same: download the installer to the virtual machine disk, launch it, and install this game or program as in normal work in real Windows.
Also, in addition to the game, you may need, for example, DirectX and other add-ons ...

Doom 2 on Windows 10
By the way, it is very pleasant that, after playing your favorite game, when you close the virtual machine, VirtualBox saves the status of your system by default (i.e., by starting it again, you will start from where you left off). Agree, it's convenient ?!

Game state saved
*
This concludes the article.
Good luck!
👋
First publication: 12.09.2017
Correction: 11/8/2020