Good day.
You work at your computer, you work, and then ... bam 😢, and you need to reinstall the system, or turn on the function keys, or turn off the USB ports, etc. You can't do without setting up the BIOS ...
On my blog, I quite often touch on the BIOS topic (since a number of tasks simply cannot be solved without configuring it at all!), But there is no generalizing topic in which all the basic terms and parameters would be analyzed.
So, in fact, this article was born ...
Note: BIOS settings are based on Lenovo B70 laptop as an example.
Many parameters, names of sections and tabs will be similar with other brands and models of laptops. I think that collecting all the variety of brands and all kinds of versions in one article (or even a section of the site) is simply unrealistic ...
*
Main sections and settings
How to enter BIOS
I believe that the first place to start this article is with the question of entering the BIOS (otherwise there will be nothing to configure ✌).
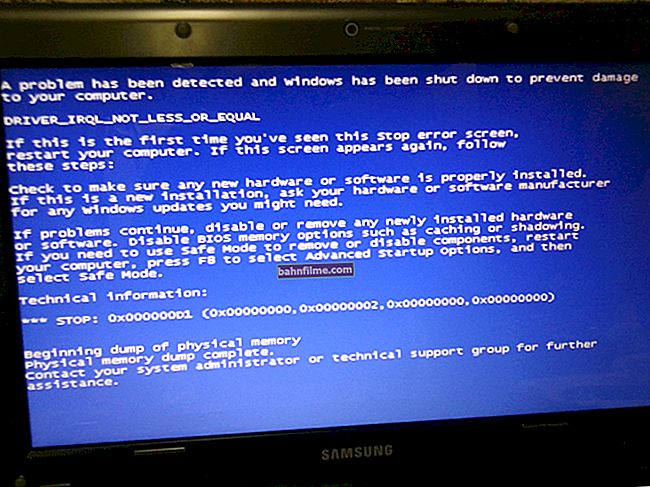
In most PC / laptop models, to enter the BIOS, you need to press the button F2 or Del (sometimes F1 or Esc) immediately after turning on the device.
Some laptops (e.g. Lenovo) have a dedicated button Recovery (which is pressed instead of the power button). After that, usually, a plate appears (as in the photo below) - to configure the BIOS, select the item BIOS Setup .

BIOS Setup
I also recommend reading the articles on my blog about entering BIOS (links below).
👉 To help!

1) How to enter BIOS on a computer / laptop.
2) How to enter BIOS on Lenovo laptop.
*
Control buttons
In the BIOS, all settings have to be set using the keyboard (which is somewhat frightening for novice users who are used to doing everything in Windows with the mouse).
Note: more modern BIOS versions (i.e. UEFI) - support mouse control.
It is also worth noting that all settings are set in English (although most of the settings are easy enough to understand what they mean, even for those who have not learned English).
And so, now about the buttons ...
I draw your attention to the fact that in almost every BIOS version at the bottom of the screen (or on the right) all the most basic control buttons are written with which it is configured.

Bottom control buttons / Dell Inspiron laptop
Generally speaking, the buttons are as follows:
- arrows → ↓ ↑ ← - are used to move the cursor (change parameters);
- Enter - the main key for entering sections (as well as for selecting certain parameters, switching items);
- Esc - exit BIOS without saving settings (or exit from a specific section);
- + / PgUp or - / PgDn - increase / decrease the numerical value of a certain parameter, or switch it;
- F1 - brief help (only for settings pages);
- F2 - hint for the selected item (not in all BIOS versions);
- F5 / F6 - change the parameters of the selected item (in some BIOS versions, they can also be used to restore changed settings);
- F9 - system information (loading secure settings);
- F10 - save all changes to BIOS and exit.
👉 Important!
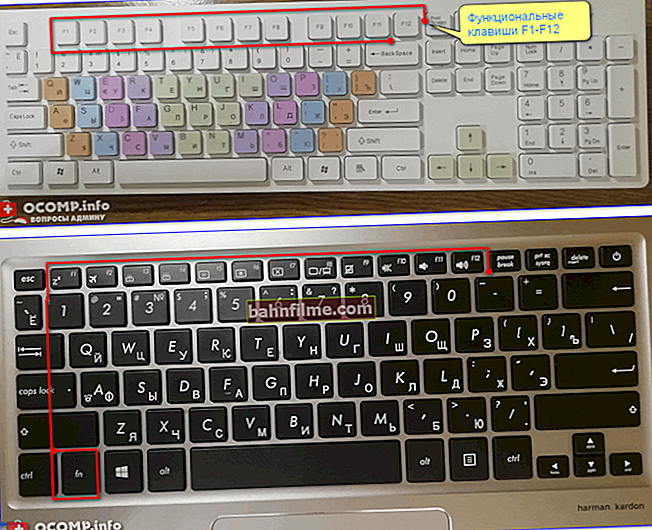
In some laptops, in order for the function keys (F1, F2 ... F12) to work, you must press the combination of buttons Fn + F1, Fn + F2 ... Fn + F12. Typically, this information is always indicated at the bottom (right) of the window.
*
Sections and tabs
Information
The main tab in the laptop BIOS that you see when you enter. Provides basic information about the laptop:
- its make and model (see photo below: Product Name Lenovo B70-80). This information is extremely necessary, for example, when searching for drivers;
- BIOS version (if you are thinking of updating the BIOS, the information will be extremely useful);
- the serial number of your device (it is not available everywhere, and the information is almost useless);
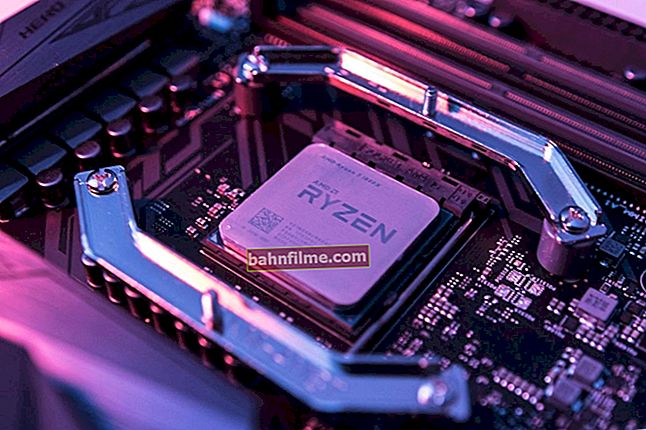
- processor model (CPU - Intel Core i3-5005U 2.00GHz);
- hard disk model;
- CD / DVD drive model and other information.

information
In general, this tab is highly recommended to visit when you want to find out information about your hardware.Also in those cases when new equipment was connected and you do not know if it was detected correctly.
*
Configuration
One of the main tabs for setting many parameters. In different laptops, the tab contains different settings, the main parameters are:
- System Time / Date - setting the date and time (often in Windows the time gets lost, and sometimes it cannot be set at all until the corresponding tab in the BIOS is configured);
- Wireless - Wi-Fi adapter, here you can disable it ( note: Enabled - enabled, Disabled - disabled). If you do not work with Wi-Fi networks, it is recommended to disconnect the adapter, as it consumes battery power significantly (even when you are not connected to a Wi-Fi network);
- Sata Conroller Mode - hard disk operating mode. This is a pretty broad topic. Here I will say that the operation of your hard disk significantly depends on the selected parameter (for example, its speed). If you do not know what to set, then leave everything as default;
- Graphic Device Settings - a parameter that allows you to configure the operation of video cards (in laptops with two video cards: integrated and discrete). In some cases (for example, when working with Windows XP, or when you want to save as much battery power as possible) you can disable the discrete video card here (note: performance degradation in games is likely to occur) ;
- Power beep - enable / disable speaker-buzzer. In my opinion, for a modern laptop in everyday use, this is a useless thing (it was relevant earlier, 10 years ago);
- Intel Virtual Technology - hardware virtualization, which allows you to run multiple instances of operating systems (guest OS) on one physical computer. Generally not for novice users;
- BIOS Back Flash - if you want to update your old BIOS to a new version (i.e. flash) - enable this option;
- HotKey Mode - mode of operation of functional keys. If the option is enabled: instead of the usual, say, F1-F12 to refresh the page in the browser or get help, you can use the multimedia capabilities - add or mute sound, brightness, etc. To use the usual F1-F12 values, you need to press them together with the key Fn.

Configuration
*
Security
A tab for setting security (for some users - one of the main ones). Here you can set admin password to access the BIOS settings or to access the hard drive.
👉 Important!
Use these passwords very carefully. The fact is that if you forget it, in some cases you will have to contact service centers.
You can also try to reset the password on your own, I talked about this here.
The main settings items in this section:
- Set Administrator Password - set an administrator password;
- Set hard dick password - set a password to access the hard disk;
- Secure Boot - secure boot (enabled / disabled). By the way, Secure Boot is only displayed if you have UEFI boot mode set.

Security
*
Boot
Download section. Also one of the most frequently used sections, it is almost always necessary for editing when installing Windows.
The boot mode is also set here: UEFI (the new standard is for Windows 8/10), or the old boot method (Legacy, for Windows 7, XP).
Note: new items for editing the download queue will appear after saving the settings and entering this menu again!
👉 By the way!
If support for the old mode is enabled, then you can (even need to!) Change the boot priority of devices (for example, first check USB devices, then try to boot from CD / DVD, then from HDD).
👉 To help!
How to create an installation USB flash drive with Windows for UEFI boot mode and for Legacy - you can learn from this article
Basic settings in this menu:
- Boot Mode : boot mode, UEFI or Legacy (described above for the difference);
- Fast Boot : fast boot mode (no logo will be shown, only built-in devices will be supported during boot: keyboard, display, etc.). Works only with Boot Mode: UEFI.
- USB Boot : Allow / Deny to boot from USB devices.
- PXE Boot to LAN : this option enables booting the computer over the network (initially, an attempt will be made to boot the operating system from the server using the local network. In my opinion, for most users, this is a useless function).

Boot
Note: it is worth noting that, in the new version of UEFI, the ability to raise menu items using the F6 button stopped working, but it was still possible to lower another item with the F5 button.
*
Exit
I think everyone knows this word - it is translated from English as output ... This section is also used in almost all laptops (and PCs) to reset the settings to optimal (or safe).
Key points:
- Exit Saveng Changes - exit and save the changed settings in the BIOS;
- Exit Discarding Changes - exit BIOS without saving settings;
- Discard Changes - undo all changes to the settings made during the current session;
- Save Changes - save changes to settings;
- Load defaults changes - load BIOS defaults (as they were when you bought your laptop). They are usually used in case of unstable operation of the device, or in cases when the user has changed something and no longer remembers ...
- OS Optimized Defaults - settings optimized for specific OS (not all laptops have this option. It somewhat simplifies and speeds up BIOS setup).

Exit
*
How to choose from which device to boot a laptop (Boot Menu)
In order not to climb into the BIOS settings and not select (not set) the boot queue, it is very convenient to use the boot menu, calling it only when you need to boot from a USB flash drive (for example). Here's a reference article on this topic (link below).
👉 To help!

Hot keys for entering the BIOS menu, Boot Menu, recovery from a hidden partition.
Calling the Boot Menu, you will see the usual list of devices from which you can boot. Most often this list contains (example in the photo below):
- HDD;
- USB flash drive, disk;
- the ability to boot over the network (LAN).

Booting from a Kingston USB stick
Use the arrows and the Enter key to select a device to boot. In general, as in the usual BIOS setup.
*
This concludes the article. For additions on the topic - thank you in advance!
Have a nice day!
👋
First publication: 03/26/2017
Correction: 01/15/2020