Good time!
In some cases virtual disk a very useful thing (I would even say irreplaceable 👌), for example:
- you can install another Windows on it (as if it were a real HDD);
- it can be encrypted with BitLocker (built into Windows). Then the files on this disk will be protected from unauthorized persons;
- it can store many small files (pictures, for example). It is much more convenient in terms of transfer: copy 1 virtual disk 10-20 times faster than tens of thousands of small files;
- through it, you can transfer files to the virtual machine (and vice versa).
If you have a modern Windows 10 OS, then you can fully use virtual disks without any programs. Actually, today's note will be about how to set it all up ... 👇
*
Working with virtual disks
How to create a virtual disk (VHD)
1) First you need to open Disk Management (the utility is built into Windows). A generic way to do it: use a combination Win + R (the "Run" window will appear), enter the command diskmgmt.msc and click OK.
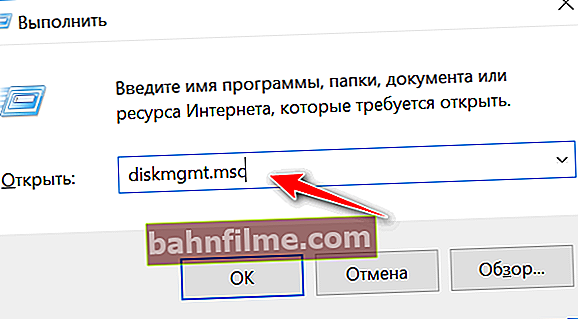
diskmgmt.msc - start disk management
2) Next, open the section "Act" and select the item "Create virtual hard disk" .
Note: if the menu list in the "Action" section is not active, it means that you have selected some kind of disk. Just left-click anywhere in the window under the disk list, and then try again ...

Create virtual disk
3) After that, specify the location for the disk, size, format, and type (I recommend choosing dynamic, because it "takes less" space on a real disk).

Settings
4) A new disk will appear at the bottom of the window: first you need to initialize it (just right-click on it and select it from the menu).

Initialize disk
5) If it works only with Windows 10 - it is better to select the partition table GPT (otherwise - MBR).

Partition table
6) Next, the new disk needs to be formatted ...
To do this, right-click on the unallocated area of this disk, from the menu that appears, select the option "Create Simple Volume" .

Create simple volume
7) Specify the size of the volume (in most cases it is better to leave the default).

The size
8) Assign a letter to it (you can choose any free one).

Letter
9) Then you need to specify the file system and volume label (for external hard drives - it is better to choose exFAT, for the rest NTFS).

Format
10) The final touch is to confirm the formatting operation.

Completing volume creation
11) Actually, now you should have a new drive in "My Computer" (in my case, drive "F: \"). Mission accomplished?! 👌

New drive F: \
How to encrypt a disk (password only access)
The disk we created in the previous step can be opened and viewed by any of the users (i.e. it is not protected in any way). If you want to store any personal files inside such a virtual disk (which should not be shown to anyone), they should be encrypted.
BitLocker encryption can be a very good option (it is built into Windows 10 Pro, if you have a different edition, you can use alternative methods).
1) And so, to enable encryption - in "On my computer" you need to click on the RMB disk and select from the explorer menu Enable BitLocker .

Turn on BitLocker
2) Next, specify twice the password that will be used to decrypt and access the data.

Use password
3) After, Windows will offer to save the key (it may be required to restore access to the disk if you forget the password. I recommend saving it to a USB flash drive ...).

Key
4) Next, you need to specify which part of the disk you want to encrypt (in general, there is no big difference between these options - you still cannot get access to files without a password).

Encryption type
5) In the next step, I recommend turning on compatibility mode (what if you transfer the disk?)

Encryption mode
6) Well, the last step is to agree to encryption ...

To begin
7) Please note that on the encrypted disk in "On my computer" the lock sign will light up. When no password is entered, the lock is closed, as in my screenshot below.

The disk is connected!
8) After entering the correct password, the lock becomes open, and the color of the icon changes to gray (now you can work with the disk 👌). See example below.

An open lock appeared on the disc!
How to auto-mount a virtual HDD on Windows restart
After turning off / on (or restarting) the PC, our created disk will need to be manually connected via disk management (and until this is done - it will not appear in "My Computer" ...).
Of course, this is not very convenient if you need to constantly work with the disk, and so that it is always "visible" in the explorer. Below I will show one of the ways how to fix it ...
1) First create a plain text document (I, for example, placed it on the desktop).

Text Document
2) Next, insert the following lines into it (note: of course, specify your path to the disk file) and save:
select vdisk file = "C: \ test_vhd.vhd"
attach vdisk

What to insert into a notebook
3) Rename this text notepad to a file with the "CMD" extension (the name itself can be anything, in my case "open_vhd.dhd"). If you can't see the file extensions (CMD, TXT, etc.) - check it out ...

Renaming
4) Then open the task scheduler: to do this, click Win + R (to bring up the Run window) and use the command Taskschd.msc .

Taskschd.msc - task scheduler
5) Then create a simple task, go to section "Triggers" and click on the button "Create" .

Create simple task, triggers / Clickable
Specify that the task should run at every logon for any user and click OK.

When logging in
6) In the tab "General" indicate task name (can be anything), and check the box that you need the task with supreme rights (see example below).

With the highest rights
7) And the last point: in the tab "Actions" create a new task.

Create action
Then indicate that you need a task in the form of starting a new program and in the line "Scenario" set the following:
C: \ Windows \ System32 \ diskpart.exe / s "C: \ Users \ alex \ Desktop \ open_vhd.cmd"
Of course, you will have your own path to the file with the "CMD" extension (which we created a little earlier). For example, instead of "C: \ Users \ alex \ Desktop \ open_vhd.cmd" it could be something like "C: \ open_vhd.cmd" (or "C: \ Users \ LENA \ Desktop \ open_vhd.cmd").

Launching the program
8) Actually, that's all. After restarting the computer, the disk will be connected automatically. It is worth noting that if the disk is password protected, then before you can work with files, you will need to enter an access code ...
After restarting the PC, the F: \ drive appeared in "My Computer" (our version of the drive was encrypted, therefore, to access the files, you must enter the password!)
*
Add-ons are welcome ...
Happy work!
👌