Good day!
Do you know who is the most dangerous enemy for a computer, besides the user himself? 👀 The most dangerous enemy is dust! ..
For some reason, some users think that cleaning a computer from dust is something out of the ordinary and accessible only to experienced gurus or masters.
In fact, there is nothing complicated in this procedure, especially since everything you need to clean your PC is in almost every home!
In this article, I will explain how this is done and what you need to pay attention to.
So...
*
👉 To help!

1) How to clean a laptop from dust: by yourself at home.
2) The best utilities for removing "junk" files in Windows (after all, if you do clean, then clean everything and conscientiously!)
*
Cleaning your computer from dust [instructions]
Frequently asked questions from users
Perhaps the first thing to start the article with is to answer the most common user questions about cleaning, which are asked regularly ...
1) How often do I need to clean my PC from dust?
Let's just say: there is no specific recipe that suits absolutely everyone. Some users clean the system unit every six monthsothers do not clean at all from the time of purchase. Both those and those will tell you that everything is in order for them and everything works.
In general, of course, a lot depends on the room in which you work: the more dust there is, the more it is in the system unit (logical). For an ordinary apartment / house - the best option is to clean it 1-2 times a year.
2) Why do you need to clean?
Over time, when the dust in the system unit becomes more and more, it begins to interfere with normal air circulation.
Sitting on the fan blades, clogging ventilation holes and radiators, it interferes with the removal of hot air from the device case.
As a result, your hardware begins to overheat, which negatively affects the performance of the PC and its lifespan. By the way, after cleaning, you will suddenly notice that the fans are no longer so noisy and do not irritate you.
Therefore, if want toso that the PC will serve for a long time and did not slow down - try sometimes to clean it from dust ...
3) How to determine when it is time to clean?
Well, in general, you sometimes need to look into the system unit and make an assessment visually. Also, pay special attention to dust when the device freezes, unexpected reboots, blue screens, if coolers are noisy.
*
What will be needed for work
- A vacuum cleaner . In general, an ordinary household vacuum cleaner should be enough, which, preferably, should have a mode reverse... If there is no reverse, then you can blow out the dust if you turn the vacuum cleaner so that it blows air directly onto the open system unit. By the way, instead of a vacuum cleaner, you can even use a fan (especially if it is powerful enough).
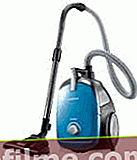
A vacuum cleaner
- Compressed air cans. Instead of a vacuum cleaner, you can use a special. cans of air, such as are sold in computer stores. They can also come in handy in narrow places: for example, to blow dust out of the fan blades, from the power supply, etc.

Compressed air can
- Cotton swabs . The most common sticks will do, many probably have ear sticks at home. If not, it is quite possible to do with a brush.
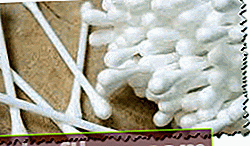
Cotton swabs
- Soft brush

Paint brush
- Phillips and flathead screwdrivers (for opening the cover of the system unit (depending on its model)).

Screwdriver
- To clean the monitor, you will need: a soft cloth (for example, from glasses), or a special one for cleaning screens (there are such in computer stores). You can also use a clean sponge.
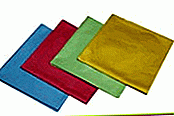
Napkins
*


How to clean the system unit
The first thing to do is turn off the PC and disconnect from the system unit: power cord, mouse, keyboard, printer and other devices.
In a typical design of the system unit, the left side opens. They usually hold it by mounting on the back wall: these can be simple latches, or they can be screws (for this you need a screwdriver, which I talked about in the previous part of the article ...).
In general, unscrew the screws (latches) and remove the side wall (usually it moves along the "rails" if you push it towards the back wall of the system unit).

Turn off the power, unscrew the screws
Next, you will need a vacuum cleaner. In general, it is recommended to blow through the system unit on the street, garage, balcony, staircase (well, if you are not afraid to dust the room, then you can right at the workplace 👀).
One more point: it is advisable to put on glasses or turn away (squint) during the first 5-10 seconds. blowing - the main dust will fly out at this time.
In general, there is nothing tricky in the purging process: just drive the vacuum cleaner in different corners of the block and purge all areas. The main task: to blow out all large lumps and dust accumulations.

Cleaning the system unit on the street
Next step: cleaning the radiators. Radiator - this is such a piece of iron with ribs (usually yellow / white), serves to cool the processor (it can also be, for example, on a video card, and wherever cooling is required).
You can easily clean the heatsink with a regular soft brush: just brush it between all the ribs. By the way, you can blow out dust from hard-to-reach places using a can of compressed air. Most often, such places are located somewhere under a cooler (fan), where you cannot crawl with an ordinary vacuum cleaner.
By the way, dust off the fan blades can be done with cotton swabs.

Cleaning the radiator and cooler
I also recommend paying attention to Power Supply... Usually many people forget to clean it, meanwhile a fairly large amount of dust accumulates in this closed box.
The power supply is located, most often, at the rear wall of the system unit, above or below (depending on the model of the unit, in my photo 👇 - it is below).

Power Supply
You can clean it without disassembling it: there are many ventilation holes in it - just blow it with a vacuum cleaner from different sides.
In general, it is better to look inside it and evaluate it visually. To disassemble it, it is enough to unscrew 4 screws (bolts) and remove the protective cover. Next, use a brush and cotton swabs to clean.
*
How to clean the monitor from dust and streaks
What can not be used to clean the monitor: alcohol, acetone, soda, etc. Many of us use everything at home to clean the monitor. Meanwhile, all these tools can spoil the surface of the screen, even if nothing is noticeable at first glance.
For example, when cleaning with alcohol, microcracks may begin to form on certain surfaces, then they will grow into cracks and the surface of the screen will be damaged.
You can use: special. liquid for cleaning monitors (sold in stores), or water lightly dampened with baby soap.
Regarding the rags: the rags sold for cleaning and wiping ordinary glasses are ideal. You can also take pieces of flannel cloth or a sponge (however, a sponge is dangerous because grains of sand can get on its surface, which will scratch the surface of the screen. If you take a sponge, then only a new one, and use it only to wipe screens).
Also in computer stores you can find special wipes for cleaning the surface of the screen.
In general, if you bought a special spray and wipes in the computer. store - then giving here instructions on how to use it, I think, is pointless. Each manufacturer has its own cleaning nuances. Below I will try to give a simple home universal version ...

Cleaning the monitor
Universal cleaning option:
- The first thing to do is turn off the monitor and unplug it.If you have an old type CRT monitor, you should wait a while (about 1 hour);
- prepare a small container of water, slightly moisten it with regular baby soap;
- remove rings, bracelets, etc. from your fingers - there is a risk that when you wipe the surface, you will accidentally scratch it;
- then dip a cloth in water and squeeze it out so that nothing drips from it (i.e. so that it is just damp). Then wipe the monitor surface: this should be done without pressure and gently - it is better to run it 5 times over the surface without pressing, than pressing hard once;
- then wipe the surface with a dry cloth and inspect the monitor surface: whether there are any dust residues (especially in the corners), streaks, etc. If there are any: wipe the surface again with a dampened cloth, and then dry;
- When the screen surface is clean and dry, you can turn on the device and enjoy the vivid picture.
*
Cleaning the keyboard from crumbs, grease marks and dust
Option 1
The easiest option (if you don't want to buy anything and spend money) - just turn the keyboard over and shake it slightly. Most of the crumbs, dust and other good stuff will fly out of there. It can also be blown out with a vacuum cleaner.
Next, take a damp cloth or soft cloth (one with which no water flows, but simply damp) and wipe the surface of the keys, between the keys to remove grease marks, dried drops, etc. By the way, you can moisten the cloth with soapy water.
In general, a simple, reliable and fast way to clean the keyboard ...
Option number 2
Now there is such a know-how as Velcro gel... The essence of its use is simple: you put it on the keyboard, slightly press down and wait. The gel will spread between the keys, take an exact copy of the keyboard, filling all the gaps and voids.
Then you remove it from the keyboard. Due to the fact that this gel is very sticky, it will remove all the dirt with it: dust, crumbs, etc.
By the way, its developers claim that it has antibacterial properties. I honestly doubt it ...

Velcro for cleaning the keyboard
Option number 3
Well, the last actual (in my opinion) option is the use of a special keyboard USB vacuum cleaner (some models operate on a network or battery).
The use is simple: turn it on and move it between the keys. As a rule, he has small brushes, due to which he can pick up crumbs even from hard-to-reach places, and then suck them in ...
One of the main disadvantages of these devices: low suction power, a lot of debris is simply not sucked in. And the second point: it removes only dust and crumbs, and greasy marks, stains, etc. - you still have to wipe it off with a cloth ...

Dedicated USB keyboard cleaner
*
This completes the cleaning. Good luck to all!
For additions on the topic - I will be very grateful!
👋
First publication: 01/28/2017
Correction: 01/05/2020