Good day!
Many users, when updating their OS to Windows 10 on their PCs / laptops, often face a situation when after that it is necessary to configure the Internet (after updating or reinstalling the OS, the network settings are reset and the Internet connection is lost ...).
Of course, a lot still depends on what type of connection and equipment is used in your case. In this article, I decided to consider the most popular options: connecting to the Internet via a Wi-Fi network, connecting with a network LAN cable directly or using a router (an ADSL modem may also be used), and connecting using 3G / 4G modems.
Well, let's go straight to the topic ...
*
Setting up an Internet connection [Windows 10]
Connecting to a Wi-Fi network (if a router is installed at home)
Perhaps the most popular method, which is now used everywhere (even many providers, when connected, "give" a router). Moreover, interestingly, not only laptops, tablets and smartphones, but also other PCs are now connected via the Wi-Fi network ...
As for the connection itself: just click on the network icon in the system tray ( ), in the menu that opens, select your Wi-Fi network and click the "Connect" button. See screenshot below.

Connect to Wi-Fi network
Next, you will be asked to enter your username and password to access it.

Establishing a connection
If the data is entered correctly, you will see that the network icon has become active, when you hover over it, you will see the message "Internet access" (example below).

With internet access (OK!)
If you see a yellow exclamation mark on the status of the network icon (without access to the Internet), then most likely you do not have a router configured or "old" data remains in the network connection parameters. Let's fix it now ...
To help! The topic of configuring a router is too extensive, so I recommend one of my previous articles on how to connect and configure a router from scratch - //ocomp.info/nastroyka-routera-tenda-fh456.html

An example of an error: when you hover over the Wi-Fi icon, Windows reports that the connection is without Internet access ...
As for network connections: to configure them, you should open the control panel window, in which they will all be presented. For this you need:
- press the key combination Win + R;
- in the "Run" window that appears, enter the command ncpa.cpl;
- click OK. See screenshot below.

Opening network connections (universal method)
Next, open the properties of the wireless network (Wireless).

Wireless network properties
Then go to the properties "IP version 4 ..." (example below), and set the receipt of the IP address and DNS servers automatically.

Get IP, DNS Server Automatically
Save the settings and check the network operation.
[Instructions for help!]
 The laptop does not connect to the Wi-Fi network - a red cross is lit on the network icon: //ocomp.info/noutbuk-ne-podklyuchaetsya-k-wi-fi.html
 Wi-Fi without Internet access (yellow exclamation mark on the network icon is lit) - //ocomp.info/wi-fi-bez-dostupa-k-internetu.html
Connecting to the Internet via a network LAN cable, Ethernet (directly with an Internet provider cable, through a router, ADSL modem)
Ethernet is the most popular data transmission technology. In Russia, the majority of Internet providers use it, laying ordinary network LAN cables in users' apartments. At the same time, the Internet cable can be connected either directly to a computer / laptop, or through a router or ADSL modem. In principle (if we ignore the formalities), this is one and the same Internet connection: just in some cases, additional. equipment.
To set up an Ethernet connection - in most cases, it is enough to connect a LAN cable to the network card of your computer / laptop. The Internet, in principle, should already start working.

Connecting a LAN cable to a laptop
Note!
1) In some cases, it is necessary to specify specific IP addresses and DNS servers in the settings of the network adapter (usually this is indicated in the agreement that you conclude with the Internet provider).Therefore, if you have incorrect IPs "indicated" there, DNS - the Internet will not work (just below it is shown how to configure this).
2) In addition, for some providers, after connecting a LAN cable, only the local network will work. For the Internet - you need to create a PPPoE connection (about in the next paragraph of the article).
By the way, if not everything is in order with the Internet connection and a problem is detected, you will notice it even by the network icon in the tray: a yellow wax will burn on it. icon (there is a local network, but no Internet access)

Network without internet access
In this case, I recommend checking the settings of the network adapter. This can be done by opening the "Network Connections" tab in the Windows Control Panel. To do this, press the Win + R key combination, enter ncpa.cpl in the "open" line, click OK.

How to open network connections || ncpa.cpl
After that, in the opened network connections tab, select your adapter [* through which you are connected] and open its properties (usually "Ethernet" or "local network connection").

Adapter properties
Next, open the properties of the line "IP version 4 ...", and specify the IP addresses, DNS servers, mask, etc. according to the recommended settings of your provider. In the overwhelming majority of cases, it is enough to set the sliders to the position of automatically obtaining IP and DNS.

IPv4 Properties - Get IP Address Automatically
To help!

The Internet does not work via a network cable [instructions] - //ocomp.info/ne-rab-internet-po-set-kabelu.html
Internet connection setup (PPPoE)
The high-speed PPPoE Internet connection is one of the most popular in Russia today (which is why I decided to consider it). To connect to the network, the Internet provider (at the conclusion of the contract) gives you a username and password. In general, this is all that is required to set up a connection. Conveniently?!
Note!
If you have a Wi-Fi router installed, then you do not need to configure the Internet (create a PPPoE connection) in Windows 10. In this case, you should configure the PPPoE connection in the web interface (settings) of the router itself. This article will tell you how to do this: //ocomp.info/kak-podklyuchit-i-nastroit-wi-fi-router.html
Actually, you have to configure the PPPoE connection in Windows when the cable from the Internet provider is connected directly to the network card of your PC / laptop (for example).
To do this, go to: Control Panel \ Network and Internet \ Network and Sharing Center ... Then you need to click on the link "Create and configure a new connection or network". See screenshot below.
How to enter the Windows 10 control panel [instructions] - //ocomp.info/control-panel.html

Create or configure a new connection
Then select the option "Connect to the Internet. Set up a broadband or dial-up Internet connection." (see example below).

Internet connection
Next, select "High Speed (PPPoE)" (DSL or cable connection that requires a username and password).

High Speed (PPPoE)
Then enter your login (username) and password. By the way, I recommend that you give permission to other users to use this Internet connection.

Entering name and password. Setting the name of the network
If the username and password were entered correctly, the cable is connected to the PC (and the provider does not conduct technical work) - after a few seconds, the computer should connect to the network.

Establishing a High Speed Connection
In general, the whole setup is fast enough ...
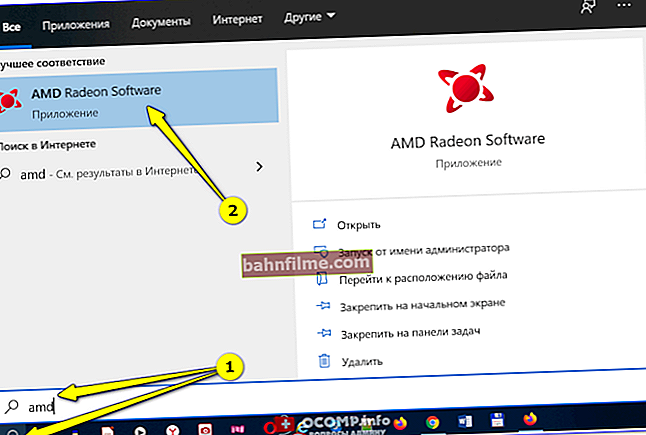
Internet setup via 3G / 4G modem
1) First, connect your 3G (4G) modem to your laptop / PC, install the drivers. It is best to download the driver from the official website of the manufacturer of your device (perhaps they came with your modem (and when you bought you were given a disc)).
Also, the drivers can be installed in the system using special. utilities for their automatic search and update - //ocomp.info/update-drivers.html#Driver_Booster

We connect the modem and install the drivers
2) Next, go to the Windows Control Panel (how to do this), open the "Network and Internet" section, then "Network and Sharing Center" and follow the link "Create and configure a new connection or network". Cm.screen below.

Network Control Center
3) After that, indicate that you want to create an "Internet connection", the type of connection - "Dial-up" (see example below).

Internet connection (dial-up)
4) Then enter the dialed number, username and password (this data should be provided to you by the Internet provider, whose services you decided to use).

Enter password, number, username
5) Actually, that's it! The connection is ready and you can use it. To run it, go to Windows settings (via START or using the combination of buttons Win + i) , open the "Network and Internet / Dialing" section: and you will see the created connection. It is enough to click on it with the mouse and press the connection button.

Windows Settings - Network & Internet - Dialing
6) You can also find the created connection if you press the Win + R combination, enter the ncpa.cpl command and click OK. The "Network Connections" window should open, where there will be what we have created. To avoid looking for it every time, you can bring the shortcut to the desktop.

Network connections
PS
You may find useful an article on how you can distribute Wi-Fi from a laptop (i.e. create an access point for other devices (smartphone or tablet, for example)) - //ocomp.info/kak-razdavat-wi-fi-s -noutbuka.html
*
That's all, I hope your setup will be easy and quick!
All the best.