Good day!
Today, working on a laptop (PC) without an SSD drive is, I tell you, quite excruciating and painful. And in order to realize this, you need to work with the system where it is installed at least once: fast OS boot, instantly opened applications and documents, no freezes or 100% disk loading after turning on the device.
So, okay, to the point ... In this article, I'll walk you through the steps of installing a "newfangled" SSD M2 in a typical laptop. Actually, there is nothing complicated in this, but there are quite a few questions regarding this disc format (and I decided to collect some of them here, summarize my past materials, and answer at once ...).
So...
Addition!
 The SSD can be installed not only in the M2 slot. There are several more options for how you can connect 2-3 disks to a laptop (I recommend for acquaintance): //ocomp.info/2-diska-v-noutbuke.html
*
Installing SSD M2: Step by Step
1) Drive selection
I think this is the first thing to note. The fact is that there are several types of SSD M2: SATA, PCIe (and these, in turn, are subdivided into several subtypes). In all this diversity it is not surprising to get confused ...
Therefore, before choosing and buying an SSD M2 drive, I recommend that you read this article: //ocomp.info/ssd-m2-kak-vyibrat-nakopitel.html
For those who doubt whether it is worth switching to an SSD drive, I recommend that you familiarize yourself with this material: //ocomp.info/kak-proverit-skorost-diska-ssd-hdd.html
By the way, here I also want to note (as I have already been asked more than once): the difference between switching from HDD to SSD (SATA) is noticeable to the naked eye, even a weak laptop starts to "fly". But the difference between SSD (SATA) and SSD (PCIe (32 Gb / s)) is not noticeable if you do not look at the test results (at least, if you are not very actively working with the disk).
Personally, I think that there is no point in chasing a "super-duper" SSD (PCIe) for the majority, but adding some kind of solid-state drive to a classic HDD is definitely worth it!
2) What do we need
- Laptop (which has an M2 slot for an SSD). I note right away: in some cases (it also depends on the type of device), self-installation of the disk into the laptop is the reason for the refusal of warranty service (if the laptop is under warranty, this point should be clarified);

Notebook
- the SSD drive itself (I talked about the intricacies of choosing an SSD M2 here: //ocomp.info/ssd-m2-kak-vyibrat-nakopitel.html);
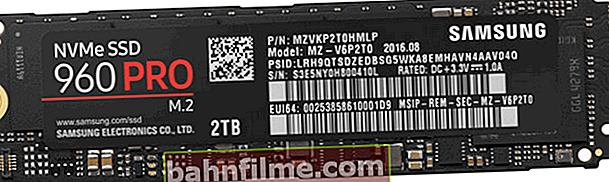
Samsung NVMe SSD - what a M2 SSD looks like
- specialist. screwdrivers. Please note that some laptops use unusual T5 screws (this is in the form of a "sun"). Therefore, I recommend preparing the necessary screwdriver in advance (it is convenient to use a universal screwdriver with dozens of different attachments).
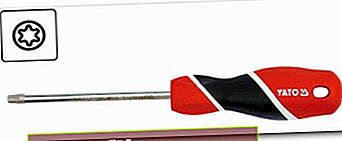
Screwdriver (for t5 screws)


3) Installation process (consider a couple of options)
There are dozens of laptop models on the market now. Conventionally, in relation to our topic, I would divide laptops into 2 parts:
- those devices where there is a small cover for quick access to slots for installing RAM, disks, etc.;
- and devices that need to be completely disassembled before the drive can be connected.
I will consider both options.
Option number 1: the laptop has a special. protective cover, for quick access to accessories
1) First, turn off the laptop. We disconnect all devices from it: mice, headphones, power cable, etc.
2) Turn over. If you can remove the battery, remove it.
Paying attention!
That before replacing or adding memory, disk, etc., some laptops (which have covers for quick access to memory, disk, but the battery is hidden inside the device) must be put into battery saving mode. For example, HP Pro Book G4 (in the example below) you need to turn off, connect the power adapter, and press Win + Backspace + Power at the same time, and then disconnect the power adapter. After the performed operation, the laptop will not start until the power adapter is connected, and you can safely upgrade the components.
3) Then we unscrew the fastening screws that hold the cover. As a rule, there are 1-4 of them. (see example below).
In my example, by the way, I used an HP Pro Book G4 laptop - this line of HP laptops has a very convenient service: access to disks, memory, a cooler can be obtained by unscrewing 1 screw and removing the protective cover.

Unscrew the screw securing the protective cover // HP Pro Book G4
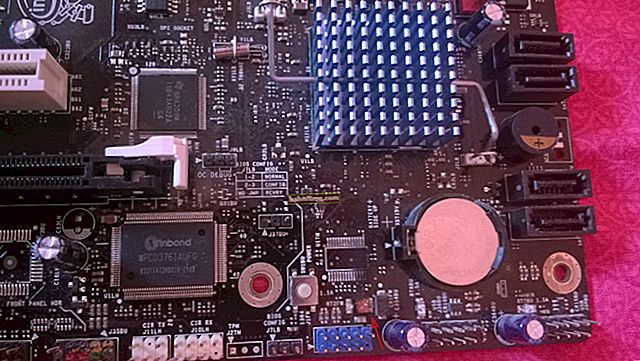
4) Actually, under the cover we find the M2 slot - it inserts a drive into it (note: the drive should enter the slot without much effort, look carefully at the keys!).

Removing the cover, you can install RAM, disks and drives, clean the cooling system
5) I will add that SSD M2 drives are fixed at the end with a screw. It does not allow the drive to accidentally fly out of the slot (the screw is usually supplied with the SSD. Do not neglect the fixation!).

Install and fix the SSD M2
6) Well, that's all, it remains to put back the protective cover, fix it. Then turn the laptop over and turn on ...
Paying attention!
After loading Windows in "My Computer" and in Explorer, you may not see this disk! The fact is that many new SSDs come unformatted.
To see the disk - go to disk management and format it (note: to open disk management, press the Win + R key combination, and in the "Run" window enter the command diskmgmt.msc).
Option number 2: there are no specials on the laptop. caps (complete disassembly ...)
As a rule, there are no special covers on compact laptops (as well as on those devices that have a metal case).
By the way, I will give one piece of advice: before starting to disassemble a laptop, I highly recommend watching a disassembly video of the same device model on the network. I especially advise this to everyone who does not do this very often ...
I hasten to remind you that disassembling and opening the case of the device may lead to a refusal of warranty service.
1) The first action is similar: turn off the laptop, disconnect all wires (power, mouse, etc.), turn it over.
2) If you can remove the battery, remove it (usually fastened with two latches). In my case, the battery was located inside the case.
3) Next, unscrew all the mounting screws along the contour. Note that some of the screws may be hidden under the stickers and rubber feet (which are often found on vibration reducing devices).
For example, on a laptop that I disassembled as a test subject (ASUS ZenBook UX310) - two screws were just under the rubber feet!

Remove the cover - fastening screws || ASUS ZenBook UX310

Fixing screw under the rubber foot
4) Further, before touching something or connecting / disconnecting - be sure to disconnect the battery (if it is inside the case, like mine is. Simply, in the absence of a protective cap for quick access to the memory slots - usually, the battery is inside the laptop ).
Typically, the battery is secured with several screws. After unscrewing them, look carefully at the cables: sometimes they go over the top of the battery, and if removed carefully, they can be easily damaged!

Removing the battery
5) Now you can connect the SSD M2 by inserting it into the corresponding slot. Do not forget to fix it with the fixing screw!

SSD M2 mount

Drive plugged in and locked
6) Then you can assemble the device in the reverse order: put the battery back in, the protective cover and fix it with the screws.
The only thing I would recommend is not to fix all the screws at once. To begin with, it would not be bad to check: whether the system sees the disk, whether everything is in order with it, or whether the hardware was bought ...
By the way, as I said above, many programs in Windows (including Explorer) may not see your SSD. Therefore, you need to use either special utilities for formatting disks, or a tool that is available in Windows - disk management .
To open Disk Management: press the Win + R key combination, enter the command diskmgmt.msc and press Enter. See two screenshots below.
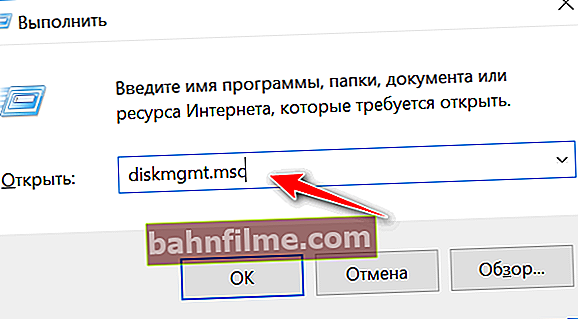
diskmgmt.msc - start disk management

SSD disk // disk management
4) The process of transferring old Windows | or installing a new OS
After the disk is installed in the laptop, and you check that the device recognizes and sees it, there will be 2 possible scenarios:
- you can install a new Windows OS on the SSD disk. How to do this see here: //ocomp.info/kak-ustanovit-windows-10-na-asus-zenbook.html
- or it will be possible to transfer your "old" system from the HDD to the SSD. I also described how this is done in one of my articles: //ocomp.info/windows-s-hdd-na-ssd.html (note: see STEP 2)
Perhaps the only thing worth noting: by default, your "old" Windows OS will boot from the hard disk drive (HDD) first. To change this, you need to go to BIOS / UEFI in the BOOT section and change the priority (an example is shown in the photo below).
Addition! How to enter BIOS | UEFI - see this article: //ocomp.info/kak-voyti-v-bios.html

Putting our SSD M2 first in the boot queue || UEFI, ASUS laptop
After changing the priorities, do not forget to save the settings: section "Save and Exit" - click on the item that contains the line "Save Changes ..." (ie, save the settings / changes).

Save UEFI settings
After reboot, by default, the new system should boot from the SSD drive.
By the way, you can also select the OS that you want to consider as the default in the Windows settings: to do this, open the control panel at - Control Panel \ System and Security \ System. Next, open the link "Advanced system settings" (in the menu on the left).
The "System Properties" window should open, we need the "Advanced" tab: it has a subsection "Startup and Recovery" - let's open its parameters.

Properties of the system
In this subsection, you can choose which OS from all installed ones is considered by default and loaded when the laptop / PC is turned on.

OS bootable by default
Well, or, if you don’t get bored, then you can manually specify the bootable system every time you turn on the computer (see the example below, such a window should pop up automatically after installing the 2nd, 3rd, etc. OS) ...

2 Windows on a laptop ...
*
In general, that's all ...
Good luck!