 Good day.
I was walking here the other day in the office between computers, and I see how several people gathered near one of the PCs and enthusiastically looked at something (one of them even filmed an image on the monitor with his phone). Coming closer, I realized what was the matter ... 😉
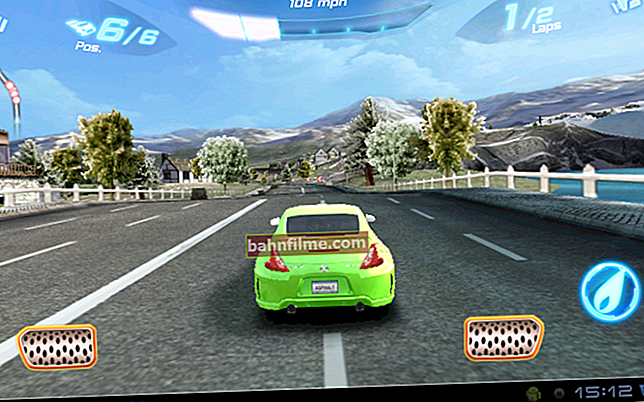
It turns out that the reason was a popular game (the name was cut out to avoid advertising). And several fans of this toy were amazed at the demonstrated results, and wanted to record it on video.
In general, you can, of course, do this on your phone, but it is much more convenient to capture video using specials. programs (and it will turn out better!). Actually, I will make this article in the form of a small instruction that will show you several simple ways to record gameplay.
So to speak, I will give an alternative solution to the issue ...
*
How to record video from the game screen
Option number 1: using Fraps and its analogues
One of the most versatile options for capturing game video is the use of specials. programs.
But I would like to note right away that despite their diversity, there are not so many really good ones ... Those that are worth paying attention to, I cited in one of my past articles (link below).
👉 Help!
Top 5 programs for recording video and audio from games (without brakes and lags) - see a selection of the best
*
In general, I would recommend starting with Fraps. Why?
1) Firstly, this program uses a special. a codec that allows you not to overload the system * too much (i.e., while recording a game, you can reduce the number of brakes (or eliminate them altogether!)).
2) Secondly, Fraps allows you to record not only video, but also sound!
3) Thirdly, you can record 60 frames / sec at full picture resolution ...
*
So, we will assume that you already have Fraps (installed and running 👌).
The first thing to do is open the Fraps settings: section "Movies" ... Here you need to specify the folder to save the video (default C: \ Fraps \ Movies) button to start recording (F9) and settings for the captured video (I recommend setting Full-size, 60 FPS - i.e. video with maximum quality).
If the game starts to slow down while recording, try setting Half-size, and 30 FPS. The quality of the recorded video will decrease, but the computer will start capturing without lags, jerks and slowdowns ...

Fraps recording settings
After settings, run the game.
If Fraps works, you should see yellow numbers in the upper left corner (this is FPS). To start recording - press F9 (the numbers in the corner should turn red - this means that the recording of the gameplay has begun). To stop capturing - press the same key again.

To start recording - press F9 in the game
All captured videos (default) are saved in the directory C: \ Fraps \ Movies ; the name of each file includes the name of the game, and the date when the recording was made (see example below 👇).

Video recorded
Note that video recording with Fraps can take up a very substantial hard disk space: one minute can easily take up 1 GB or more space (see example below 👇)!

Fraps Recorded Video Properties
*
Option # 2: using a Windows 10 feature
Windows 10 has a pretty convenient feature built in for recording videos and creating screenshots from games. Unlike Fraps, it allows you to compress video into a more compact size (due to which, 1 minute of video does not weigh 1-2 GB, but, for example, only 50 MB ...).
To enable and configure this feature, first open Windows Settings (keyboard shortcut Win + i ).

How to open Windows options - Win + i
Further open the section "Games / Game DVR" ... First of all, pay attention to the choice of the folder for saving your records (see the screen below, area-2), as well as the length of the record (by default it is equal to 2 hours).
👉 To help!
If your version does not have such a thing (DVR for games) - most likely you simply do not have an updated version of Windows 10.

Video recording folder / settings
If you plan to record sound, then also enable this option in the settings (specify the quality of the recorded sound, by default 128 Kbps).
By the way, Windows 10 can record not only sound from PC speakers, but also from a microphone (i.e. along the way, you can comment on your video).

Sound recording / settings
Well, another important parameter in this section is the video quality and the number of frames per second (30 or 60 fps).
It is difficult to give an unambiguous recommendation here, since when you set it to a higher quality, the load on the system increases, and the game may start to slow down during the recording process. Try it experimentally ...

Video quality / settings
In general, we will assume that the settings were specified 😉.
Now start the game and press the combination of buttons Win + G - a game panel should appear at the bottom of the window. To start recording video, click on the button "Recording this moment" (see the screen below 👇).

Recording start button
notethat on the right side of the game window you will see a small window with the recording time and the stop button thereof.
Note that the captured video is saved to the hard drive, and immediately after stopping the recording, you can start watching it.

The recording went ...
By default, captured clips are saved in the system folder "Video" (see screenshot below).

Recorded videos
Note that the video is compressed quite well. As an example, I opened the properties of one of the captured videos: a video with a length of 50 seconds. (with sound) weighs about ~ 30 MB.

Video Properties / Clickable
*
Option number 3: we use the capabilities of the video card (for example, ShadowPlay)
The use of special. functions and tools from the developers of the video card allows you to get very high-quality video, and significantly reduce the load on the CPU.
For example, the functionShadowPlay from Nvidia (I’m taking it into the review today) allows you to record Full HD video without a significant load on the processor (thanks to which you can play with the same comfort as without recording).
The H.264 encoder is used to capture images from the game. The resulting video can be processed in almost any video editor (supporting MP4 format).
👉 Help!
The best free video editors for Windows (in Russian) - see the golden selection
*
Requirements for using ShadowPlay:
- video card GeForce GTX 650 and higher (to help: how to find out the model of your video card);
- latest Nvidia drivers (and help: how to update video drivers);
- availability of the GeForce Experience 1.7+ application (link to the official site).
In general, everything further is quite simple. First you need to launch GeForce Experience (after installing it, there will be an icon on the desktop).

Launching GeForce Experience
Then open the ShadowPlay tab (see the link in the upper corner of the window 👇).

ShadowPlay
And enable ShadowPlay (here you can also specify quality settings, mode, etc.)

Turn on ShadowPlay
Further, when an interesting moment appears in the game and you want to save it, just press the combination Alt + F10... The video will be captured and saved to your PC hard drive ...
*
PS
After you've shot a video, chances are you need some kind of video editor - i.e. the program in which you will edit (add various effects, titles, cut something, etc.). In one of my articles (link below) I have collected the best products for beginners, I recommend!
👉 Help!

Video editing software (for beginners) - see selection
*
That's all for now ...
Add-ons would be very helpful ...
All the best!
👋
First publication: 15.01.2019
Correction: 11/15/2020
