Good time!
Today, many users have already gradually begun to abandon classic PCs - some even have Internet-related equipment: TV, and a telephone.
On the one hand, for many, this may be more than enough (modern TV and video with photos will show, and it will give you a look at sites ...) - but when setting up a network and a number of devices, questions may arise ...
Actually, in this note I will give a small example of setting up a home Wi-Fi router without a PC or laptop* - all actions will be done from a regular phone on Android (by the way, in some cases, the router is configured much faster from the phone!).
* Note: we are talking about modern routers. It's just that older models (∼ up to 2015 release) do not always broadcast the Wi-Fi network by default - it must first be turned on by connecting the router with a LAN cable to the PC (i.e., for security reasons, the manufacturer turns off Wi-Fi auto-broadcast ).
Now directly to the topic ...
👇
*
Setting up a router from a phone (without a PC)
STEP 1
And so, the first step is standard: we connect the cable from the Internet provider to the WAN (or Internet) port of the router.

We connect the LAN cable from the provider to the Comfast router
Also note that a number of modern routers can operate in different modes: repeater, router, etc. If there is a special device on the case of the device. switches - enable the mode "Router" .

Turn on router mode
After that, connect the device to a 220V network (if everything is in order with it, the LEDs on the case should start to light / flash).
STEP 2
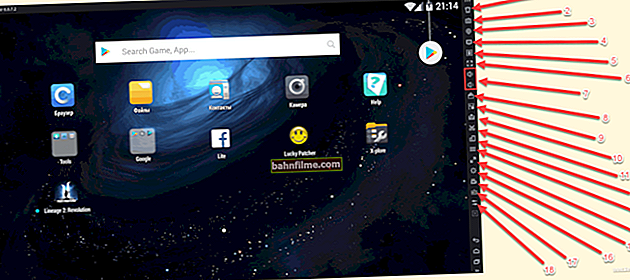
Now open your phone settings. In the wireless networks section, go to the tab "Wi-Fi" (see example below).

Wireless & networks - Android settings
Then turn on the work of Wi-Fi: among the list of found networks "ours" should appear - try to connect to it ...
Usually, the name of this network (and the password for connecting to it) are indicated on a sticker located on the body of the router. See screenshots below.

Available networks - connecting to our Wi-Fi network

ZyXEL Router Sticker
Note: if there is no such information on the sticker, then usually the router broadcasts a Wi-Fi network to connect to which a password is not required.
If the router is working, but the Wi-Fi network does not appear, several options are possible:
- you have a not quite "new" router and someone turned off Wi-Fi in its settings (this could have been done in a store ...). You can try resetting the router to default settings;
- you are too far from the router (behind 2-3 walls - the signal may be very weak);
- if the Wi-Fi network did not appear after resetting the router settings, it is possible that the router does not broadcast Wi-Fi by default (i.e. it cannot be configured from the phone - you need to connect the device with a LAN cable to the laptop / PC);
- a malfunction of the router cannot be ruled out ...
STEP 3
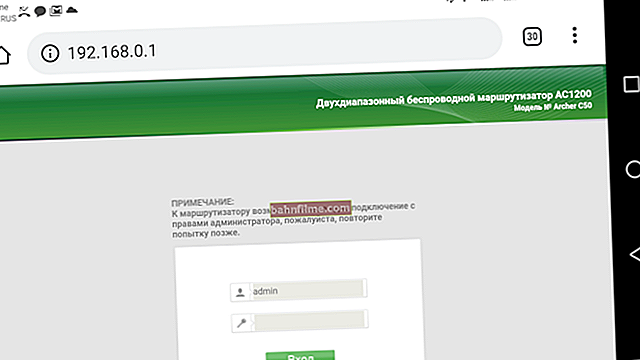
After you have connected to the Wi-Fi network, open the browser (in which the VPN is turned off, there are no plugins for blocking ads, etc.) and enter in the address bar IP from the web interface of the router.
The IP address from the web interface is also indicated on the body of the router (on a sticker). Most often, these IPs are:
👉 192.168.10.1
👉 192.168.1.1
👉 192.168.0.1
👉 my.keenetic.net

Router settings IP address (default)

Stickers on the body of ZyXEL models
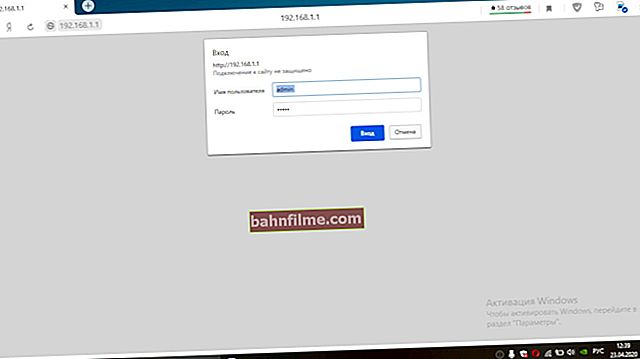
In my case, an IP was required 192.168.10.1 (see screenshot below). I draw your attention to the fact that you need to enter the IP without unnecessary periods, quotes, and other symbols (if you specify the IP correctly, the router will then redirect itself to where you need it ...).

The IP address of the Comfast router settings (by default!)
STEP 4
If you entered the correct IP, a welcome window should appear with a proposal to enter a username and password to access the settings (the window depends on the model and firmware of the router).
This information is also indicated on the case of the router, or standard data is used:
👉 login: admin
👉 password: admin or 1234 or {empty field}

User - password
By the way, when entering your login and password, pay attention to register! By default, Android capitalizes the first letter - which is wrong (in this case). Password and login must be specified lowercase letters!

An important point - pay attention to the register!
If the username and password came up, the main page of the router settings will appear in front of you (it differs significantly from the others, so you will immediately notice it ...). See example below.

You have entered the router settings!
Important!
If the password does not work, it may be worth trying to reset the router settings to the factory presets.
STEP 5
Next, usually, they open the WAN (Internet) settings and indicate the type of connection, for example, PPPOE (depending on it, additional information may be required: password, IP, etc.). After setting these parameters, the router will reboot and start distributing the Internet, the task is completed ✌!
👉 Usually, both the type of connection and other information required for communication with the Internet are always specified in the agreement with the Internet provider. Those. you just need to transfer the parameters from the contract to the settings window of the router's web interface.

Internet setup (PPPOE connection)
STEP 6
Well, and the final touch - I would recommend changing the name of the Wi-Fi network and the password for it (all the more so if in the default version you have no password at all ...).
This is usually done in the advanced parameters of the router in the section "Wireless Settings" (wireless settings).

Wireless Settings - setting up a Wi-Fi connection
Briefly about the most important parameters:
SSID Is the name of the Wi-Fi network (can be anything).
Wi-Fi Password - it is desirable to set a password of at least 8 characters!
Channel - channel (for our country from 1 to 13). For a start, you can set any (or "auto" mode). Learn more about channel selection ...
Band - 20 or 40 MHz. The channel width, for a start, I recommend choosing 20 MHz. the radius of the network will be higher.
RF Output Power (TX Power, Transmitter power, etc.) - the power of the Wi-Fi. The further the router is from the phone or TV, the more powerful the transmitter should work.

Setting up a wireless network
After saving the settings, you will need to reconnect to the Wi-Fi network on your phone (by entering a new password).
*
On this, in fact, that's all ...
Good luck!
👋