Good day everyone!
Recently, wireless mice and keyboards have become quite popular.
On the one hand, it is very convenient: there are no extra wires on the table, the mouse slides freely in any direction, it is comfortable to use in "road" conditions; on the other hand: there are connection issues, plus they do not always work before Windows boots (which is sometimes needed  ) .
) .
I will build this article in the form of step-by-step instructions for connecting a typical wireless mouse (I will consider the two most common options: the so-called radio frequency mouse, and Bluetooth). I think the note will be useful to all novice users who have not yet used this type of mouse.
Now closer to the point ...
To help! How to connect wireless headphones - //ocomp.info/kak-podklyuchit-besprovodnyie-naushniki.html
*
Connecting a wireless mouse
RF (with adapter)
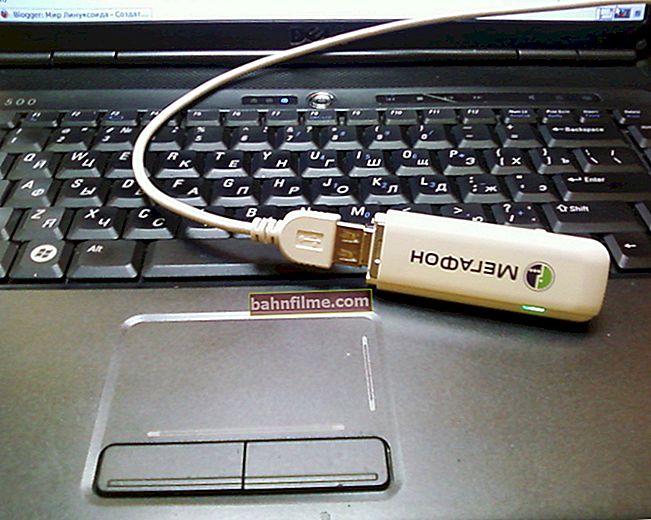
This mouse comes with a small adapter (looks like a USB flash drive). As a rule, the size of this adapter is very modest: after inserting it into the USB port, the protruding part is barely visible (shown in the photos below).
I would also note that, on average, mice in this category are cheaper than Bluetooth (today prices are comparable to classic wired ones).
I will consider its connection step by step.
STEP 1
And so, first check the completeness: there must be a mouse itself, batteries and an adapter (see photo below). It should be noted that batteries are not always included with the mouse (pay attention to this when buying!).
Note: 1) by the way, some novice users are faced with the fact that they cannot find the adapter. The fact is that sometimes it is located in the battery compartment (inside the mouse). Apparently, manufacturers are doing this so that it does not get lost ...
2) Before starting the connection: disconnect your old mouse from the computer.

Completeness of the radio frequency mouse
STEP 2
Turn the mouse over, open the battery compartment and insert them (pay attention to the polarity).

Installing batteries
STEP 3
Some mice are equipped with additional. switch. Check that it is in the "ON" position (ie switched on). If you do not have such a switch, then the mouse, in principle, should start working immediately after installing the batteries.

Pay attention to the switch!
STEP 4
Connect the adapter to the USB port (after a few seconds you should hear a characteristic sound from Windows, which always happens when connecting USB devices).

Connecting the adapter to the USB port
STEP 5
Try moving the mouse, spin the wheel, press the right / left buttons. As a rule, after 1-2 clicks, the mouse should establish a connection and start working.
Note that some mice have specials. a button for establishing a connection (sometimes it is combined with the "DPI" button. Located next to the wheel). If you have a similar button, click it.

The mouse is working ...
In general, that's all. If everything is in order with the mouse, the batteries are new (and not yet installed), then the mouse will start working. No extras no settings are required.
STEP 6
If the speed of movement of the pointer is too fast (slow), then you can go to the control panel (for this you need to press Win + R, and enter the command control ), go to section "Hardware and Sound" and open mouse settings (see screenshot below).

Control Panel - Mouse
Further in the section Pointer Options set the speed of the pointer. In general, everything is standard ...

Pointer speed
Bluetooth mouse
Bluetooth mice are less popular than previous ones. To use them, of course, a Bluetooth adapter must be installed on your computer / laptop (usually, all modern devices are equipped with it). Before setting up and connecting, I recommend that you check if your Bluetooth works (and turn it on if necessary).
To help! How to enable bluetooth on a laptop - //ocomp.info/kak-vklyuchit-blyutuz-na-noutbuke.html
Now, in fact, in essence ...
STEP 1
Go to the device manager and see that the Bluetooth adapter is working fine and there are drivers for it (how to open the device manager).

The device is working normally (Bluetooth adapter)
STEP 2
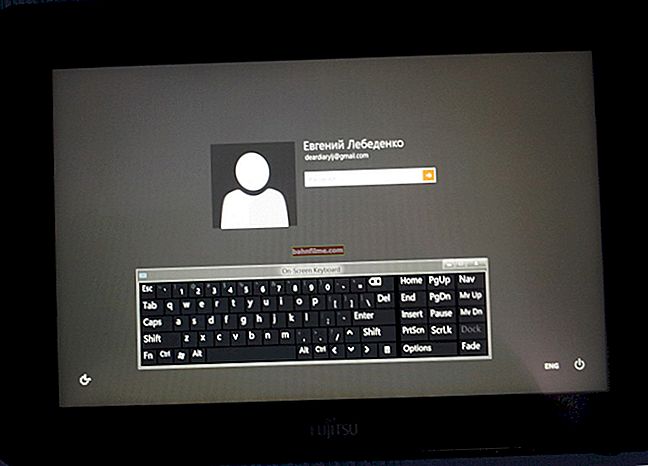
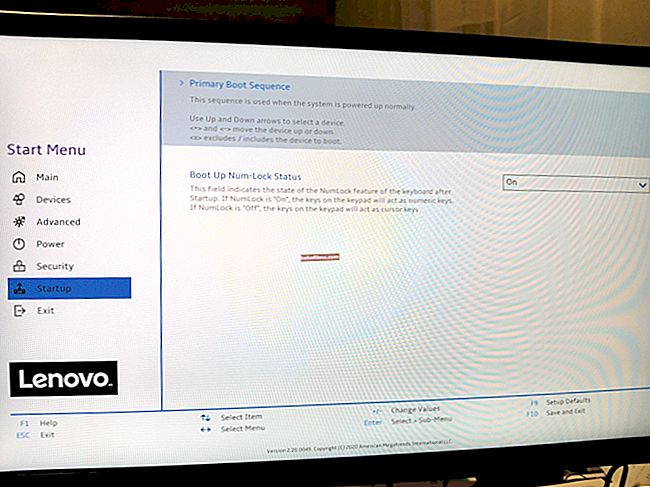
Check if Bluetooth is enabled in Windows settings (some laptops have a special button on the device's case).
If you have Windows 10 - go to the OS settings (the combination of Win + i buttons), to the "Devices / Bluetooth and other devices" section and check that Bluetooth is turned on. See the screenshot below for an example.

Is Bluetooth enabled (Windows 10)
STEP 3
Install the batteries in the mouse and turn it on (some mice have a special switch, others don't).
Pay attention to the switch!
STEP 4
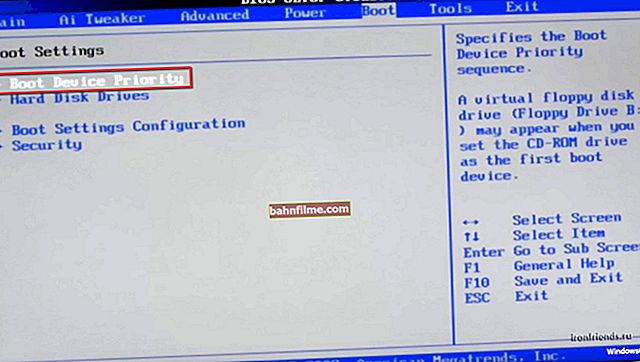
Click on the Bluetooth icon in the tray and start the function of adding a new device (see example below).
To help!The Bluetooth icon on the laptop disappeared: how to add it to the tray next to the clock [instructions] - //ocomp.info/propal-znachok-bluetooth.html

Adding a Bluetooth device
Alternative No. 1
In Windows 10, you can add a Bluetooth device from the system settings (note: to open them - press the combination Win + i), in the section "Devices / Bluetooth ..." (see screenshot below).

Windows 10 - adding a device
Alternative No. 2
If you have Windows 7 (or other options did not fit *): open the control panel (how to do it), section "Hardware and Sound \ Devices and Printers" .
Then click on the link "Add device" ... This will launch the Found New Hardware Wizard.

Alternative option to add a device
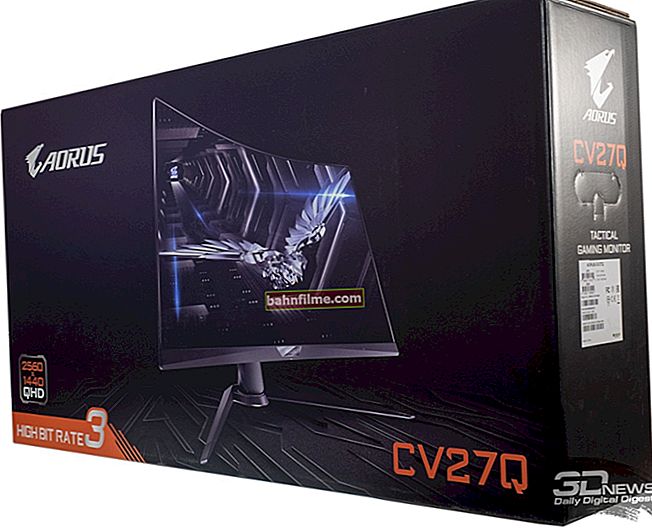
STEP 5
After that, the hardware setup wizard will start: you need to indicate that you want to connect a Bluetooth mouse and click next. As a rule, after several. seconds Windows will automatically connect the device and you can start using the mouse ...

Add mouse
Addition!

Why Bluetooth does not find devices - //ocomp.info/bluetoth-ne-vidimost-ustroystv.html
PS
Not so long ago, Wi-Fi mice also appeared (released by HP). But, to be honest, I haven’t worked for this yet, and therefore, as they say, "know comments"  (yes, they have not yet become widespread).
*
Add-ons are welcome ...
Good luck!