Good time everyone!
Often I am asked to recommend one or another configuration for normal office / home work and relatively non-demanding games (with the ability to play at least at minimum wages in Tanks (WOT), Warcraft (WOW), etc.). 👀
Today I decided just in this small note to recommend the most optimal and budget PC assembly for the current crisis year (and with a small upgrade, it will last for several more years without any problems).
Note:
- We will assemble the PC from new components (you can find cheaper ones if you use AliExpress or Avito: but in this case you will not have a guarantee (and the risks of buying "broken hardware" are very high ...));
- If you have never assembled a PC yourself - add extra to the total price. 500-1000 rubles, which the store specialists take for the assembly.
*
Assembling a budget PC for 2020-2021
👉 STEP 1: build configurators
Now (in my opinion) it is very easy and convenient to assemble a PC for your tasks. configurators in stores:
- DNS
- DNS (TechnoPoint)
- Citilink, etc.
First, they automatically check the compatibility of different hardware with each other (which is useful for beginners). Secondly, they allow you to quickly adjust any of the assemblies to fit your budget.
In my example, I will use the DNS configurator (not advertising, just as an option ...).
*
👉 STEP 2: Choose the CPU and cooler to cool it down
At the moment, the most interesting option under the above-voiced criteria is yavl. CpuAMD Ryzen 3 3200G OEM. Why:
- 4 cores (3600 MHz) - the performance of this CPU will allow you to solve almost all office and home tasks: working with text, watching videos, surfing the web, will master most of the games;
- there is a built-in Vega 8 video card (i.e. no need to purchase an external card). Vega 8 has enough performance to run many of today's network hits at medium settings and get stable 50-60 FPS! Figures in practice - see the bottom of the article 👇;
- it is on socket AM4 - and for it there are more high-performance and modern Ryzen CPUs, which can eventually replace the current one.

AMD Ryzen 3 3200G OEM
Boxing cooler (i.e. the one that comes with the CPU) I do not recommend taking - it is noisy, and often does not cope with cooling under high load. It is much better to choose a tower cooler with copper pipes (I like the manufacturers: Deepcool, Xilence, Be quiet!).
Besides, over time, if you update the CPU, this cooler will cope with a "hotter" processor without any problems (that is, you will save on this).

Cooler for processor Xilence M402 [XC028]
*
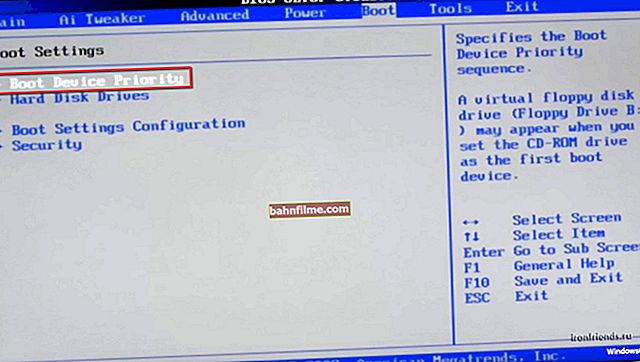
👉 STEP 3: choosing a motherboard
First of all, checkmate. the board must be for the CPU socket (in our case AM4, since this is checked by the configurator automatically).
Second, pay attention to the chipset. In my example, selected B450 (it allows you to "indulge" in overclocking, unlike motherboards based on the cheapest A320).
In my assembly, I chose mate. feeASRock B450M-HDV R4.0... Why:
- relatively cheap;
- there are all the necessary ports: M2 (NVMe), 4 SATA, 1 PCI-Ex16, 1x VGA (D-Sub), 1x DVI-D, 1x HDMI, 4 USB 3.0, etc.;
- memory support at 3200 MHz;
- plus the ability to overclock the CPU from 3.7 to 4.0 and RAM to 3500 MHz (which is + 7-15% to performance).

ASRock B450M-HDV R4.0 motherboard
👉 To help!
How to Overclock Integrated Vega Graphics on PC (AMD Ryzen CPU)
*
👉 STEP 4: choosing a case
Most often, when choosing a case, 3 mistakes (key) are made:
- do not take into account the dimensions of the mat. boards and cases (if the board is of the ATX standard, and the case is for Micro-ATX, then it's a problem ...);
- do not take into account the height of the cooler (this is important for tower coolers);
- do not take into account the length of the video card (in our case it will not be there yet, but there is a reserve of up to 320 mm - and this is in excess 👌).
In my example, I chose one of the cheapest, universal and standard cases: it will be possible to install both the above hardware into it, and calmly carry out an upgrade.

DEXP DC-301B [DC301B JC02] case black
By the way, if you are going to install the system unit in the compartment of the computer desk (etc., etc.) - then add. pay attention to the dimensions of the case (they are all different, and if you do not fit at least a couple of cm, the unit simply will not fit into the place you need).*
👉 STEP 5: choosing a power supply
The total consumption of our assembly will be about 150 W (taking into account the margin and some error) - we need a device with a capacity of at least 250-300 W.
Well, if later an upgrade and additional purchase of a video card is planned, then it is advisable to select the power of the unit at least 500-600 W.
In my example below, I chose the budget model Aerocool VX PLUS 550W - it is, firstly, quiet, and, secondly, with sufficient power reserve for the future.

Aerocool VX PLUS 550W Power Supply [VX-550 PLUS]

Power supply load
Of course, if funds allow, you can choose something more interesting - for example, now there is a power supply unit with semi-passive cooling (i.e. at low loads it is generally silent). This will make working with a PC even more comfortable ...
*
👉 STEP 6: choose RAM and disk
The choice fell on 2 standard 4 GB dies from Goodram. They are cheap, reliable enough, and they chase well. A volume of 8 GB is the minimum that should be installed on a PC today.
An important note: 2 dies of 4 GB each cost about the same as 1 x 8 GB, but due to their dual-channel mode of operation, they will allow the integrated Vega video card to work much faster (up to 20-30% more FPS in a number of games).

RAM Goodram Iridium [IR-X3000D464L16S 4G] 4 GB
As for the SSD, the most budgetary solid-state drive of 256 GB was chosen (since 120 GB is now not enough for the OS, programs, 3-5 games, and 10 movies and music albums).

256 GB SSD Apacer AS350 PANTHER [95.DB2A0.P100C]
*
👉 Total
The total cost of the listed "pieces of iron" came out in the region of 25 thousand rubles. (with assembly 26 thousand rubles). In addition, all hardware is under warranty, and such a system unit can be easily upgraded.

What is the bottom line for the cost
By the way, if you wish, you could and save:
- if you have your own hard drive, then the SSD drive could not have been ordered (and this -3500 RUB);
- you can install a weaker power supply, for example, 300 W (saving about 1000 RUB). But with a further upgrade, it would have to be changed (which is not good);
- choose another mat. board on the A320 chipset (this would give about RUB 700-1000 savings, but overclocking and increasing on "free" 10-20 FPS in games would have to be forgotten);
- choose a "noisier" boxed cooler (still -700 RUB). But it would also have to be changed when upgrading the CPU.
Total, you can assemble a system unit for less than 20 thousand rubles. (but it is no longer overclocked and it is more problematic to upgrade). Look here for yourself ... 👀
👉 How can you upgrade:
- buy a video card of the level of GTX 1050 / 1050Ti / 1060/1650 (currently about 10-12 thousand rubles). This will increase the number of FPS several times!

GeForce GTX 1650 Prodigy
- change the CPU to something more productive (on Ryzen 5/7 with 6-8 cores). Fortunately, the AM4 socket is at least several. years will still be relevant;

AMD Ryzen 7 2700
- add RAM, disk format M2.


*
👉 What happened in terms of performance
I cite not just screenshots with FPS, but tests of real people from the User Benchmark site.
With medium graphics settings (without overclocking and optimizing video drivers) at FullHD, it is possible to achieve:
- in CS-GO about 60 FPS;
- in League of Legends 70-80 FPS;
- in Fortnite about 50-60 FPS;
- in WOT about 50-60 FPS.

RX Vega 8 - Results in Games

Counter-Strike Global Offensive

League of legends
Fortnite video games for example ... 👇
Generally, I think this is a very decent result, given the very budget assembly. 👌
*
Additions in the comments are welcome!
Well, that's all for now, good luck!
👋