User question
Hello.
Please tell me about one problem: after buying a new large monitor, the joy was not long, the photos and films on it became amazing, and the text was not very small! When reading such a text, the eyes get tired quickly due to its small size ...
Is it possible to somehow increase the font size in general in all programs and in Windows itself?
Advice: by the way, on your site I noticed that the small font is also worth it (for me). I advise you to increase it a little ...
Svetlana.
Hello.
Yes, there is such a problem: now the diagonal of monitors is growing, at the same time, it is growing at a faster pace and screen resolution (because of this, the text on the monitor, and just some of the details, become difficult to read).
In this article, I'll explore different options for how you can make the font and elements on the screen larger for easier reading. By the way, according to the assurances of doctors, there is a recommendation to sit to the screen no closer than 50 cm from it (if you often have to approach the screen while working, then this is another reason for you to increase the font on your computer).
By the way, the font on this site has been slightly increased, let's look at the reaction of visitors ☺ (thanks for the tip, I somehow didn't even think about that).
*
Increasing the font and some other elements
Method number 1: using hot keys
The method works in a browser, on the Windows desktop, in many applications.
To begin with, I would like to point out the easiest, most versatile and affordable way to FAST increase the size of the text (and some elements) by pressing just a few buttons!
Button combination:
- pinch "Ctrl"and press"+"- increase by 10% of the font and everything that is open in the browser window (or, for example, on the Windows desktop, or in another application);
- pinch "Ctrl"and press"-"- decrease by 10% (similar to the previous one);
- pinch "Ctrl"and twist wheel mice - a similar effect;
- pinch "Ctrl"and press"0"- return the scale to the default one (reset increase / decrease).
It is very convenient to use such combinations. Let's say you have opened some website (for example, you are working and you need to read a lot), you feel that the font on the screen is too small for you - press the button "Ctrl"and twist wheel mice. So you can quickly adjust the font to the desired size, and read it calmly (example below).

Same desktop but different icon sizes

Chrome - View Site (zoomed in: magnifying glass plus icon)
*
Method number 2: change the resolution and screen scaling
Everything that is displayed on the monitor depends on the screen resolution! The higher the resolution - the smaller all the elements on the screen (however, the more space you have), the lower the resolution - the less space on the desktop, but all the elements are larger.
In general, you need to look for a middle ground, and not always recommended resolution drivers or Windows - is optimal.
Important!
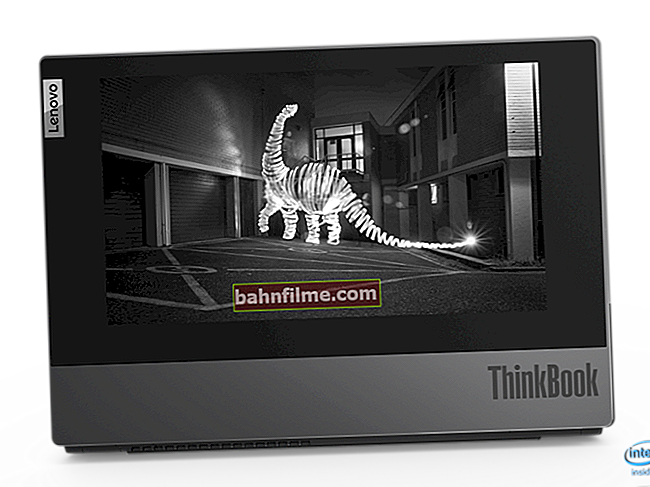
Some users set a high resolution on a monitor with a small diagonal (higher than the one recommended by Windows for this diagonal). This is not good because the details and elements on the screen are too small and your eyes quickly get tired of constantly straining ...

Full HD vs Ultra HD (4k) - An example of the difference in resolution
And so, to change the resolution, right-click in any place free from icons on the desktop. In the menu that appears, it is advisable to open the link to the settings of your graphics adapter (in my case, this is IntelHD, in yours it can be either also, or AMD, or NVIDIA).

Graphics Specifications - Graphics Card Driver Settings
Important!
If there are no links in this menu to configure your graphics adapter, try opening the Windows Control Panel: section "Hardware and Sound" (also look at the tray icons next to the clock).

Link to IntelHD (in the tray next to the clock)
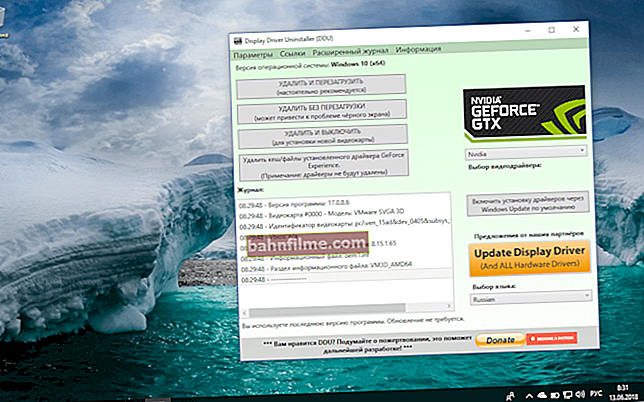
If there are no links anywhere - most likely, you have not installed (not updated) drivers on the video card. In one of my articles, I already told you how best to update them, I give the link below:
//ocomp.info/kak-obnovit-drayver-na-videokartu.html
Next, you need to open the tab with the basic display settings: usually it always contains the desired option to set the resolution. I recommend that you choose a lower resolution and try to see if it will be comfortable. Empirically determine the optimal resolution.

Intel (R) Graphics Control Panel - Resolution Selection
♦
By the way, if the drivers are not installed on the video card, you can change the resolution using Windows tools (usually).
To do this, right-click on an empty space on the desktop, and select the option "Screen Options" (this is relevant for Windows 10, in Windows 7 - you can immediately open the option for choosing a resolution).

Display settings // Windows 10
Next, in the "Display" section, click on the tab "Resolution" (for Windows 10) and set the desired value (see arrow-2 in the screenshot below).

Scaling and resolution / Windows 10
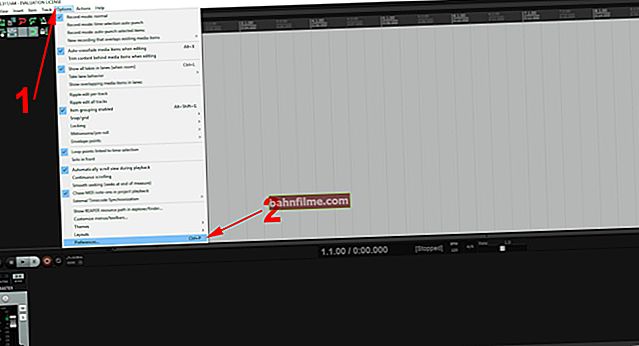
After that, I also recommend "experimenting" with additional scaling options (they allow you to adjust the image size, for example, you can increase all the elements on the screen by 20%).

Custom Scaling / Windows 10
*
Method number 3: adjust the size and clarity of the font in Windows
If you have modern Windows 10, then the font size in it can be changed using the special. applications (the option in the control panel has been removed) - //ocomp.info/kak-izmenit-razmer-shrifta-windows-10.html
For detailed font settings in Windows - open the control panel, then the section "Design and personalization" , and subsection "Screen" (see screenshot below).

Design and personalization
In the tab that opens, I recommend checking each tab. For example, the first thing you can do is set the size of the window titles, the size of the icons, subtitles, etc. (see screenshot below, signed).
Also, I recommend that you open all the links on the left in the menu one by one, there are also very important parameters there!

Screen
*
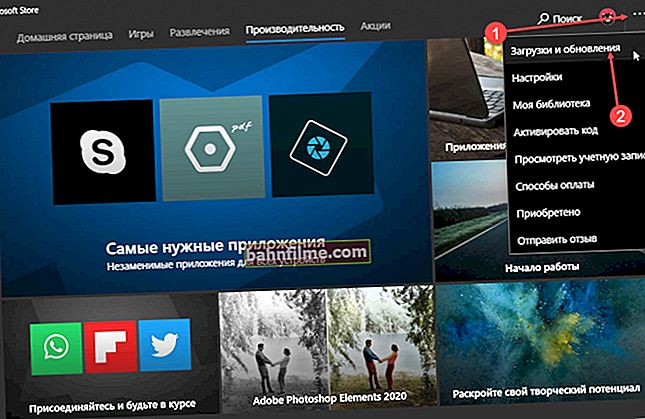
In the screen parameter settings (this is the first tab in the menu on the left in the screenshot above) you can change the size of the text, increase the scale of various elements, etc. Move the slider to the right and test, choose the best option for you.

Resizing text in Windows
*
In brightness and color calibration settings - adjust the parameters also for yourself. In general, the optimal brightness depends on the room in which you work: if it is dark and there is no daylight in it, then the brightness needs to be dimmed (sometimes to a minimum), if it is light, it must be increased. Remember that too much brightness will tire your eyes faster!

Changing Power Scheme Settings - Adjusting Display Brightness
*
Adjust the clarity of the text (ClearType).
I think that they won't argue with me that the ease of reading depends not only on the size of the font, but also on its quality: clarity, brightness, smoothness and contour of letters, etc. Technology ClearType was specially developed for LCD displays to make fonts as easy to read as possible (so to speak, adjust anti-aliasing for yourself!).
Moreover, due to accurate calibration - the quality of the font (anti-aliasing, brightness, clarity, etc.) is adjusted for each specific monitor and a specific user! That is why I definitely recommend setting this parameter.
To get started with ClearType :
- Press Win + R ;
- in the window that appears "Run" enter cttune ;
- then check the box "Enable ClearType" and click Next.

ClearType Text Tuner
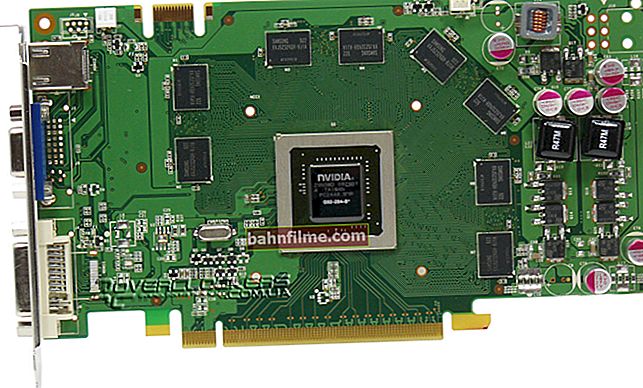
After that, you will be offered a choice of several tests: squares with text will appear on the screen: choose the one on which the text is most readable on your monitor.

Screen - select a more readable font
After several such choices, testing will be completed, and the font will be optimized as much as possible exactly for your hardware and your requirements.

Font Display Setting Complete (ClearType Text)
*
That's all for me today.
For additions on the topic - a separate merci!
Good luck!
👋
Article revised: 1.03.2019