Good day everyone!
It is better to see once than hear a hundred times!
Photography helps to revive memories very pleasantly. But even greater contrast and emotions will be caused by a photo collage or a beautiful video of photos (I think that those who have watched such a video at least once will agree with me ✌).
And if high-quality and pleasant music in the subject is selected for such a video, it will cause a real sensation among your loved ones!
In general, you can create such a video in various ways - both using programs and online services. In this post, I wanted to give the most simple examples of examples (which most users will be able to repeat).
Of course, I'll make my examples step by step ... ✔
*
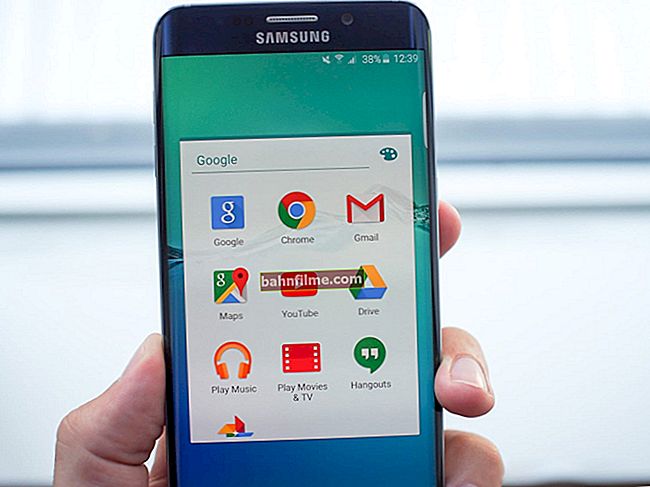
Note: to get started, it is recommended that you already have some photos that you add to the project (for example, from holidays, vacations, etc.). To help: 👉 how to download photos and files from your phone to your computer.
Also, for such a video, you need music (you can do without it, but the video will turn out to be too "dry". I still strongly recommend choosing some composition in the theme).
*
Let's consider three ways
Option number 1 (for beginners)
To make our first video from a photo with music, we need some video editor (and it is desirable that it be as simple as possible to learn). In my opinion, the program meets these requirements. "Video Editing".
*
Video Editing
Developer site: //video-editor.su/

Simple and easy to use video editor for beginners.
Why the choice fell on him:
- all actions are performed in steps (convenient wizard);
- completely in Russian;
- supported by all popular Windows: 7, 8, 10 (32/64 bits).
And one more important detail: in Video Montage, you can improve the quality of your photo (an example is shown below, in one of the editing steps).
Considering the above, we can state that this is one of the best programs for a beginner video lover.
Below in the article I will consider an example of creating a video in this editor!
STEP 1
And so, after starting the program, you will see a window with a choice of action. Specify the first option - "new project" .

New project (Video-Editing 9.25)
STEP 2 * (optional, can be skipped)
Further, the program may offer you to select the format of your video: 16: 9, 4: 3, automatic option, or set manually. In most cases, it is recommended to choose either automatic or 16: 9 (as the most popular format today).
STEP 3
In general, from the third step, the direct work on the video itself begins!
In this step, you need to add to our video all the photos that you want to include in your video. You can add several photos at once (use the Ctrl + left mouse button to select and add individual pictures).

Add photos and pictures to the project - Video Editing 9.25
Note: the order of the photos in the video can be changed by simply dragging and dropping one onto the other with the mouse (see the arrow in the screenshot below).

Photo on video track
STEP 4
When all the photos are added, I recommend trying (for a start) to improve them (well, plus set the display time for each).
To do this, just double-click the left mouse button on the photo on the track
- general (photo duration): In this tab, you can set the display time for each specific photo. The default time is 10 seconds;
- improvements: very relevant section. In it you can rotate the photo, adjust the brightness, add contrast, saturation, etc. I recommend that you open it and see how the tools in them can improve the quality of your photo;
- Image: Here you can adjust the color balance of the photo.

Setting up photo enhancements
By the way, pay attention to the example below - by simple manipulations in the Effects and Improvements section, we managed to achieve a brighter and more vivid image in the photo. I think many people will find photographs in which they would like to increase the brightness, saturation and revive the colors. 👌

Left (was) - right (now!)
*
👉 On the topic!

More details on how to improve the quality of video and photos in the Video-Editing program (with examples) is presented in this post.
STEP 5
To sign your photos, you need to open the section "Text" , subsection "Inscriptions" .
Then use the mouse to move the required template onto the photo into the preview window (line-2 👇). The size of the letters, the location of the text, its color and font - everything is set up quite quickly and clearly (you can immediately see how the finished video will be displayed). An example is shown below.

We sign each photo!
STEP 6
Transitions between photos.
When creating their video, many users want the photos not only to change one to another, but to do it with a certain effect: for example, one photo slowly moved out and replaced by another, or faded with squares, along the line, etc. All this is done using a special tool - transition .
After choosing the transition that you like, just drag it with the mouse to the place to transition between the photos you have selected (example below). This way you can set different transitions for different photos. In general, it is convenient!

Transitions between photos
STEP 7
The penultimate and important detail is the addition of music. To do this, use the section "Music" ... In general, the process of adding music itself is nothing complicated (an example is shown below).
If you do not know where to find suitable compositions, you can use the VK network. How and what is described in this article.

You can use a prepared collection, or you can add something of your own!
STEP 8
And the last thing - saving the project ... After all the photos are arranged in the desired order, their quality has been improved, captions, transitions and background music have been added - you can save the project!
In this regard, Video-Editing offers almost all options that are relevant today:
- AVI video file is the most popular type of video, it can be played on all PCs, laptops, etc .;
- DVD - this option is suitable if you want to burn your video to a DVD and donate it to someone;
- HD video (analogue AVI);
- video for phones, etc.

Save Video as AVI - Video Editing 9.25
*
Option number 2
There is another somewhat similar editor to the previous one - 👉 Movavi Video Suite (link to official site).
Allows for a few mouse clicks to quickly make a colorful video or slideshow and surprise your loved ones. Perhaps only a more complex interface can scare off inexperienced users a little ...
However, I will try to show consistently how to solve the current problem in it.
*
1) And so, after installing and running the program, we create a new project (everything is usual here).

New project - Movavi Video Suite
2) Next, add photos and pictures to the project (tab "Import files" ) and transfer them with the mouse to the track (see the screen below 👇).
Please note that the order of photos can be changed right on the track.

Add a photo to the project and transfer it to the track
3) Afterwards, I recommend visiting the tab "music" and add something thematic to the project (depending on the subject of your video). The choice, I must say, is pretty good here! 👌

Add music to the project
4) So that one photo replaces another more beautifully and gracefully - you can add transitions ... It is enough to open the section of the same name and transfer the transition between the photos you like (example below 👇).

Add smooth transitions between photos
5) Further, if necessary, you can add various stickers : hearts, clouds, animation, etc. This can really enhance the experience of your video. 👇

Adding stickers
6) I would also recommend adding credits (inscriptions).For example, if you are making a congratulatory video, you can write your wishes for the birthday person in them (and also indicate who the gift is from 😉).

Adding titles and captions
7) The last action is to save the received video. I don't think there is much to comment on here. 👀

We save!
*
Option number 3: using online services
In general, I do not like this option, tk. it does not always work out what I wanted initially. In addition, not everyone is ready to upload their photos to various unfamiliar online services (you never know ...).
Be that as it may, in this subsection I will recommend a few pretty good services.
*
Note!
To fully work with such online services, you may need the Adobe Flash Player.
*
👉 Site 1 - //slide-life.ru
One of the best online slideshow maker with music (note: a slideshow - in fact, this is a video created from a set of photos) .
Having chosen a certain topic (there are declarations of love, birthdays, children's, cartoons, etc.), you will need to upload photos, select or upload a melody, set up a project and wait for the received video to download.

Your own slideshow with music
I would especially like to note that the resulting video will not be just a video in which the photos will alternate, but a real cartoon (film) with your images. It looks very cool!
*
👉 Site 2 - //fromfoto.com/
A great site where you can quickly create a small video from photos. In general, the service is not entirely free (there are just some designs, the use of which will cost a certain amount).
To begin with, I recommend getting your hands on free options - for this, when you go to the site, press the button "Try it for free".

Photo slideshow
Next, you will be presented with several designs (layouts). Please note that they are different not only in design, but also in the number of photos that will need to be added to the project (perhaps this is a significant drawback, in my opinion).
In general, by adding the required number of photos, you will be prompted to add music and captions. Then, by entering your e-mail, you will receive a video ...

Project design
*
👉 Site 3 - //vimperor.ru/
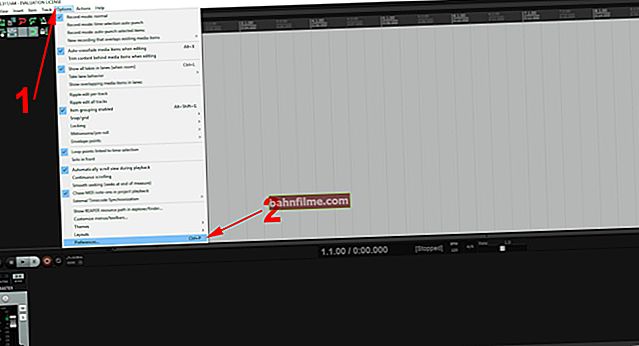
Another video creation service. Quite staid, but effective: first upload your photos, music, videos. Then, for each photo, you can specify the duration, background, crop, effects, etc.
When the project is ready, click one green button at the top of the site: "Make \ Download" ... Start creating a video - the time is quite long, so you have to wait patiently 😊 ...

Vimperor / project creation
*
👉 Site 4 - //sdelatvideo.ru/

Small online video editor. In it, you can create not only videos from photos, but also edit and work with the video format in general, as in a regular editor. For an online editor, it has quite a lot of functions: working with music, background, text, etc. Some of its options are shown in the screenshot below.

Online editor functions
*
On this, I think it would be time to end the review ...
By the way, I wanted to give a small instruction on how to work in Movie Maker (Film Studio), but Microsoft has so far suspended access and does not allow downloading this program from the official website (which is a pity).
All the best!
👋
First publication: 04/29/2017
Corrected: 15.10.