Good time everyone!
Sometimes a seemingly rather simple task arises: to record the sound that is heard from the headphones / speakers (or the one that you yourself just speak into the microphone).
Well, for example, if you heard some interesting online broadcast, you need to record an audio lesson for subordinates or talk to distant relatives and want to share the recording with loved ones. But according to the law of meanness, with the simplest tasks like this, you can sit for more than one hour until you achieve optimal quality  .
.
Actually, in this article I want to show a couple of examples of how and how you can record sound on a PC. I think this post can be very useful for all beginner audio editors.
So...
👉 By the way!
If you want to record telephone conversations, then I recommend that you read this note.
*
How and what to record sound
First, check if the microphone is working.
If you are going to record from a microphone - check first of all its operability. To do this, press the combination Win + R, and in the window "Run" use command mmsys.cpl (see example below).
👉 Help!
What to do if the sound icon disappeared (it is not in the tray next to the clock).

Win + R - mmsys.cpl - sound settings
Next open the tab "Record" and specify a working microphone.
Important! If you have several devices in this tab, then with an incorrectly selected microphone, you will not be able to make sound recording (you simply will not be heard).

Choosing the default device
For the correct choice - pay attention to the sliders on the right (opposite each device). If you say something into the microphone, you will see them turn green (depending on the volume). See example below.

Microphone check
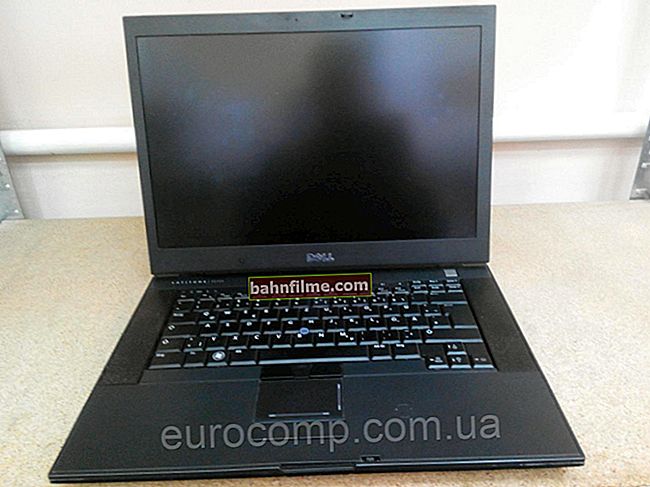
By the way, also pay attention to the fact that modern laptops have a built-in microphone: usually located next to the webcam, above the screen. See the example in the photo below.
It's just that many users connect an external microphone to their laptop and choose the built-in microphone as their default.
As a result, they are very hard to hear. they speak into the wrong microphone (he explained it chaotically, but I think the point is clear ...).

Where is the microphone usually located on a laptop
👉 To help!
Connecting and configuring an external microphone in Windows - see the beginner's guide
*
Built-in Windows Application: Sound Recorder (or Voice Recorder)
Windows already comes with a very simple application for recording sound from a microphone. In Windows 7 it is called "Sound recording" (see the screen below), in Windows 10 - "Voice recording" (it's easier to run it through a search, see example below).

Sound Recorder in Windows 7

Voice recording (Windows 10)
In my example below I will show the program "Voice recording" ... After starting the program - you just need to press one button "Record" (or a combination of Ctrl + R buttons).

Main window (voice recording)
Next, you can watch the recording process: note that the circle near the button "Stop recording" will show the activity of the microphone (the louder the sound, the larger the circle in diameter, see the screenshot below).

Recording process
After stopping recording, it will be displayed in the menu on the left. You can listen to it, cut off unnecessary fragments from it, rename it, share it with someone, etc. In general, everything you need for an inexperienced user ...

Recordings made
If the capabilities of a standard program in Windows are not enough for you, I recommend paying attention to specialized programs (I will discuss a couple of them below).
*
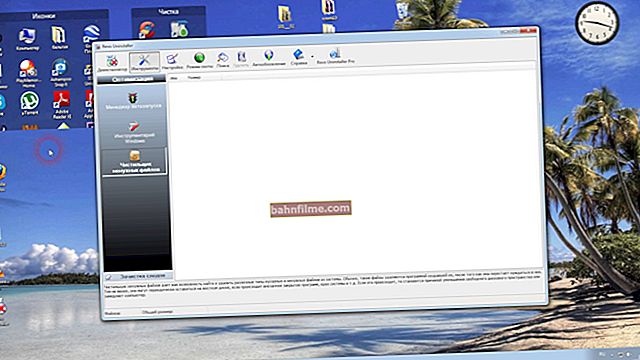
Audio Master
Developer site: //audiomaster.su/

Audio Master - main program window / Clickable
Multifunctional program for working with audio.Allows you not only to fully edit audio files, but also to record speech from a microphone (or any sound from speakers / headphones, for example), extract music from audio CDs, create ringtones for smartphones, various effects, etc.
Features:
- the program allows you to capture sound from various audio devices: a microphone, sound card, TV tuner, etc. (moreover, the captured parts can be combined later). The audio track can be saved in OGG, MP3, or WAV formats;
- you can convert music from audio discs (also to OGG, MP3, or WAV formats). Moreover, in the process of capturing, you can edit any of the tracks: for example, cut off the excess part from it;
- the ability to extract sound from a video file (for example, many "get" their favorite songs, melodies and phrases and put them on their phones);
- the program allows you to work with all popular audio formats: MP3, WAV, WMA, OGG, FLAC, M4R, etc.;
- the ability to trim files and combine multiple audio tracks into one;
- it is possible to apply dozens of different effects (for example, you can add an echo, try to change your voice, etc.);
- intuitively simple interface: to perform the desired task, just select it from the left menu (see screen above);
- Russian language support, and popular OS Windows 7, 8, 10 (32/64 bits).
As for the process of starting recording, immediately after installing and launching the application, just select the option in the window "Record sound from microphone" .

Microphone sound recording
Then specify the recording device (Microphone, see the screen below), and start recording. In general, quite simple!

Start recording
*
Audacity
Developer site: //www.audacityteam.org/
Download from Source Forge

Audacity - main program window / Clickable
Free open source software for editing audio files. Also, with its help, you can record sound both from a microphone and from any other sound source. Works on Windows, Mac OS X, GNU / Linux, etc.
I would like to note that compared to the previous software, it is somewhat more difficult to learn. there are many more functions here.
Features:
- Audacity can record live sound from a microphone or computer audio card (you can do it in parallel);
- the ability to trim, paste, copy and delete audio tracks added to the program window;
- the ability to add any of your past recordings, music tracks, etc. to the program for editing;
- supports sound of different bitness: 16-bit, 24-bit and 32-bit;
- the program supports plugins (moreover, the effects they create can be changed by you by editing a regular text file!);
- any of your actions in the program can be canceled (moreover, you can roll back any number of steps);
- most of the actions for editing a track can be carried out using the keyboard (which means that over time, getting used to it, you will be able to edit files very quickly);
- frequency spectrogram viewing mode (for visual and simple perception).
For reference : to record sound, you must first set the input signal level (see screen below, # 1), then select the device "Microphone" (2), press the record button (3).
Pay attention to how the audio track starts to "play", depending on the volume of the incoming sound (4). To stop recording - press the button "Stop" (5).

Instructions for recording sound in Audacity
👉 By the way!

For those who want to record not only sound, but also video from the screen, I recommend this note.
*
Thank you in advance for the additions ...
Good luck!
👋
First published: 07.12.2018
Correction: 2.04.2020