User question
Hello.
I have a 1500GB external USB hard drive that's about half full. Can I make it bootable for installing Windows 10 without formatting or deleting data from it?
Hello.
If everything is done carefully, then yes, the data on it will not be lost and you can install the OS from it.
Below in the article I will show how this can be done using the example of one of your own disk (used to store various software). I draw your attention to the fact that if you do some actions differently than shown in my example, you can lose data on the HDD ...
*
Creating a bootable external drive
STEP 1: connect ...
And so, turn on your laptop (PC) and connect your external HDD to the USB port (preferably to USB 3.0 - then all operations will be much faster). Also, I cannot but recommend disconnecting all other disks and flash drives from the USB ports of the computer (this will help to avoid various recording errors ...).

External HDD connected to USB
STEP 2: create a new Windows partition
Next, we need to run disk management (press Win + R, and enter the command diskmgmt.msc in the open line, see the screen below). This software is built into all the latest Windows XP, 7, 8, 10.

How to open disk management - diskmgmt.msc
In Disk Management, you should see all connected drives to your computer. We need to find the external drive that we connected to the USB port.
Next, select one of the partitions on this external HDD (note: in most cases, there is one partition on an external disk - and there is nothing to choose from ...), right-click on it and select the function shrink volume (the bottom line: we will "take" a little space from this section and create a new partition for Windows, where we will write the boot data).

Shrink volume (on external drive)
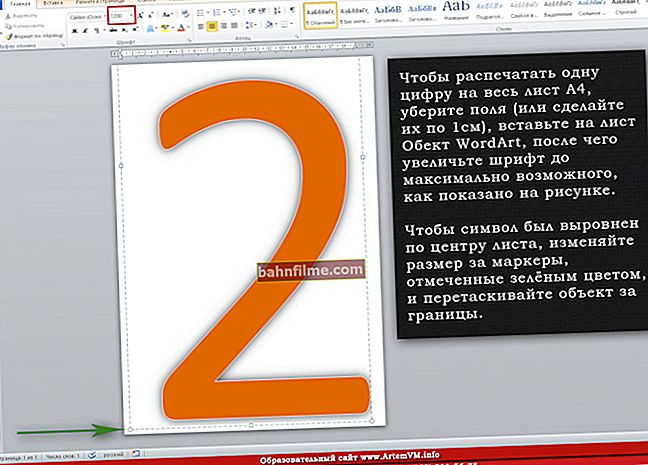
Then, in the settings, specify the size of the new partition (I recommend choosing a figure of 20-30 GB).

30,000 MB for a new disk
Then you will see that a new unaligned black area has appeared on the disk (on which there is nothing yet). Right-click on it and create a simple volume.

create a simple volume
Next, specify the FAT 32 file system, set the volume label (can be any) and format the partition (Important! Only this newly created partition is formatted, not the whole disk. Therefore, all data on other partitions of this disk will be intact).

FAT 32
STEP 3: making this section active
Now we need not forget about one very important thing - to make our new section active ... Active partitions are used to host the OS bootloader (if you do not do this, then almost certainly you will not be able to boot from it).
By the way, only one partition on one physical hard disk can be active. If you have several hard drives, then each of them can contain only one active section.
And so, the easiest way to do this is in disk management, just right-click on the desired section and select the function "Make section active" ... Unfortunately, this feature is often greyed out and unavailable ...

Make a section active
Alternative option
First you need to run Command Prompt as administrator. To do this, just open the task manager (Ctrl + Shift + Esc), create a new task through the file menu, and use the command CMD (example below).

Command line with administrator rights
Next, you need to sequentially enter the following commands (after each press Enter):
- diskpart;
- list disk (you will see a list of connected physical disks);
- select disk 3 (instead of 3, specify your disk number on which you created the new partition);
- list partition (view all partitions on the selected disk);
- select partition 3 (instead of 3, specify your partition number (the one that you created in the previous step)).

Selecting a section
Now that we have selected the drive and partition - just use the command active (if everything went well, a message will appear that this section has been marked as active).

Active
By the way, if you go to "My Computer" - you will see a blank new disk (example below).

New disk partition
STEP 4: write to the Windows 10 OS partition
To get started, we need an ISO image with Windows 10. If you don't have one, you can create it using the following instructions: //ocomp.info/kak-skachat-win10-legalno.html
Now about how to write bootable media correctly.
Option 1
Just copy all files from the ISO image to our new partition. This can be done using a regular archiver, the same 7Z (the best archivers: //ocomp.info/arhivatoryi-analog-winrar.html).
The method, although convenient, but personally, I still resort to specials. utilities (more on this in option 2).
Option 2
Use the program WinSetupFromUSB (for more details about it: //ocomp.info/soft-sozdaniya-zagruz-fleshki.html#WinSetupFromUSB). Please note that you need a version of at least 1.9 (I will show my example just in it).
You need to run this utility as an administrator (to do this, just right-click on the executable file and select it, see the example below).

WinSetupFromUSB - run as administrator
Next, I will give the steps in order:
- first you need to click on the opening of the advanced options window (see arrow-1, Advanced options);
- enable display of drives connected to USB (see arrow-2);
- choose the section that we are special. prepared in the previous steps (be guided by the size);
- specify the ISO image of the file with Windows 10;
- start recording.

Configuring the utility
Please note that the program should warn you that you have selected an external drive and it is too large. Just agree.
(Important! There should not be any warnings about formatting the disk! Just look through the message that it does not contain the words formate or erase, delete ...).

the confirmation
After ~ 10 minutes, if everything went well, you will see a message that the job is done (Job done). So the disc is ready!

Done!
STEP 5: check if it works
In general, if you did everything exactly step by step, as shown above, then when you boot your laptop (PC), you only need to enter Boot Menu (boot menu), select an external HDD and start installing Windows 10 (see example below).
To help!
You can find out how to enter BIOS and boot menu here: //ocomp.info/bios/

Check and boot from external HDD
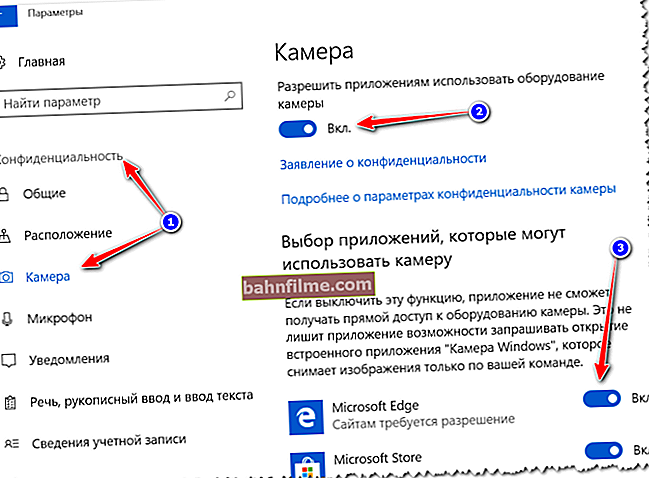
If your disk is not displayed in the boot menu, first of all you need to go into the BIOS settings and check if the ability to boot from USB devices is enabled (the USB Boot parameter should be set to Enabled, see the example below). Typically, this setting can be found in the BOOT or System Configuration sections.

If the disk is not visible - check if booting from USB is enabled in BIOS
Note: the instructions are relevant for relatively new computers (laptops) that support UEFI.
*
That's all for now, additions on the topic would be helpful ...
Break a leg!
✌