User question
Good day.
Don't tell me about one problem ... I have 3 computers at home: one PC and 2 laptops. They are all connected to a Wi-Fi router. A printer is connected to the PC.
How can I set up PCs, laptops and the network so that I can send documents from laptops to print to the printer? I tried to set it up - still nothing ... Now I write the files to a USB flash drive, and then print them from a PC, it's inconvenient ...
Good day!
In fact, both at home and in small offices, usually one printer is enough for the eyes (of course, if you can print to it from any of the computers on the local network).
In general, setting up Windows itself to make a printer publicly available for a local network is not particularly difficult and any "average" user can handle it. In this article I will show with an example how this is done ...
*
Opening access to the printer for the local network
Before describing the settings, I consider important to report a few points:
- you must have turned on the PC, printer, and laptops (and other devices) that will be configured;
- on the PC to which the printer is directly connected (to a USB port, for example), drivers must be installed (i.e., printing should work normally on the PC itself). Finding and installing a printer driver - here's an article on the topic;
- A local network must be configured: computers have the same workgroups (you can see this if you go to properties of my computer ), and different computer names (in general, if your local network works, then this is so ...).
*
👉 To help!

Setting up a local network - instructions for beginners
*
Note: all settings below are given and are relevant for Windows 7, 8, 10.
Now let's start setting up
The first thing to do is to set up the computer to which the printer is directly connected (ie "share" the printer: give access and permission to use another PC on the local network).
1) First, go to the Windows Control Panel at the following address:
Control Panel / Network & Internet / Network & Sharing Center
Next, click on the link on the left - Change advanced sharing options . 👇

Change sharing options
2) Next, we will have three tabs: private , guest or public , and all networks ... Now they need to be opened one by one and ticked in the right places. More on this below.
Note: in some cases there will be not 3 tabs, but 2. Then open those tabs that you have and do according to the screenshots below.

Private, guest, all networks
3) Expand the tab "Private" , and set the sliders to the following positions (according to the screenshot below):
- enable network discovery (enable automatic configuration on network devices);
- enable file and printer sharing;
- Allow Windows to manage homegroup connections.

Private
4) Then open the next tab - "Guest or public" , and we expose:
- enable network discovery;
- enable file and printer sharing.

Guest
5) Last tab "All networks" , here we expose:
- disable sharing;
- use 128-bit encryption to protect shared connections;
- disable password protected sharing.
Be sure to click save all changes!

All networks
Important!
A similar setting in these three tabs (private, guest, all networks) - must be done on all computers in the local network (and not only on the one to which the printer is connected)! Otherwise, later you will not be able to connect to the local printer.
Allowing access to the printer
First you need to open the control panel at:
Control panel / hardware and sound / devices and printers .
If you have installed drivers and everything is OK with the printer - here you should see it in the tab "Printers" .
Right click on the printer (the one you want to make network / public) and go to it properties ... In properties open the tab "Access" and put a couple of checkboxes:
- Sharing this printer;
- rendering of print jobs on client computers.
Save your settings.

Share the printer (clickable!)
To check if your printer has become local - open a regular explorer (you can open any folder). On the left side of the menu, you should see your computer name .
In my case, the computer name is "Desktop-UGHM5R" - we click on it and see that our shared printer. 👇
Now you can start configuring other computers to enable them to print to the printer.
Note: please note that next to the name of your PC, the names of computers that are in the same local network with you will be displayed.

Checking: is the printer visible on the network
*
How to connect a network printer and start printing
Important! Before you start connecting the printer, you must configure three network tabs: private, guest, all networks (I wrote about this just above). If you do not give permission to use shared folders, printers, etc., you will not see the printer and connect it!
*
1) Turn on the computer from which we want to print (note: the PC is connected to a local network, in which there is a computer, with a printer connected).
Open the explorer (Win + E) and click on the tab "Net" (on the left in the menu). Next, you should see a list of computers that are in the same local network with you: open the one that has a publicly accessible printer (which we made a network one in the previous step).

We go to the PC where the printer is open
2) Next, the icon and the name of the printer should appear - right-click on it and select "To plug" .

Connect printer
3) 1-2 minutes (usually) will be required to install and configure the driver. At this time, it is better not to touch the PC or close this window (example in the screenshot below).

Driver search process
4) Next, if everything went well, the printer appears in the tab "Printers" and it can be used.
Try to open any Word document, press the Ctrl + P key combination and send the document to print (do not forget to select a printer, by default, usually the printer is not the one you added).

Printer connected / task completed
*
Actually, that's the whole Windows setup for creating a public local printer. As you can see, in this regard, in Windows (7, 8, 10), everything is quite simply organized - you can figure it out on your own.
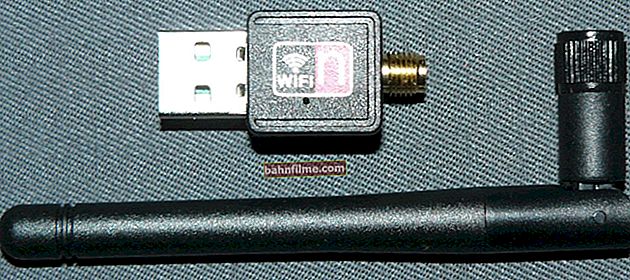
Even more convenient and a universal option would be to connect the printer directly to a Wi-Fi router. Thus, there will be no need to keep the PC to which the printer is connected.
In principle, there is also nothing complicated there - usually, a special goes to the router. Software that performs a similar setting in auto-mode.
*
That's it for now, good luck!
👋
First publication: 09.02.2017
Correction: 01/15/2020