Good day!
To quickly transfer files to other people, and between your PC, laptop and phone, it is very convenient to use Yandex Disk (a cloud service for storing files). I uploaded a photo to it once (for example) - and they can be viewed from all devices that have access to the Internet. In addition, you can significantly save space in the phone's memory (many often do not have enough) by setting up auto-uploading videos and photos to the cloud.
Add to this the ability to work with Word, Excel and Power Point documents online (without installing anything on a PC). It is very convenient!
I'm not even talking about the fact that information on cloud drives is more reliably protected from various misunderstandings (viruses, problems with the file system, erroneous formatting, etc.) than on a classic HDD. Those. it makes sense to send part of the information to the cloud for a backup (by the way, it can be done automatically, more on this below in the article).
Actually, in this article I wanted to show how all this can be quickly configured and used. I think the note will be useful to everyone who is still new to cloud disks.
And so, closer to the topic  ...
...
*
How to use Yandex disk
Registering and Logging In to Drive [On Windows and Android]
In general, registration for the service is quite standard for similar products. First, follow the link below to the official Yandex disk website and press the "Start Disk" button (see the screenshot below).
Officer. website: //disk.yandex.ru

Start disc
Next, you need to specify your data: name, surname, login, password and phone number. By the way, if you already have mail from Yandex (or you use other products of this company), then registration is faster (just log into your account, the link will be located above the registration form).

Registration form is standard
After registering, you can start downloading applications for Windows and Android (to access files on the disk, and work with it).
For Windows
Officer. page: //disk.yandex.ru/download#pc
By clicking on the link above, download the program and start the installation.

Yandex disk - program for Windows
I do not quote the entire installation process, tk. the installation is standard (like other programs) and does not contain anything complicated (interesting).

Standard installer
After installing the application, a characteristic "Yandex disk" icon will appear on your desktop and in the system tray, see the screen below. Clicking on it will open a window with all files, folders

An icon for quick access to the disk has appeared in the system tray
The window for working with disk files is no different from the classic explorer: all actions are the same. As a rule, creating, editing and deleting files and folders does not cause any difficulties, even for novice users.

Yandex disk program on Windows is installed
For Android
Link to the official. Yandex website (For smartphones) - //disk.yandex.ru/download#mobile
Link to Google Play: //play.google.com/store/apps/details?id=ru.yandex.disk
Installing the application on Android is also standard. It is enough to go to Google Play (link above) and click the install button.

Installation
After installation, open the application shortcut, enter the username and password (specified during registration), set the pin code (this is necessary so that no one except you can access the disk, even if you lose your phone), and woo-a-la - you in the disk. See screenshots below.

Yandex disk on a smartphone
How to increase free space on Yandex disk
In general, the allocated disk space is constantly changing (depending on different promotions, conditions, etc.): for example, a few years ago I was given 10 GB during registration (how much they will give you at the time of registration is difficult to predict).
Also, as a bonus, they give extra.space for using the mailbox (in my case, 9 GB), and for installing the application on the phone (32 GB). In total, in total, it turns out about 47 GB (which is quite enough for documents, photos, files).

Free ways
If you need much more space, you can buy it for a small amount per month. In order to see the current tariffs: just open the Yandex Disk application and at the bottom of the window click on the Buy more link (see the screen below).

Yandex disk - buy a seat
For example, today "extra" 100 GB costs only 67 rubles / month. If you need much more, for example, 1 TB, you will have to fork out for 167 rubles / month.

Paid subscription - 67 rubles. 100 GB
How to upload files and photos to disk
On Windows
Usually this question is asked by people who have not yet worked with Yandex Disk. In general, in fact, everything is very simple: first you need to open the disk (you can use the tray icon, see the screen below).
Open Yandex disk
Next, select the desired folder, click the "Upload" button and select the files / folders you want to upload to the cloud media.

Download (Yandex Disk application)
After a while, the files will be uploaded: in front of them you will see small green checkmarks (synced). See example below.

Files uploaded
By the way, it is not necessary to launch the Yandex Disk application: for example, in Explorer (Windows 10) there is a link to the folder with the disk. It is enough to open the desired directory and copy the files into it (if you have synchronization enabled in the application settings, the files will also be sent to the cloud).

Explorer - Yandex Disk
On Android [+ setting up auto-uploading photos and videos to the cloud]
Downloading the files you want manually:
- Select the files you want and click the "Share" button (at the bottom of the screen, see the example below);
- select "Yandex disk" from the list.

Share a file
Next, open the required directory (where you want to upload the files) and click the "Upload" button (see the screen below).

Upload file to disk
To automatically upload photos to Yandex disk:
- run the application;
- then open the "Settings" tab in the menu;
- turn on auto-uploading photos via Wi-Fi (or even choose the "Any network" option if you use unlimited Internet on your phone);
- now all photos will be automatically uploaded to Yandex disk. Even if something bad happens to your phone, you can quickly restore all your pictures. Safe and convenient!

Auto upload photos from phone to Yandex disk via Wi-Fi
How to make files available for download by other users
Option 1
If you use the Yandex Disk application: this is done very quickly - just select a file or folder and click on the "Copy link" button in the menu.

Copy link
Then it can be transferred via social media. networks, chat, e-mail and other ways. It is enough to insert the link into the address bar of the browser - and the file can be viewed or downloaded (see example below).

We look at the photo
Option # 2
If you use the web version of the disk (//disk.yandex.ru/client/disk), just select that photo / file (or directory with photos), right-click on it and select "Share" from the menu. See example below.

Share this
Then copy the link and pass it (for example, via social networks) to those people with whom you wanted to share the files. When they view / download them, the file can be removed from the distribution (similarly).

Copy link
Option # 3 (if we are talking about Android)
First open the "Disk" application and navigate to the desired directory.

Yandex disk - main menu (Android)
Next, select the file, click on the "share" icon ( ) and choose the "Share link" option. After you drop the link through the same Viber, Telegram or social. networks. I guess there is nothing more to comment on ...

Yandex disk on Android
How to set up auto-creation of a copy of my documents to a cloud drive (backup!)
Everything is simple enough. I will consider the steps.
1) First, open the Yandex disk settings (you can use the tray icon next to the clock for this. See the screenshot below).

Disk settings
2) Next, I immediately recommend to go to the "Advanced" tab and check that synchronization is enabled (that is, all created and modified files in your folder on your hard disk will immediately be uploaded to Yandex disk in auto-mode (that is, they will be duplicated )).

Make sure sync is turned on!
3) In the "General" tab, check that the program starts automatically. Then open the folder location setting.

Setting folder locations
4) Look where the folder that will be synchronized with the cloud is located (if necessary, move it to another HDD partition).

Find out (configure) the folder for synchronization
5) Now open the explorer, right-click on the system folder "Documents" and open its properties. See example below.

Open the explorer and go to the properties of the "Documents" folder
6) In the "Location" tab, click the "Move" button and move it to any of the folders located in "C: \ Users \ alex \ YandexDisk" * (* the path is shown as an example, you will have your own directory - see item 4 just above, where we looked at directories in the application settings) ... Those. we move our system folder "Documents" to a folder that will be synchronized with Yandex disk.

We look at the location of the system folder. Move it to any Yandex disk folder!
7) Personally, I named the folder "My Documents" to which I moved the system "Documents". Now all files (photos, documents, videos, etc.) that fall into this folder will be automatically duplicated to the cloud drive!

Now the folder will be synchronized with Yandex disk
8) It will be possible to work with the transferred documents, both in the directory located on the HDD, and by opening the Yandex Disk application. Conveniently!

The same folder only in the application
Recovering a modified file
By the way, what else captivates in Yandex disk: you can view the history of file changes. Imagine you edited the wrong document and saved it. And then they remembered that they had removed the unnecessary from it ... What to do?
- Go to //disk.yandex.ru/client/disk;
- then find the required file, right-click on it and follow the link "Change history";
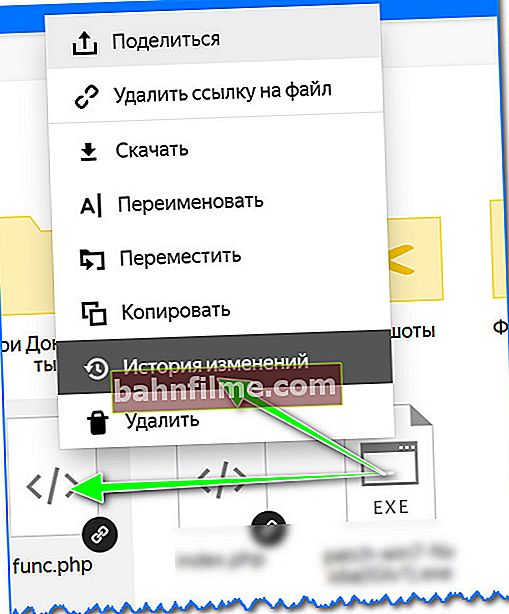
Change history
- after which you will be able to see several copies of files for the last 14 days, sorted by date (with purchased additional space - 90 days!).
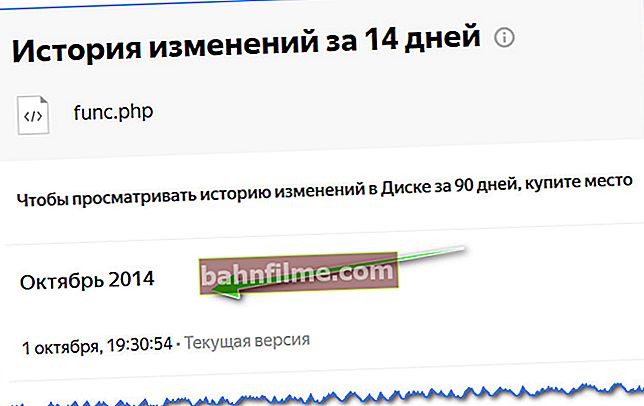
Change history available for 14 days
- also pay attention to the "History" and "Trash" tabs: having rummaged through them, you can find recently deleted files, view all your actions with files on Yandex disk.
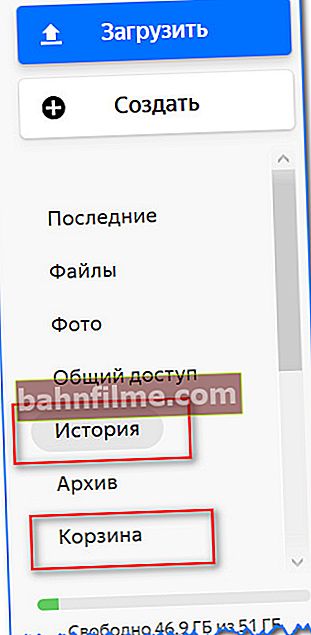
History, basket


*
Add-ons are welcome ...
That's all, good luck!