Good day.
Sooner or later, everyone who works at a computer is faced with the need to enter the BIOS (note: its more modern version is UEFI, the principle of operation and functions are the same) and change some parameters. By the way, this may be needed for a variety of reasons, for example:
- decided to reinstall Windows, but the computer does not see the installation flash drive (disk). And you just need to change the boot priority in the BIOS;
- decided to overclock the CPU (you will have to change the frequency in the same place);
- the time or date on the computer is displayed incorrectly - you need to change the settings;
- unstable work of the PC;
- the computer does not see the connected hard drive, etc. In fact, there are quite a few reasons to enter BIOS.
In this article, I want to look at how this is done (and what to look out for if you can't get into BIOS). The article is aimed at a novice PC user.
And so, let's get started ✌ ...
For laptop users!
I have accumulated several articles on my blog on entering BIOS / UEFI on laptops from the following manufacturers: Acer, Asus, Dell, Lenovo, HP (specific recommendations are always better than general ones ✔).
*
How to enter BIOS or UEFI
STEP 1: important basics
BIOS / UEFI - a set of firmware that provide Windows OS and programs with access to the computer hardware (i.e. hardware). After turning on the computer (or laptop), it is the BIOS that starts up first (and only then the OS), which checks all the equipment of the machine, and if something is not working properly, you will hear sound signals (for example, if the video card is malfunctioning, 1 long beep will be heard and 2 short ones).
So, after turning on the PC / laptop, you will have only a moment (1 ÷ 2 seconds) to press a special key to enter the BIOS / UEFI (if you do not have time, then pressing is already useless).

Press the BIOS entry button several times before and during the appearance of the first logo (immediately after turning on the device)
Important!
If you have a modern Windows 8 or 10 operating system installed (and it works / boots), then you do not have to "stuff" your head with all sorts of keys ...
Now you can enter the BIOS without any keys, just take advantage of the opportunity offered by Windows ... (see my note, the link to which is given below)

How to enter UEFI (BIOS) from the Windows 8, 10 interface (without using special keys F2, Del, etc.) - //ocomp.info/kak-voyti-v-bios-iz-windows.html
By the way!
If you have a laptop, then pay attention to the case of the device. Some models (for example, from Lenovo) contain special. keys to enter the BIOS (you need to press them when the device is turned off).

Lenovo B70 - BIOS entry button next to the power input. It is most convenient to press with a pencil or pen
*
STEP 2: identify the manufacturer
Each manufacturer (Dell, Asus, etc.) has its own buttons for entering BIOS (UEFI)! By the way, personally, I think this is not very convenient, they could have standardized ...
The most popular keys for entering BIOS:
Delete, F2, Esc, F1.
Which one you have - you can guess, but it does not always work out 👀. Without knowing the equipment model, you may never find the cherished key at all, because in some cases 3 key combinations are used! Can you imagine how many combinations? ..
Therefore, there are several ways:
- View your manufacturer in the documents that came with your PC (perhaps the buttons are also indicated there);
- Run some special. a utility (the best of them I gave here) that can find out the characteristics of your PC (I personally am impressed by the AIDA 64 program, see the screen below);
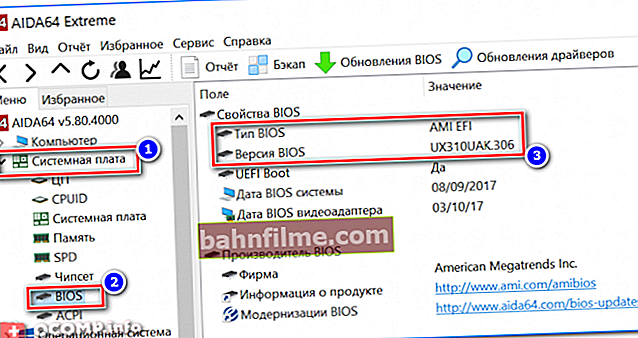
How to view BIOS information and laptop / PC model in AIDA 64
- In most cases, when you turn on the PC, a screen appears for 1-2 seconds. which shows the buttons for entering the BIOS (example in the screenshot below).

Press Del to enter BIOS.
- if you have a laptop, then I can recommend my old article on determining the exact model of the device to help: //ocomp.info/kak-uznat-model-noutbuka.html;
- You can also determine the manufacturer by the stickers on the device case ...
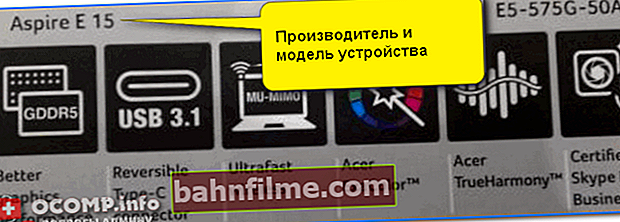
Laptop case sticker (Acer E 15)


*
STEP 3: knowing the manufacturer (BIOS version) - defining the button
Now, knowing the manufacturer of the equipment (for example, the laptop model or the type of BIOS) - you just need to find the key to enter the BIOS. You can do this according to the table below (or use a search engine, some reference books).
By the way, on my blog there are several tables with hotkeys for entering BIOS and Boot Menu (for different manufacturers) - //ocomp.info/goryachie-klavishi-dlya-vh-bios-boot-menu.html
Table 1: manufacturer and BIOS entry buttons
| Computer / laptop manufacturer | Keys |
|---|---|
| Acer (Aspire, Power, Veriton, Extensa, Ferrari, TravelMate, Altos) | Del or F1 |
| Acer (Altos 600 Server) | Ctrl + Alt + Esc or F1 |
| Acer (Older PC) | F1 or Ctrl + Alt + Esc |
| ABIT | Del |
| ASUS | Del, F2 |
| AMI (American Megatrends AMIBIOS, AMI BIOS) | Del |
| AMI (American Megatrends AMIBIOS, AMI BIOS) - Old Version | F1 or F2 |
| ASRock | Del or F2 |
| Award BIOS (AwardBIOS) | Del |
| Award BIOS (AwardBIOS) - Old Version | Ctrl + Alt + Esc |
| BIOSTAR | Del |
| Compaq (Presario, Prolinea, Deskpro, Systempro, Portable) | F10 |
| Compaq (Older Computers) | F1, F2, F10, or Del |
| Chaintech | Del |
| Cybermax | Esc |
| Dell (XPS, Dimension, Inspiron, Latitude, OptiPlex, Precision, Vostro) | F2 |
| Dell (Older 486 Models) | Ctrl + Alt + Enter |
| Dell Dimension L566cx System | Del |
| Dell (Older Laptop Models) | Fn + Esc or Fn + F1 |
| Dell (Some Models) | Double Reset |
| ECS (Elitegroup) | Del or F1 |
| eMachines (eMonster, eTower, eOne, S-Series, T-Series) | Del or Tab |
| eMachine (Some Older Computers) | F2 |
| Fujitsu (LifeBook, Esprimo, Amilo, Tablet, DeskPower) | F2 |
| Gateway Using Phoenix BIOS (DX, FX, One, GM, GT, GX, Profile, Astro) | F1 |
| GIGABYTE | Del |
| Hewlett-Parkard (HP Pavilion, TouchSmart, Vectra, OmniBook, Tablet) | F1 |
| Hewlett-Parkard (HP Alternative) | F2 or Esc |
| Hewlett-Parkard (HP) Tablet PC: | F10 or F12 |
| IBM ThinkPad using Phoenix BIOS | Ctrl + Alt + F11 |
| IBM (Older Computers or Notebooks) | F2 |
| Intel | F2 |
| Lenovo (ThinkPad, IdeaPad, 3000 Series, ThinkCentre, ThinkStation) | F1 or F2 |
| Lenovo (Older Products) | Ctrl + Alt + F3, Ctrl + Alt + Ins or Fn + F1 |
| MSI (Micro-Star) | Del |
| Micron (MPC Computers ClientPro, TransPort) | Del or F1, F2 |
| Microid Research MR BIOS | F1 |
| NEC (PowerMate, Versa, W-Series) | F2 |
| Packard Bell (8900 Series, 9000 Series, Pulsar, Platinum, EasyNote, imedia, iextreme) | Del or F1, F2 |
| Phoenix BIOS (Phoenix-Award BIOS) | Del |
| Phoenix BIOS (Phoenix-Award BIOS) - Old Version | Ctrl + Alt + S, Ctrl + Alt + Esc, Ctrl + Alt + Ins, or Ctrl + S |
| Sharp (Notebook Laptops, Actius UltraLite) | F2 |
| Samsung | F2 |
| Sony (VAIO, PCG-Series, VGN-Series) | F1, F2 or F3 |
| Sony Vaio 320 Series | F2 |
| Toshiba (Portégé, Satellite, Tecra) | Esc or F1 |
| Zenith, Phoenix | Ctrl + Alt + Ins |
*
STEP 4: restart the computer and press the special. key
Actually, knowing the key, you restart or turn off your computer, and after turning it on, press this button several times until the BIOS or UEFI settings window appears in front of you (example below in the photo).

Typical window view when entering BIOS

Typical window view when entering UEFI
If the settings window does not appear, restart your computer again and try another key ( approx. : the table above shows, as a rule, two keys, for different device models) .
*
STEP 5: Manage BIOS Settings and Options
Many beginners are frightened by the fact that the mouse does not work in the BIOS, there is no Russian language and everything has to be configured using only the keyboard (although in the new UEFI, which replaced the classic BIOS, all these shortcomings have been eliminated).
Meanwhile, everything is quite simple. In many ways, their purpose can be understood from the context, and the most necessary control buttons are usually indicated either at the bottom or to the right of the settings menu (pay attention to the photo from the UEFI menu below: there is a "Hot Keys" section on the right - i.e. Hotkeys) .

Change boot priority (control keys are shown on the right) / UEFI
Another tip: if you do not know what a particular parameter means, I do not recommend changing it (if this is your first time in BIOS  ).
).
Most popular button meanings:
- Arrows - moving up, down, left-right;
- F1 - help (the button is standard, in many other programs it also opens the section with the help);
- F6 or F9 - set default settings;
- F10 - save all the settings made in the BIOS (used very often);
- Enter - confirm / enter the selected menu, on which the cursor is located (the choice is made using the arrows on the keyboard);
- Esc - reverse function of the Enter key - back or exit (also used very often);
- Plus and minus keys - increase or decrease the value (respectively);
- Tab - move the cursor to the next menu (sort of like arrow padding).
By the way, just like in UEFI (the photo of which I gave above), the BIOS in the menu on the right (or below) also provides hints about which button is responsible for what.

Hints: arrows - move the cursor, Enter - enter, F1 - help, F10 - save settings and exit, Esc - exit.
*
STEP 6: why you can't enter BIOS (reasons)
There can be many reasons, but most often I come across the following:
- Incorrectly selected key - i.e. you just press the wrong button when you boot your computer. The BIOS version may have been incorrectly identified. I advise you to try the most common buttons one by one: Del, F2, F1, Esc, F10;
- On some laptops (for example, Lenovo) there are special buttons on the device case, by pressing which, you can enter the BIOS (photo given above);
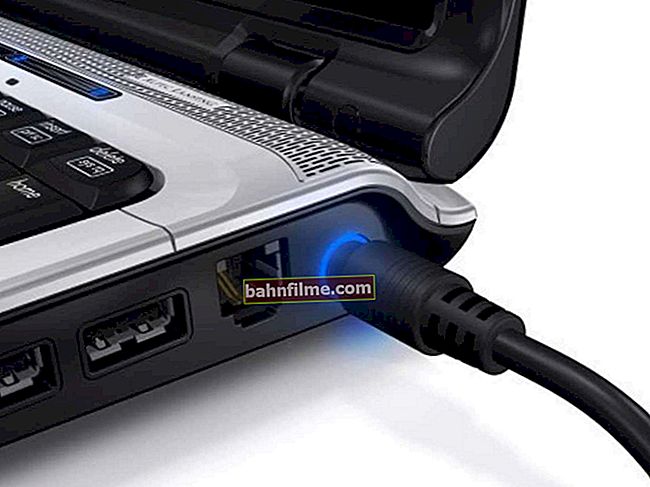
- If you have a USB keyboard (i.e. connected to a USB port), it is possible that it does not work yet when the PC boots up and therefore you are wastingly pressing the coveted key. In this case, I recommend connecting the keyboard to the PS / 2 port (for example, you can use a special adapter, screen below).

PS / 2 to USB keyboard adapter
- On some laptops, manufacturers do one "thing": when the device is running on battery power, you won't be able to enter the device's BIOS. To check this fact, you just need to connect the laptop to the network and try to enter the BIOS again;
- You might want to reset your BIOS settings. This is done using a battery on the computer's motherboard: you need to take it out for a few minutes, and then reinsert it and turn on the PC (in general, this is a rather large topic for an entire article ... therefore, within the framework of this article, I will be brief).

*
That's all for me today, additions would be very useful ...
Good luck! 👣
First published: 25.11.2016
Article revised: 01/27/2019