Hello!
Despite the fact that many users criticize Windows 10, it is nevertheless gaining popularity. New computers and laptops are so often everything with Windows 10 (and drivers for old equipment are no longer produced, which means that over time, we will all be on the new OS 👌). For example, I have already switched to this OS ...
Basically, by and large, installing Windows 10 is not much different from installing previous operating systems Windows 7, 8 (and even XP). The algorithm of actions is the same: create bootable media, configure the BIOS (UEFI) accordingly, run the installer and act according to its recommendations ...
In this article, I will consider step by step how and what to do, what to create in what sequence, in order to install a new Windows 10 on your PC / laptop. The instruction, first of all, is aimed at novice users, so that after reading it, anyone can install an OS for themselves.
So...
*
Windows 10 installation instructions(from USB stick)
STEP 1: create bootable media
The first and most important thing to install is bootable media (in our case, it will be a USB flash drive).
In general, you can take a regular DVD instead. But, firstly, not all PCs / laptops have a DVD drive (compared to a USB port), secondly, installation from a flash drive is faster, well, and thirdly, a flash drive is easier and easier to carry with you.
The choice is obvious!
*
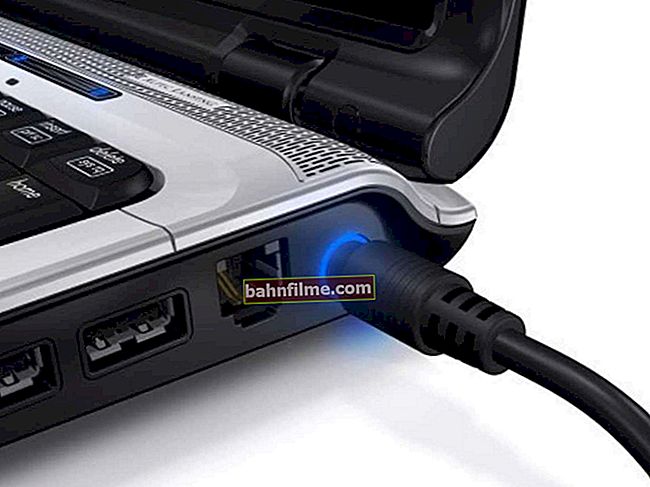
What kind of flash drive you need: the most common one, at least 4 GB in size (8 GB is better). By the way, you can use flash drives that support USB 3.0, with them the installation will be much faster (they are marked in blue).

Difference between USB 2.0 and USB3.0 (marked in blue)
The easiest way to prepare bootable media is to use the special. tool from Microsoft (link to it on the official site).
After downloading and running this utility, it will easily and quickly prepare a bootable USB flash drive (it will automatically download the system you need from the Microsoft server and write it to the USB flash drive). See screenshot below. 👇

Download ISO or Prepare Flash Drive Directly / Tool from Microsoft
In order not to describe in detail here each step (on how to create such media), I recommend that you read my recent article (link to it below).
👉 To help!

Creating a bootable USB flash drive with Windows 10 - instructions * This tip applies to those users who already have Windows installed (and who want to replace / reinstall it). Many instructions on this topic do not contain this advice, but I still recommend saving all your drivers in a backup (so that if something happens, you can restore all your files and drivers). By the way, in addition to drivers, be sure to save all your important documents to a USB flash drive / external hard drive / to the cloud. When installing an OS - anything can happen ... 👉 Help! 1) OneDrive: what is it? Automatic backup of my documents in the cloud! 2) How to create a backup (backup) of drivers. * In order to boot from the installation flash drive, you can go in two ways: use the Boot Menu (note: boot menu) - i.e. selection of bootable media from spec. list without changing BIOS settings; either configure the BIOS - i.e. change the boot queue to which to add the USB flash drive (usually, this line in the BIOS is called as USB-HDD). Links to the necessary materials are given below. Important! Before configuring the BIOS (and entering the Boot Menu), the installation flash drive must be connected to the USB port. Boot section - boot configuration 👉 Help! 1) How to enter BIOS (UEFI) - step by step instructions 2) How to configure BIOS to boot from a USB flash drive * If the USB flash drive was written correctly, and the BIOS (UEFI) is correctly configured - after restarting the PC / laptop, you should see the first welcome window - select the language (start installation). We select "Russian" (usually, it is indicated automatically) and click the "Next" button. 👉 Help! For those whose BIOS does not see a USB flash drive - //ocomp.info/bios-ne-vidit-zagr-usb-fleshku.html Start Windows 10 installation In the next step, Windows 10 Installer will ask you to choose one of the options: either System Restore or System Installation. In our case, click on the button "Install" . Note: I recommend that you save this installation flash drive as a backup. When Windows does not boot (in case of any errors), using such an installation flash drive, you can restore it to work. repair or clean install (Windows 10) Next, the installer will ask you to familiarize yourself with the license. Everything is simple here: read it, if you agree, tick the box, and continue with the installation ... License agreement In the next step, I recommend choosing "Custom installation" and manually set all parameters. Despite Windows warnings that this is recommended only for experienced users - I can say that there is nothing complicated there ✌ ... Custom installation! * Perhaps this is one of the most important and crucial steps when installing the OS (that's why I put it in a separate part of the article). In this step, you need to specify where you want to install Windows 10 - i.e. select the desired partition of the hard disk (or generally SSD). Important! When formatting, creating and deleting partitions, all information on the hard disk will be deleted. That is why the second step after creating a flash drive - I recommended making a backup copy of important data (or, install the OS on the disk that does not have any necessary documents). Selecting a disk for OS installation 👉 Tip! In general, I recommend partitioning your hard drive like this: If you suddenly have to reinstall Windows, then you just format the first partition on the disk and install a new OS on it, and all your files on the second partition will remain intact. GenerallyTo start the installation: create a partition on your hard disk (the "Create" button), then select it for installation and press the "Next" button. In principle, nothing complicated ... * When all the files have been copied to your disk, unpacked, etc., the installer will start rebooting the computer. So that after rebooting the PC it does not start the installation again, after rebooting, it is better to remove the USB flash drive from the USB port - you will not need it further, because the installation will come from your disk. The files have been copied to the hard drive The next step in the installation is to enter the product key. If there is - enter, if not, you can do it later - just press the button "Do it later" (see the arrow in the screenshot below). In the next step, Windows will prompt you to configure your voice input, keyboard input, your PC's location, protection from malicious web content, and more. In my opinion, all this is convenient to configure in the OS itself by going to the Windows control panel. Therefore, I recommend pressing the button "Use standard parameters" . Use standard parameters Next, you need to specify the name of your account - roughly speaking, the name that you will see when you turn on the computer. I recommend setting the account login in Latin (the fact is that this will save you from various errors in programs and games that do not always work correctly with Russian characters found in the paths to your documents). The password is at your discretion (if there are children in the house - I recommend to put it). Create account The last step in installing Windows is to wait for the final system configuration. Usually, at this time, the OS displays a window: "It does not take much time" (in fact, it can hang for 5 minutes, or all 25!). This is especially true for old computers on which they decided to install a new OS. By the way, many users at this moment mistakenly believe that the installation is frozen and restarting the PC - there is no need to do this. Completing the installation * Actually, this completes the instruction. Then you can start your usual activities, and I will allow myself to give a couple more recommendations in the last step ... Windows 10 is installed! The first icons appeared on the desktop ... What is the best practice to do immediately after installing Windows? Here is such a provocative headline ✌. The first thing to advise is to install and update drivers for all your hardware (you can use it from a backup copy, which I advised to make in one of the steps of this instruction), or you can use the programs from the article, the link to which is given below. 👉 To help! Programs for auto-updating drivers - my selection Note! Many people do not update drivers after installing Windows 10 - after all, it still works (this was before, 15 years ago, after installing Windows 2000 / XP, there was no video driver in the system, and the image on the screen flickered so much that the eyes instantly got tired - so everything immediately installed drivers (no reminders)). Now the OS is "smarter" and install drivers automatically for most equipment. However, the selected Windows drivers leave much to be desired. Subsequently, we often have to face problems in games, when setting up Wi-Fi, Bluetooth, in audio and video programs, etc. Then I recommend installing a modern antivirus from some well-known manufacturer and updating its databases. I expressed my preferences for the current year in the next article. 👉 The best antivirus programs of this year -> * This short video shows the general sequence of actions and all the menus that appear during the installation process (some video content is easier to perceive than the text version of the instruction ...). * That's all, good luck to everyone and quick installation! Until... 👋 First publication: 17.02.2017 Article revised: 7.07. STEP 2: Save a copy of your drivers and important documents

STEP 3: configure BIOS (UEFI) to boot from a USB flash drive or use the Boot Menu


STEP 4: start installation


STEP 5: partition the disk!

STEP 6: the process of copying files, restarting the PC, setting the parameters


STEP 7: Installation is complete, but there are still 2 important steps left!


🐤 Video: a short guide